20 Sally Nightmare Before Christmas Makeup Ideas for a Festive Holiday Look
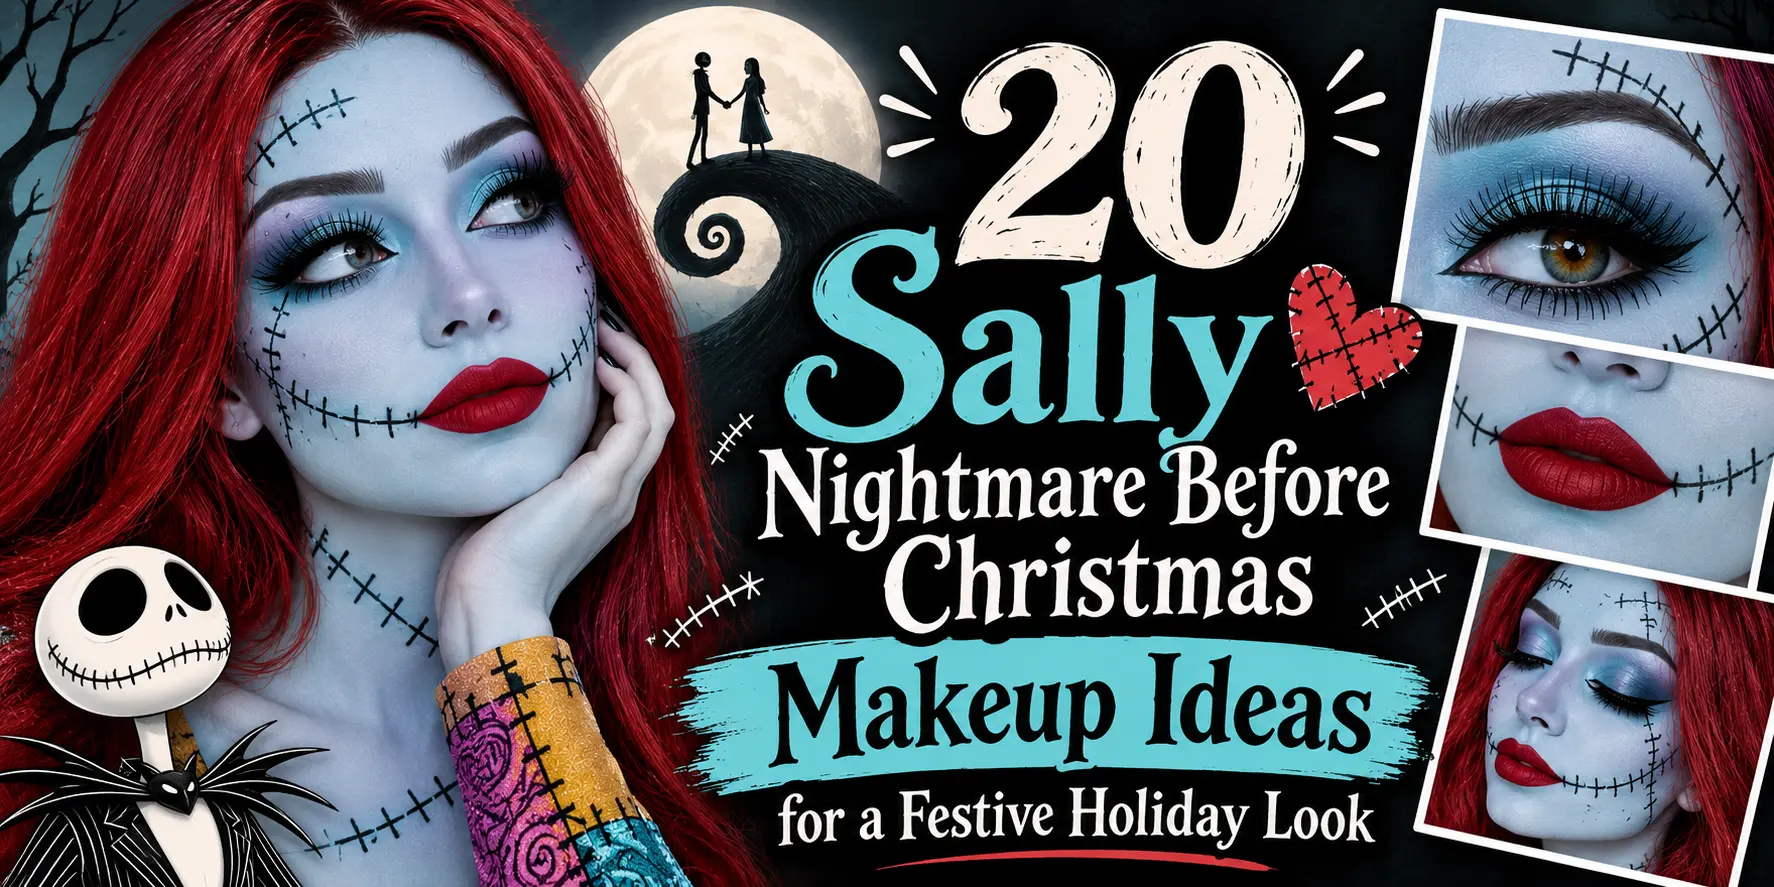
Sally from The Nightmare Before Christmas is the rare character who belongs to two holidays at once — and Christmas is where her stitched, patchwork look turns genuinely festive. The pale blue-grey skin, the long red hair and those famous stitched details stay exactly as fans love them, but a few holiday touches — a sprig of holly, candy cane colors, a dusting of snowflake shimmer — move the look from Halloween Town straight into Christmas Town.
These 20 Sally Nightmare Before Christmas makeup ideas cover the whole range: the classic film-accurate version for purists, glam and glitter versions for parties, soft pastel and beginner-friendly versions that keep the stitches small, and a few playful twists with lights, bells and gingerbread warmth. Every look starts from the same Sally base, so once you learn the pale skin and the stitch work, each variation is just a change of color and one or two details.
Classic Sally Christmas Makeup
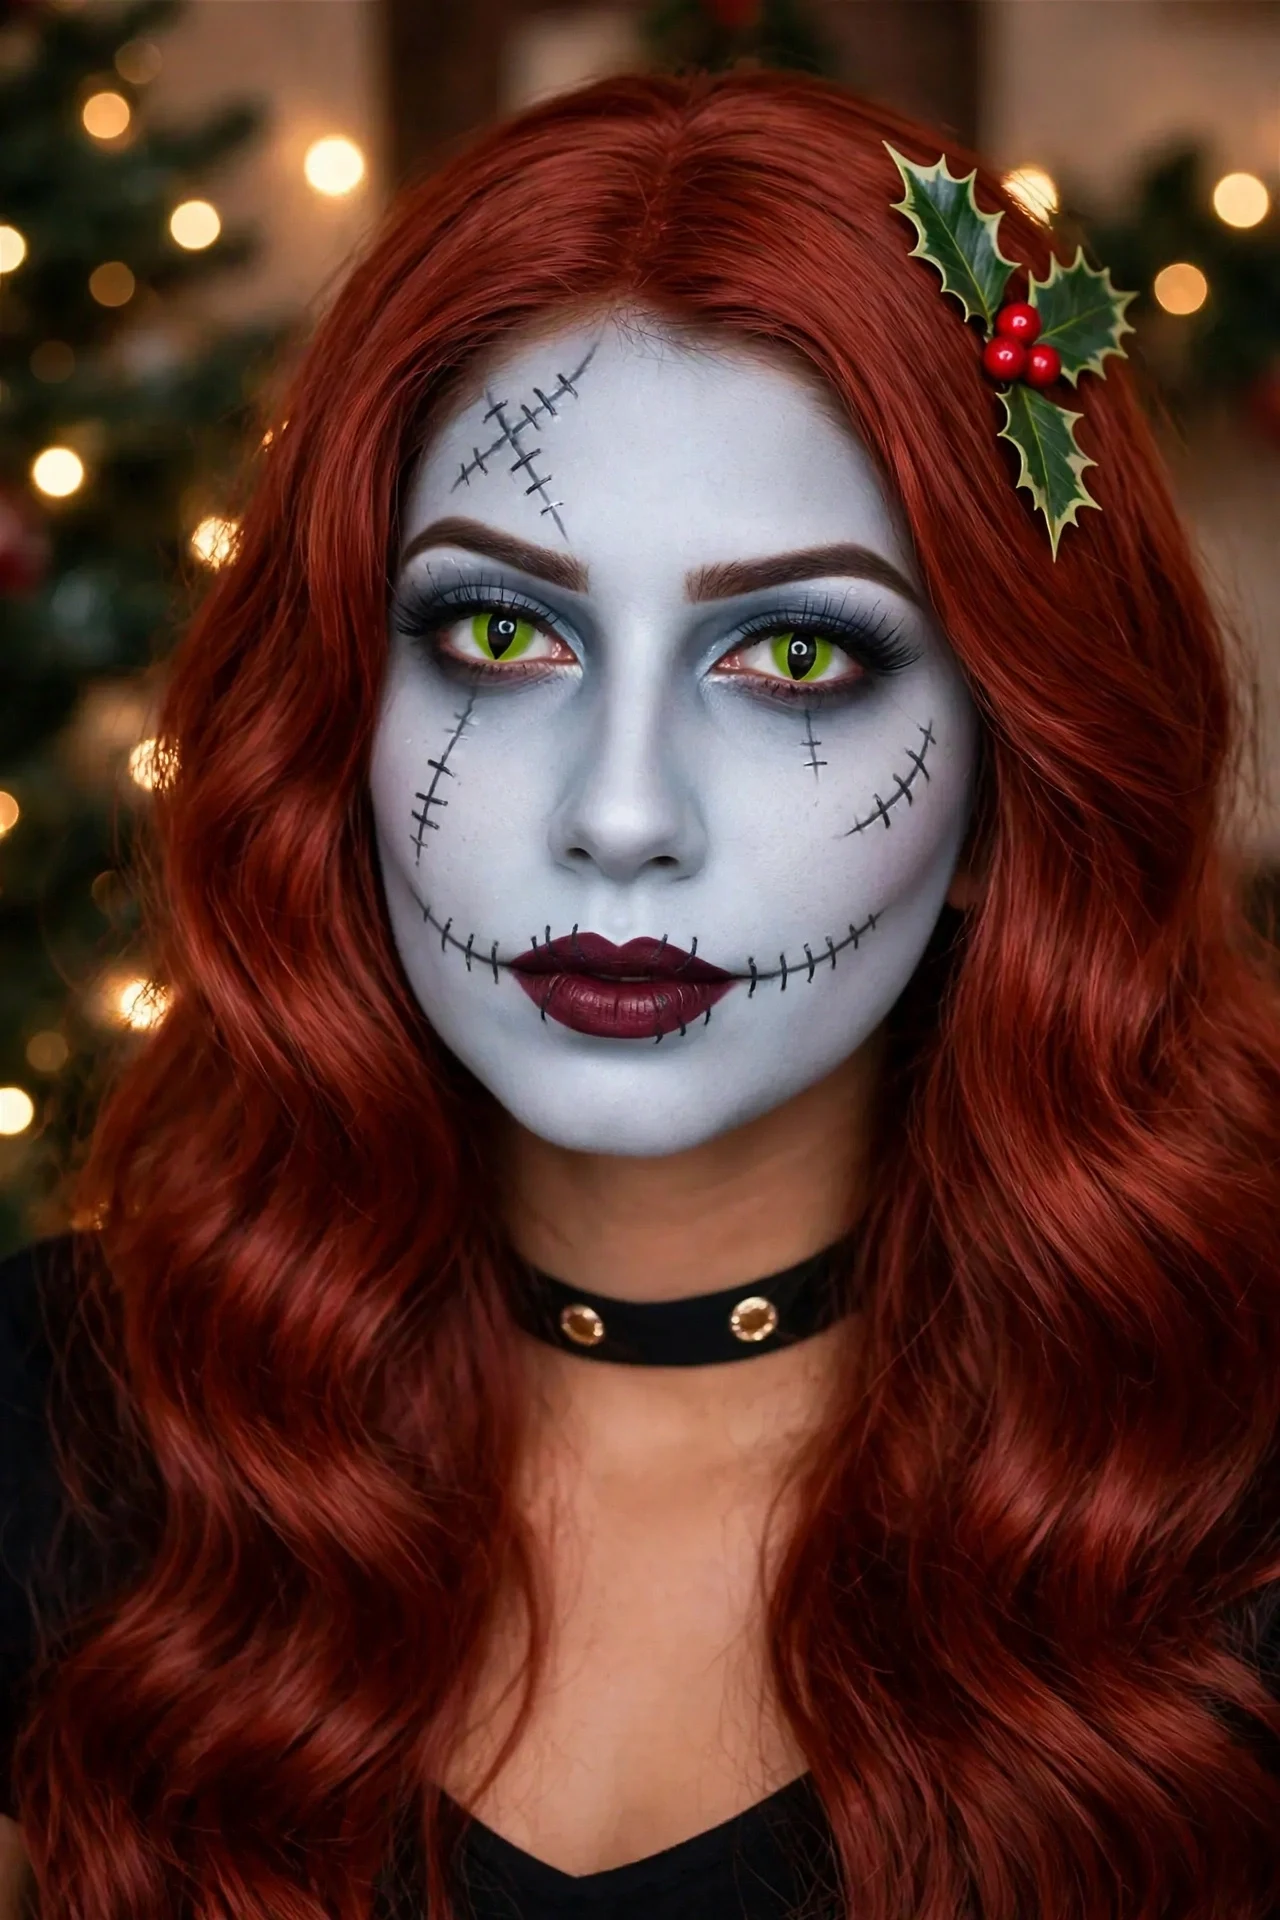
The classic Sally starts with her signature pale blue-grey skin — a cool, slightly ghostly base that reads instantly as the rag doll from Halloween Town. Darken the eye sockets softly with grey and plum shadow, draw the long lashes she is known for, and add her stitched smile: a thin line extending from each corner of the mouth with small vertical stitches crossing it.
The Christmas update is deliberately small: a tiny sprig of holly painted at one temple or tucked into the hairline, and a deep berry-red lip instead of the usual muted tone. It keeps the film look intact while making it unmistakably December — the version to choose for a themed party where accuracy matters.
Quick Tip: Mix a drop of blue-grey pigment into foundation rather than buying face paint — it sheers out more naturally and photographs better.
Candy Cane Stitches Sally Makeup
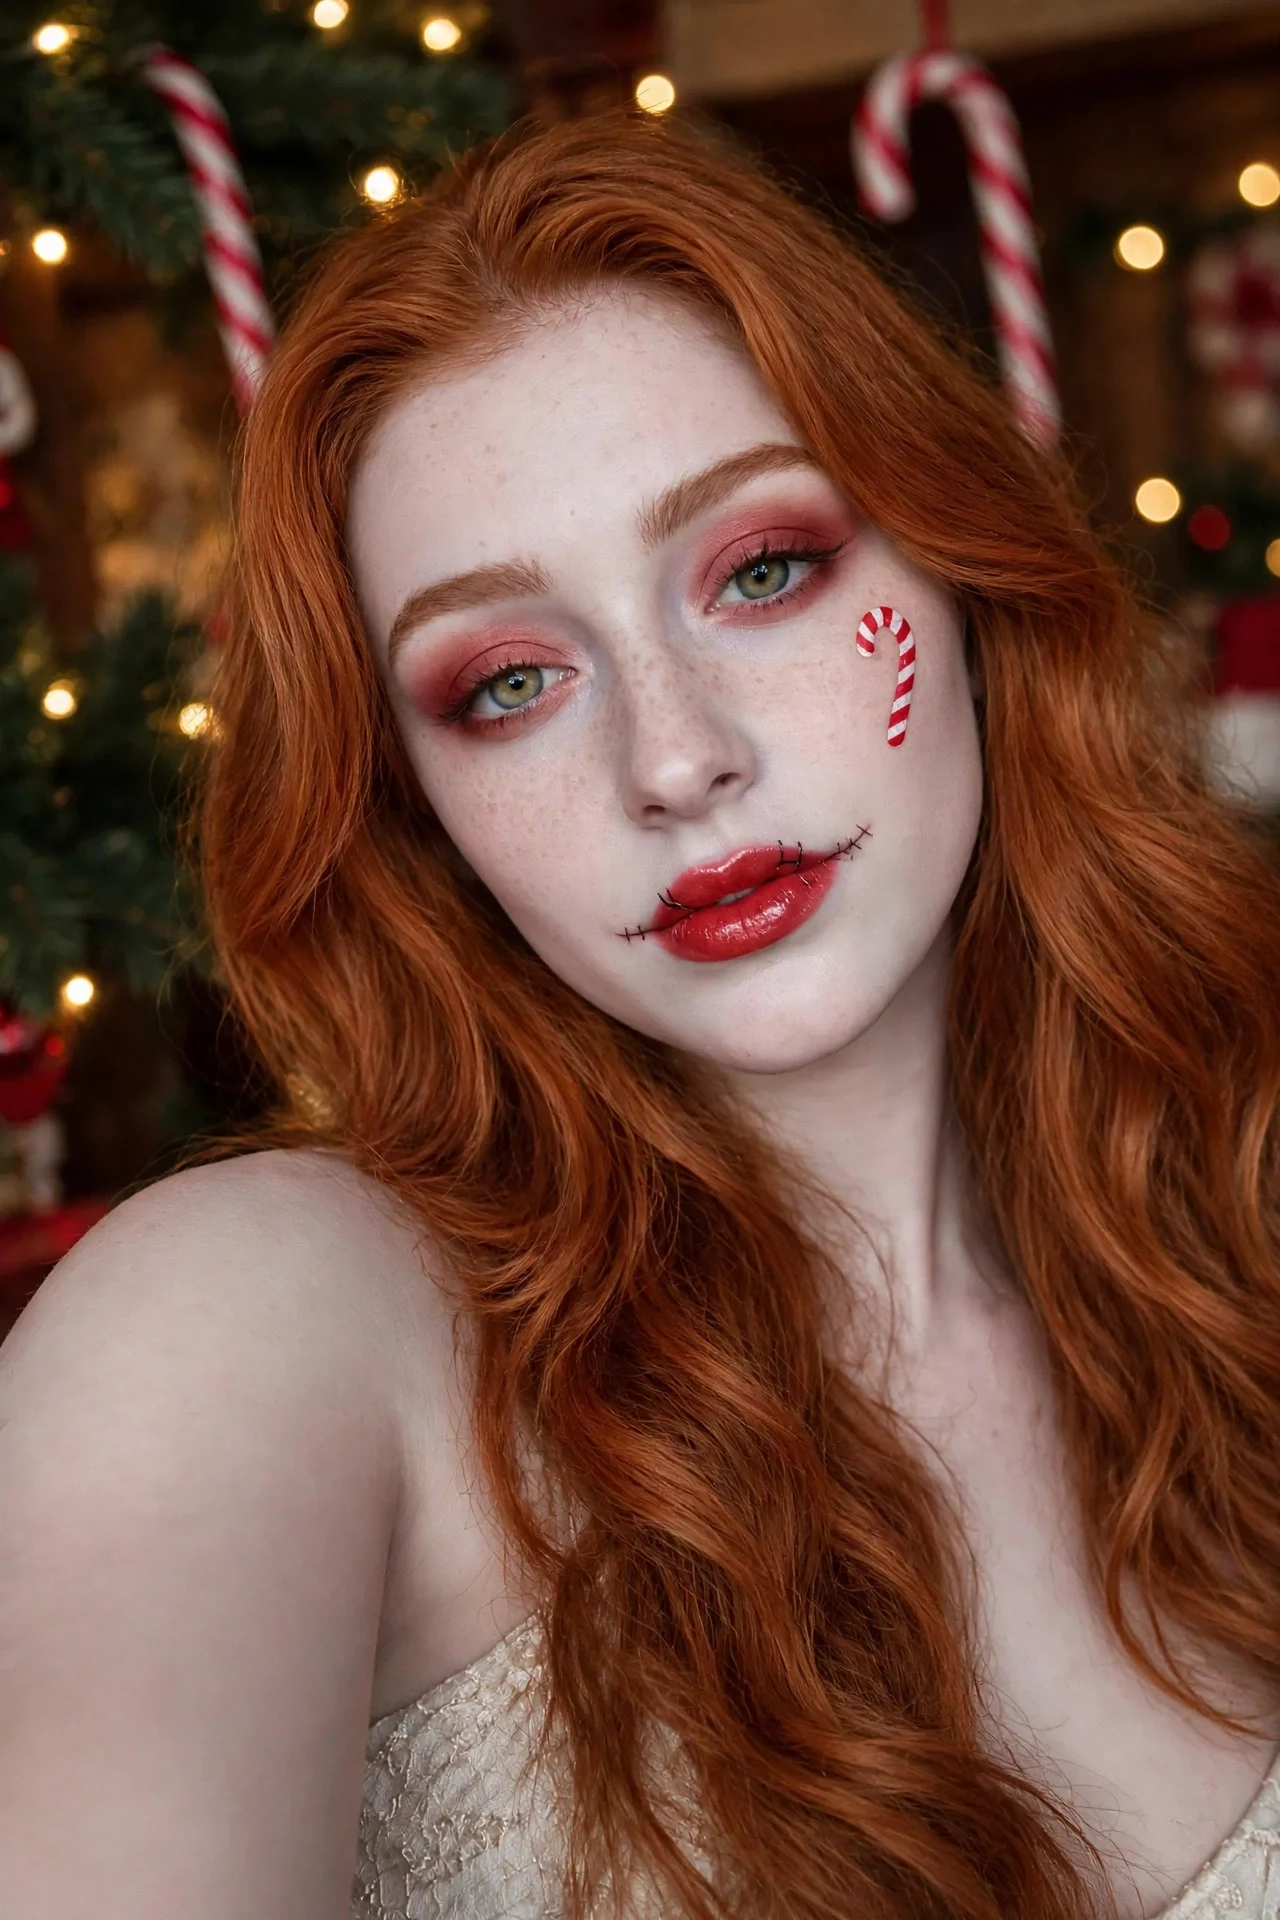
This playful version keeps Sally’s pale base and long red hair, then swaps her usual black stitch thread for candy cane colors. The stitches along the mouth and cheek are drawn as fine red-and-white striped dashes, like tiny pieces of peppermint candy sewn across the skin — instantly Christmassy without changing the structure of the look.
Balance the sweetness with a soft red eyeshadow blended into the crease and a glossy red lip. Because the stitches do the talking, keep the rest of the face clean: no heavy contour, just a little pink blush high on the cheeks like cold December air.
Quick Tip: Draw the white stitch first, let it dry, then add the thin red stripe beside it — layering keeps the candy stripes crisp instead of pink.
Glam Glitter Sally Makeup
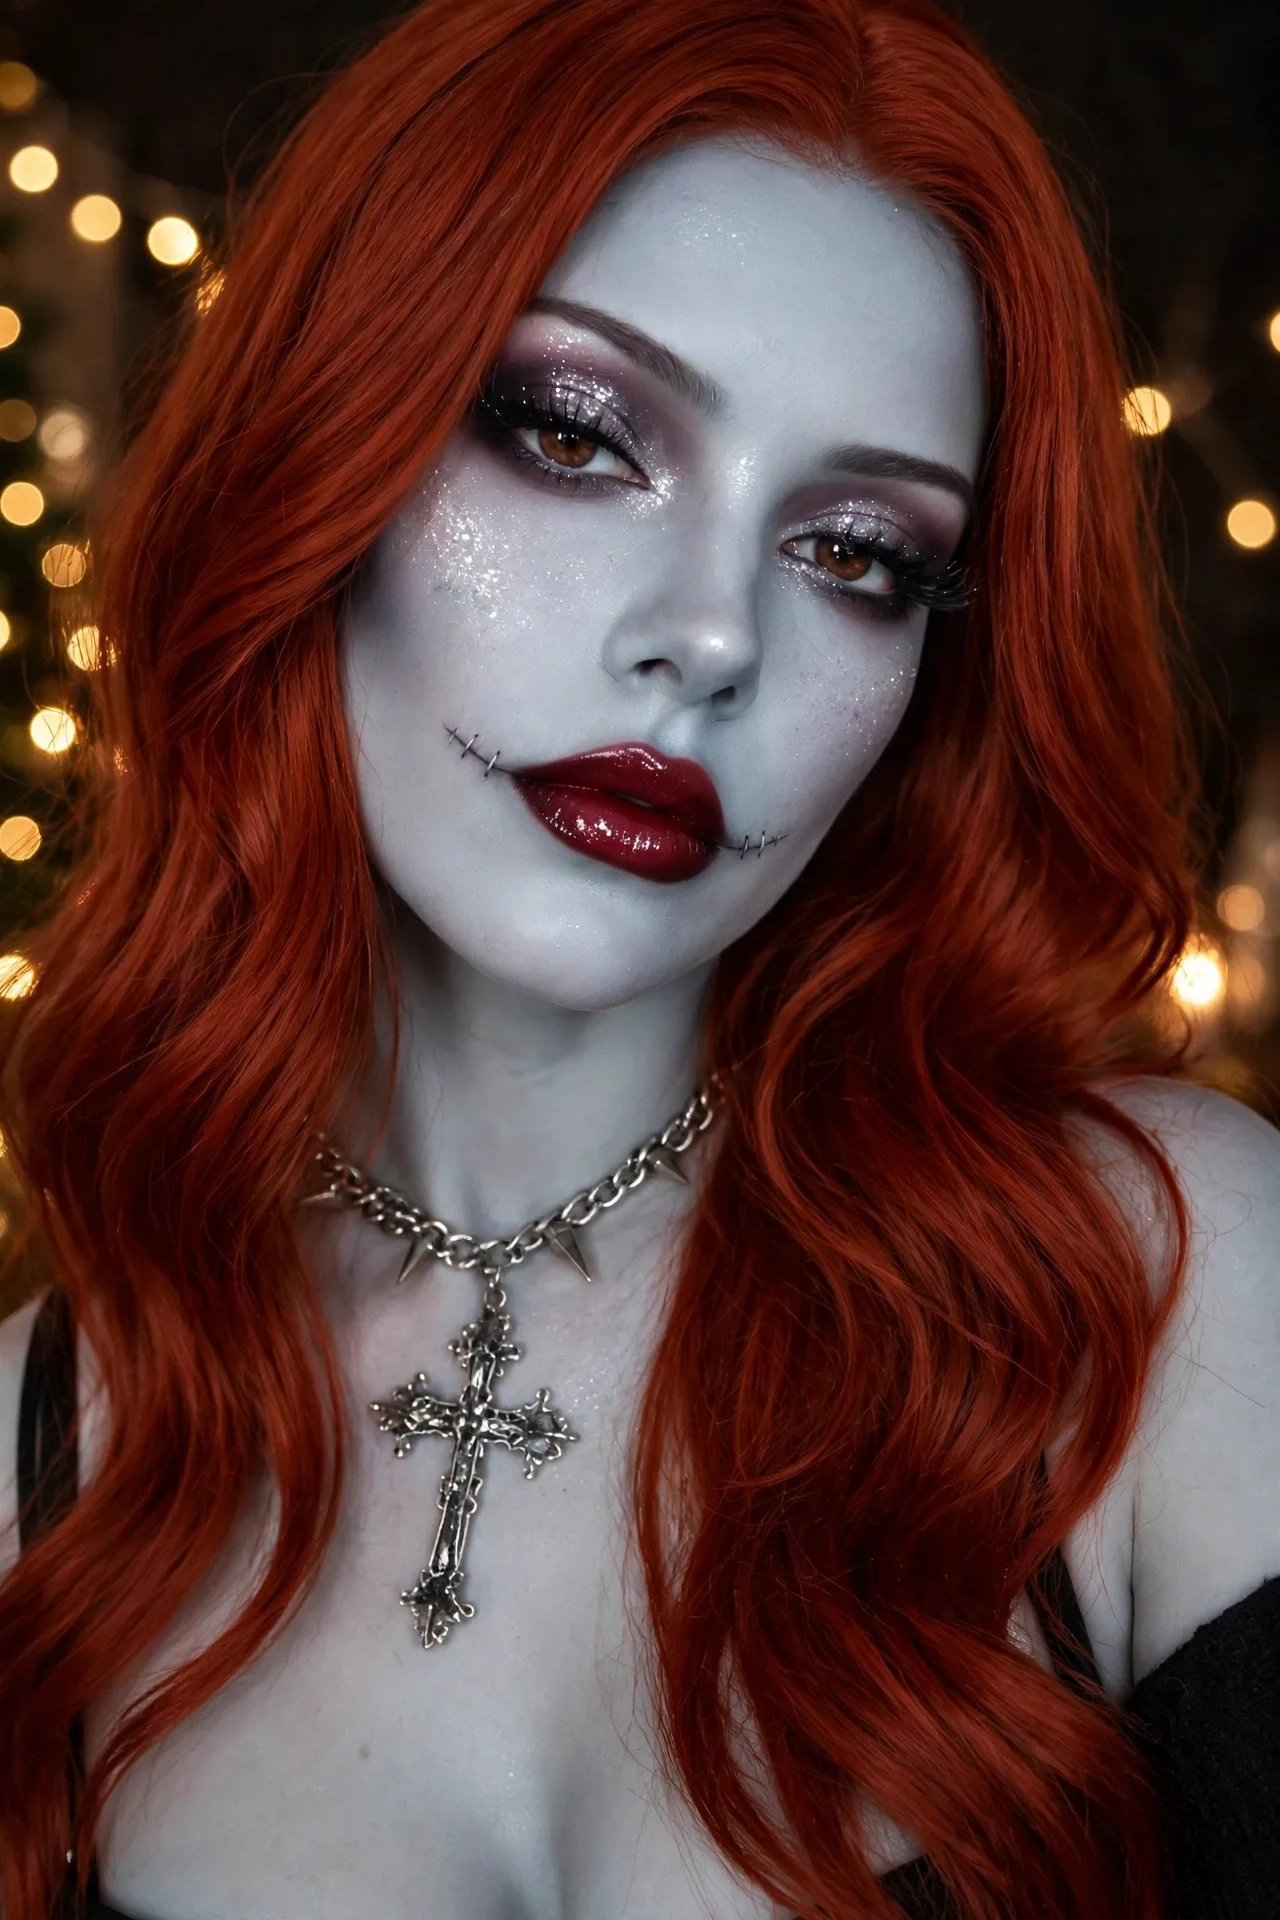
For a Christmas party, Sally goes glam: the pale base stays, but the eye sockets become a smoky plum-and-silver gradient packed with fine glitter, the lashes grow longer and feathery, and a dusting of silver shimmer runs along the cheekbones like frost catching the light. The stitched smile stays thin and elegant in deep charcoal.
A glossy deep-red lip keeps the glamour grown-up rather than costume-like. This is the version that works with a real party outfit — a velvet dress and heels — because the makeup reads as evening glam first and Sally second, until someone notices the stitches.
Quick Tip: Apply glitter over a glitter glue, not bare shadow, and do the eyes before the pale base — fallout on blue-grey skin is very visible.
Snowflake Sally Makeup
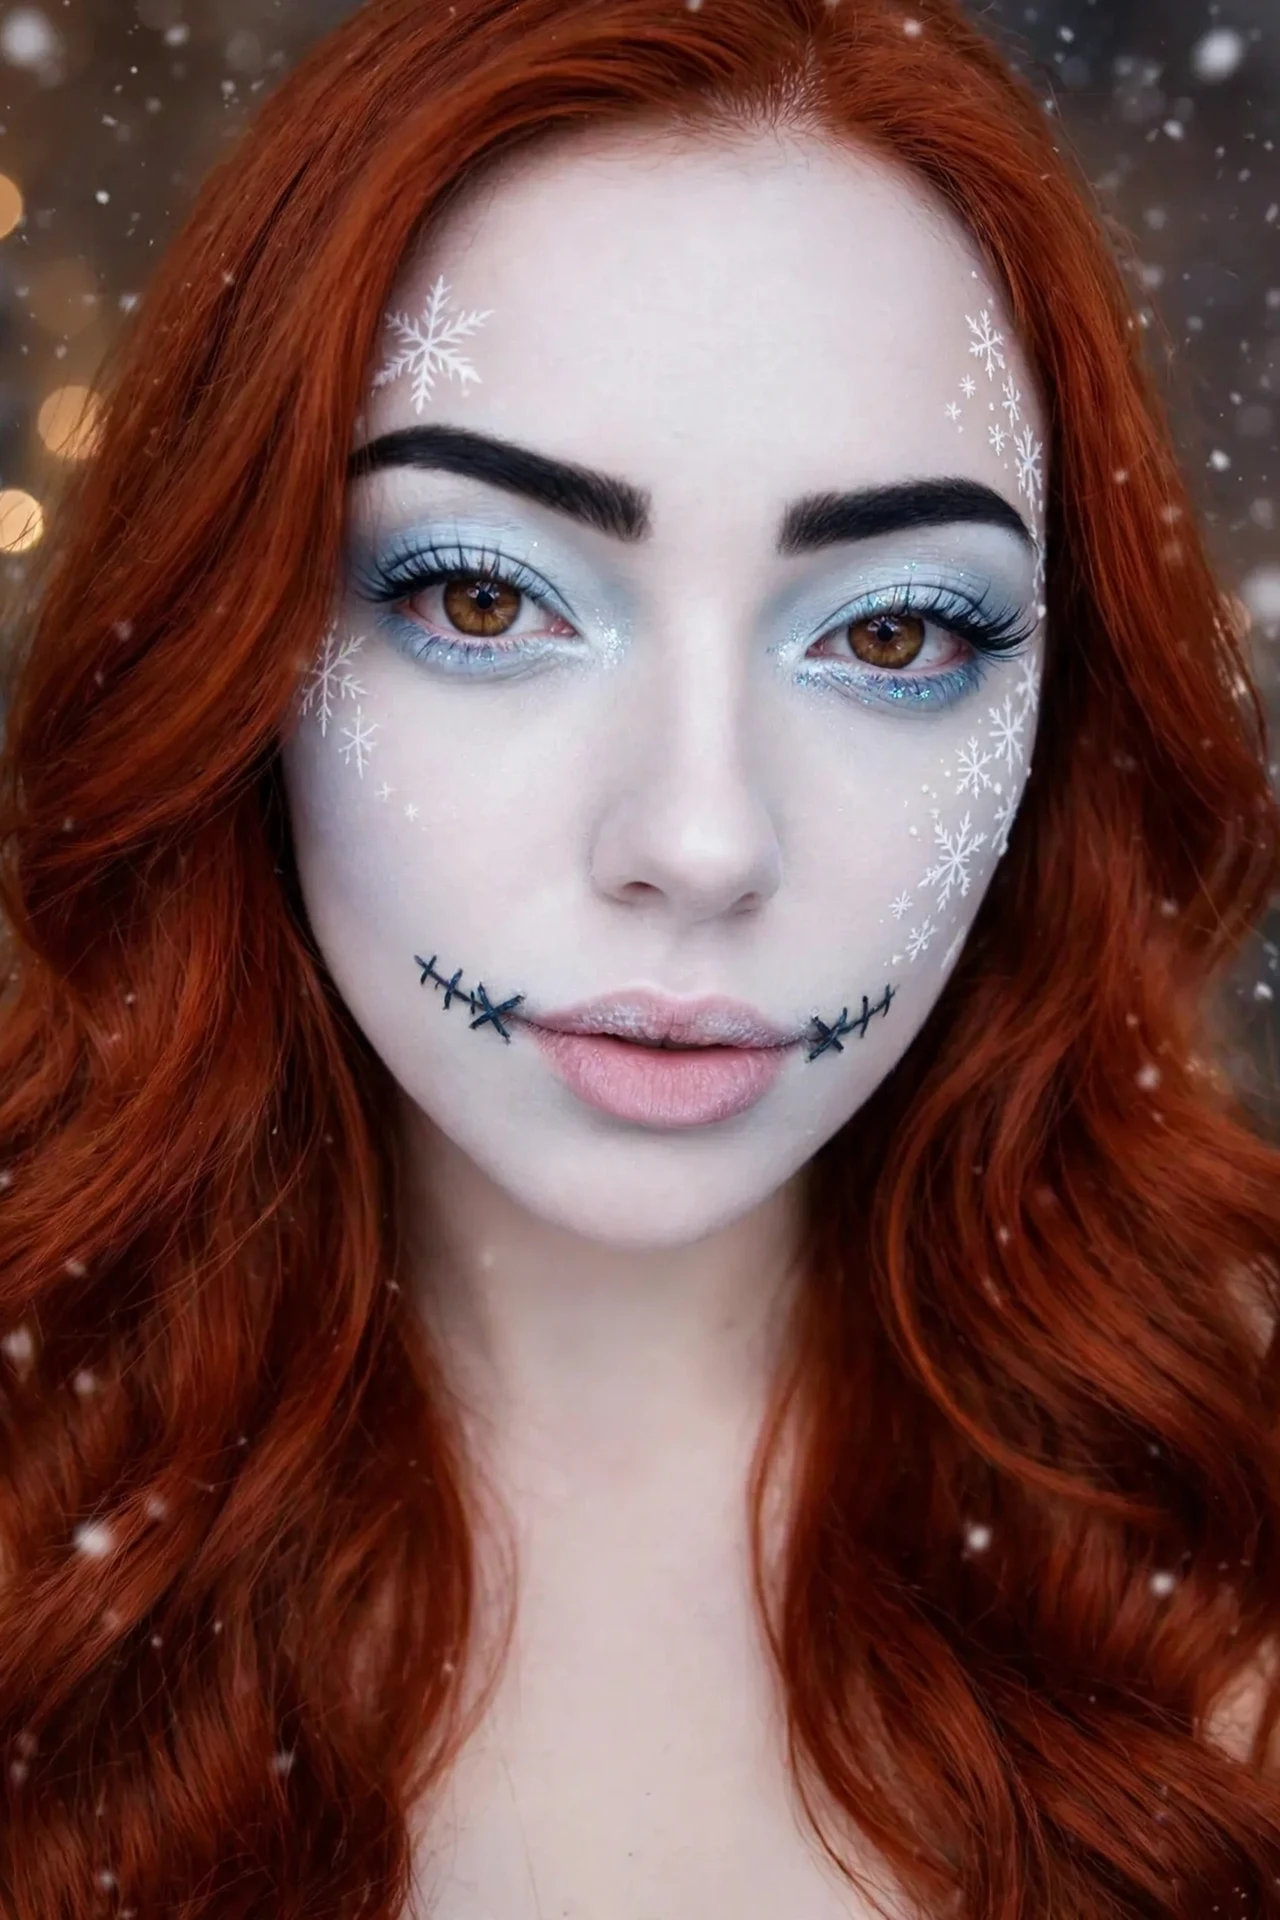
Winter turns Sally’s cool palette into a whole theme: icy blue and white shadow around the eyes, a paler, frostier base than usual, and delicate white snowflakes painted at the temples and along one cheekbone, each one small and slightly different like real snow. Her stitches are drawn in deep navy instead of black to stay inside the frozen color story.
Finish with a frosted pink lip and the faintest blue-white highlight on the nose and cheekbones. Long red hair warms the whole thing up — the contrast between the fire-red hair and the ice-blue makeup is exactly what makes this version so striking in photos.
Quick Tip: Paint snowflakes with a fine liner brush and white face paint: one six-point star, then tiny branches. Imperfect flakes look more natural than perfect ones.
Christmas Lights Sally Makeup
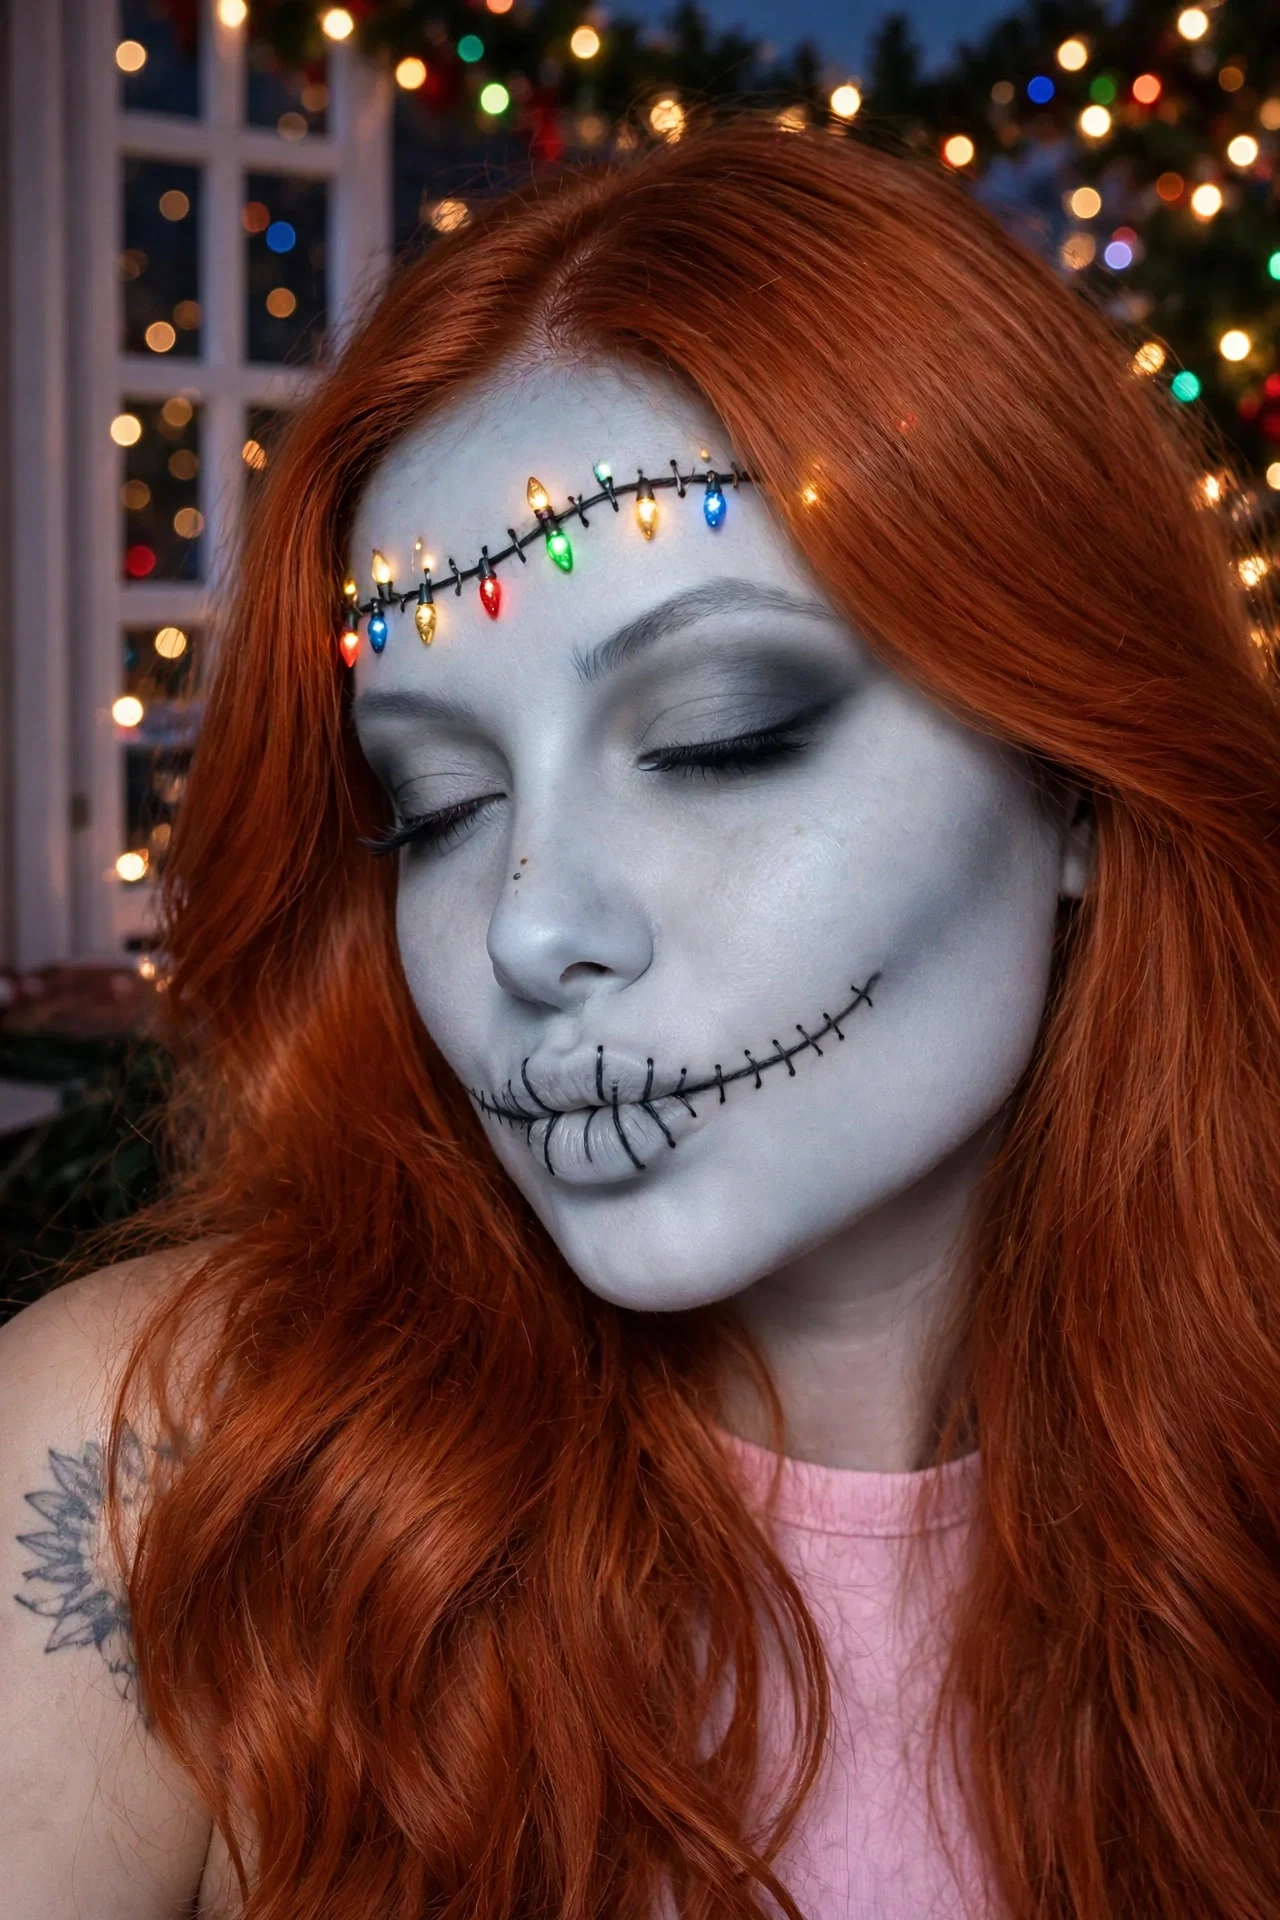
The most playful idea on the list: a string of tiny Christmas lights painted as a fine curving line across the forehead or along one cheek, with little glowing bulbs in red, green, gold and blue. Sally’s stitched patches give the lights a story — as if the rag doll has been decorated for the tree — and the pale skin makes the colors pop like bulbs in the dark.
Keep the eye makeup simple and smoky so the lights stay the star, and add one real accessory: a strand of tinsel or a light-up necklace in photos. It is a look that gets compliments from across the room, and it is far easier than it looks — the wire is one wavy line, the bulbs are colored dots with a tiny white highlight each.
Quick Tip: Give every painted bulb one tiny white dot on the same side — that single highlight is what makes flat paint read as glowing glass.
Pastel Pink Sally Christmas Makeup
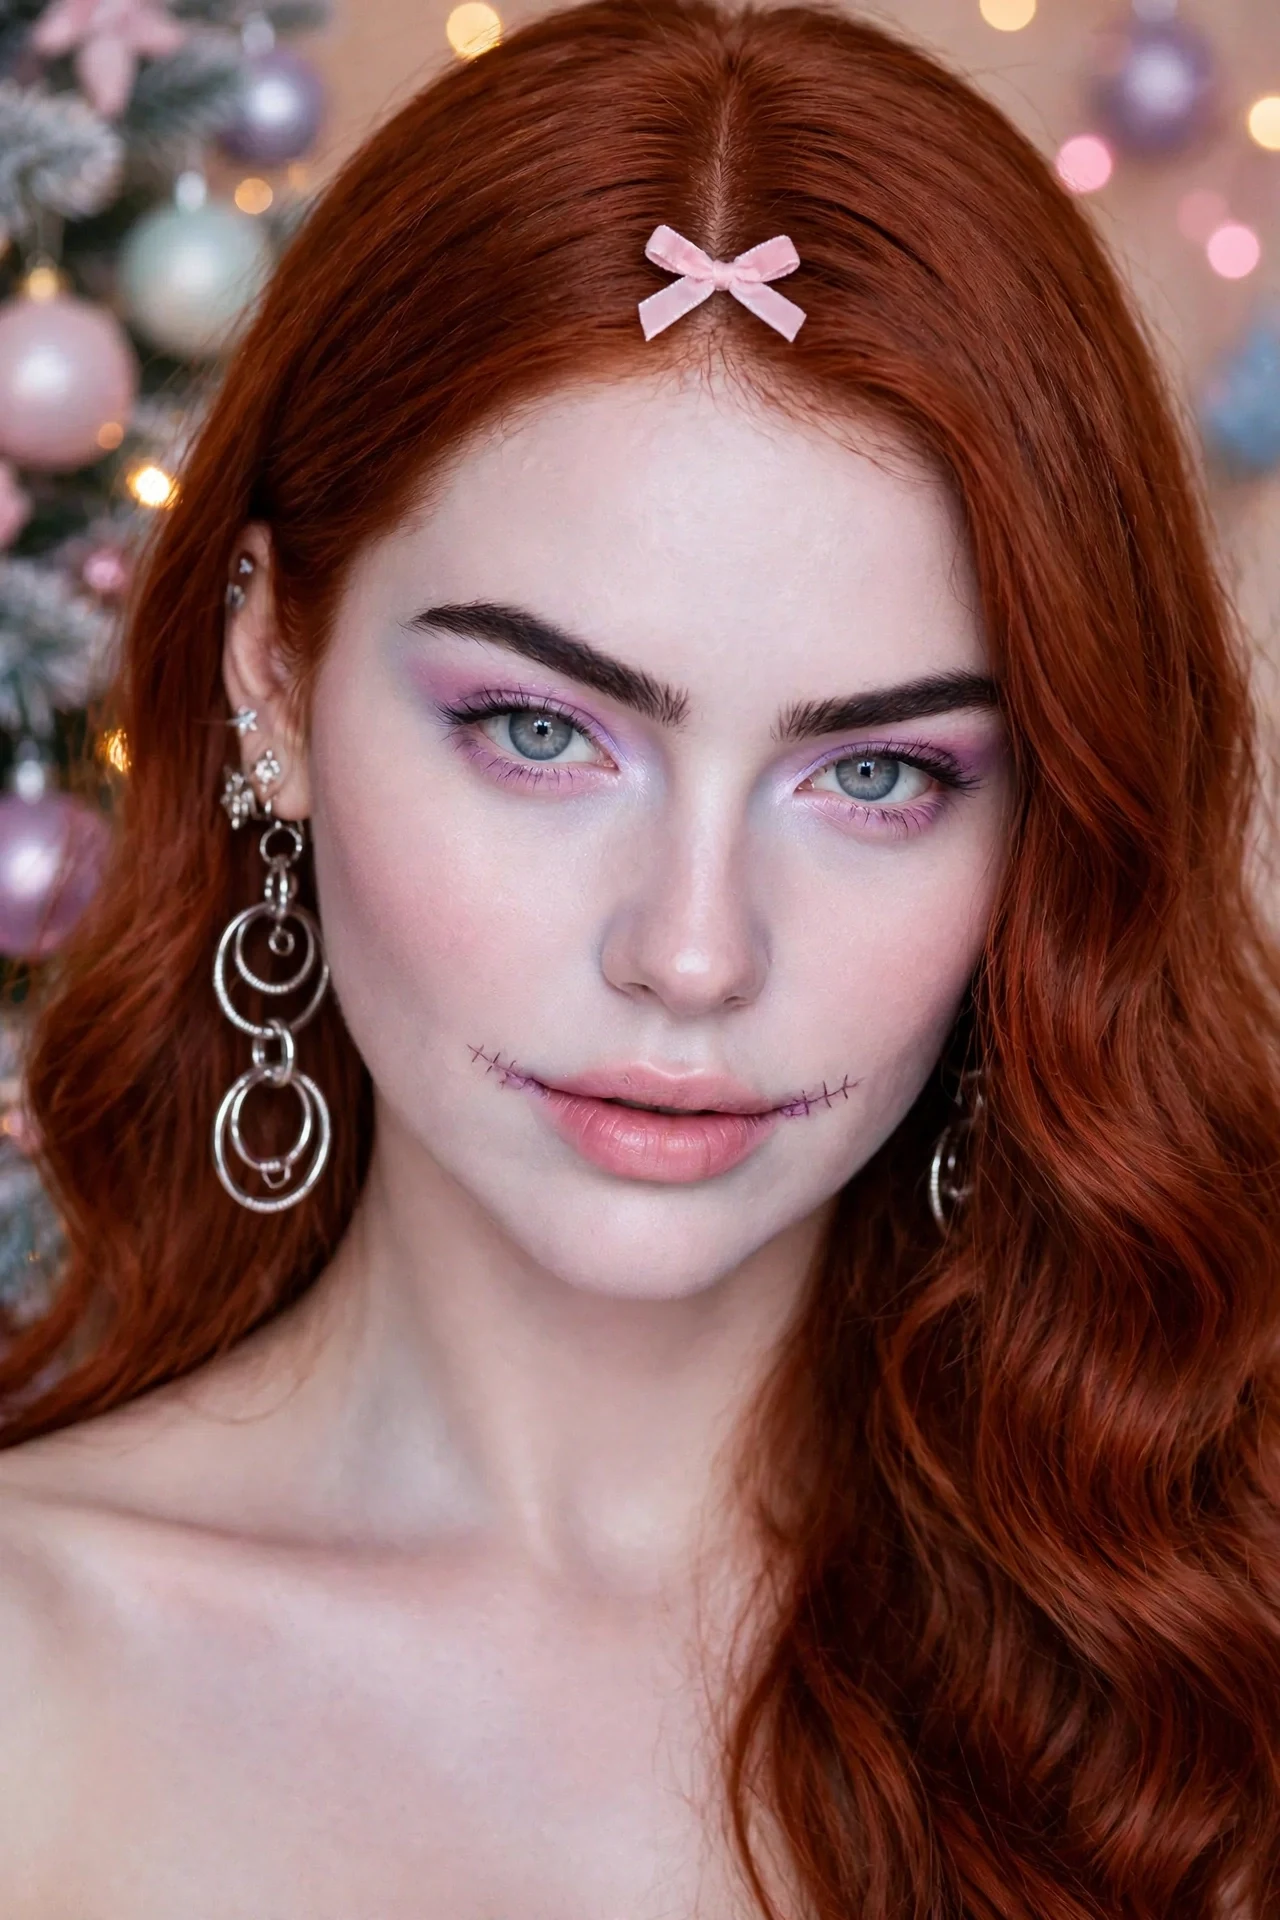
A soft, sweet take for anyone who finds the classic base too ghostly: the skin becomes a pale porcelain pink-blue, the eye makeup turns to pastel pink and lilac, and the stitches are drawn in a soft mauve instead of black. A tiny pink bow at the hairline and a rosy lip complete the sugar-plum version of the rag doll.
Because everything is lighter, this version photographs beautifully in daylight and suits Christmas morning photos, school events and family parties where a full ghoul look would be too much. It is also the most forgiving version for beginners — soft colors hide small mistakes that black lines would show.
Quick Tip: Keep one unmistakably Sally element strong — the long red hair or the stitched smile — so the pastel version still reads as Sally, not just pink makeup.
Santa Sally Makeup

What happens when Sally delivers the presents herself: the classic pale face and stitches stay, but the lips turn Santa red, the cheeks get a round rosy blush, and a fluffy red Santa hat sits over her long red hair. A fine line of white ‘fur’ painted along one hairline edge ties the hat into the makeup like a costume seam.
It is a funny, warm version — half Halloween Town, half North Pole — and it pairs with any red dress or even a Santa suit for couples’ costumes with a Jack Skellington in a Santa coat. Keep the eye makeup warm and simple so the hat and lips carry the joke.
Quick Tip: Pin the Santa hat slightly back on the head so it frames the face instead of shadowing it — stitched details need light to read in photos.
Golden Bells Sally Makeup
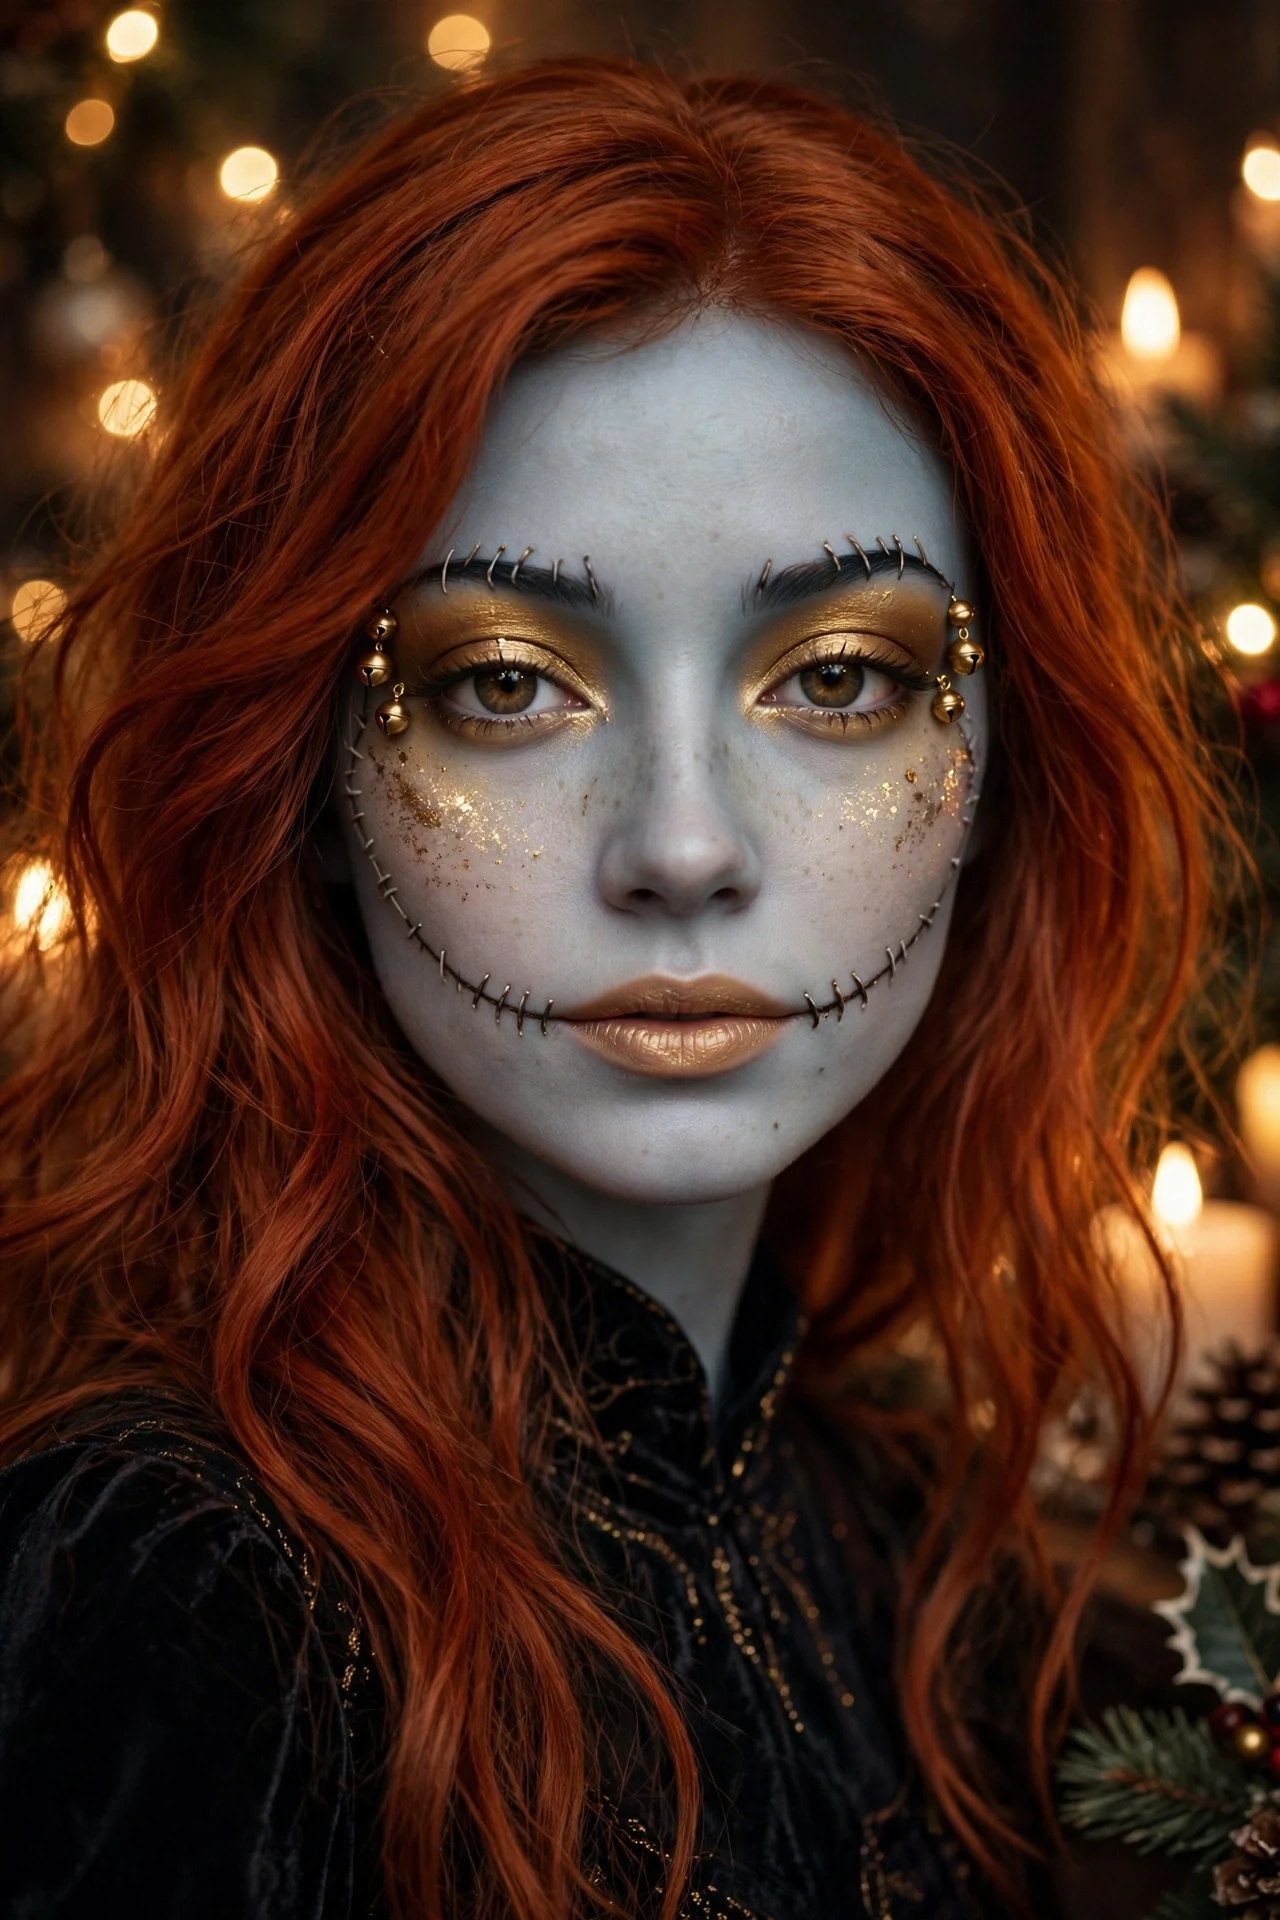
Metallic gold warms Sally’s cool face into candlelight territory: a wash of antique gold shadow, tiny gold bells painted or placed as gems at the outer eye corners, and gold-flecked highlight along the cheekbones. The stitches go deep bronze instead of black, which keeps the whole face inside one warm, glowing family.
A warm nude-gold lip finishes it. This is the most ‘holiday dinner’ version of the character — elegant enough for a formal party, with the stitches as the only giveaway that you arrived from Halloween Town.
Quick Tip: Use cosmetic-grade gold leaf flakes sparingly on the cheekbones for real dimension — one or two flakes catch light better than a full dusting.
Gingerbread Sally Makeup
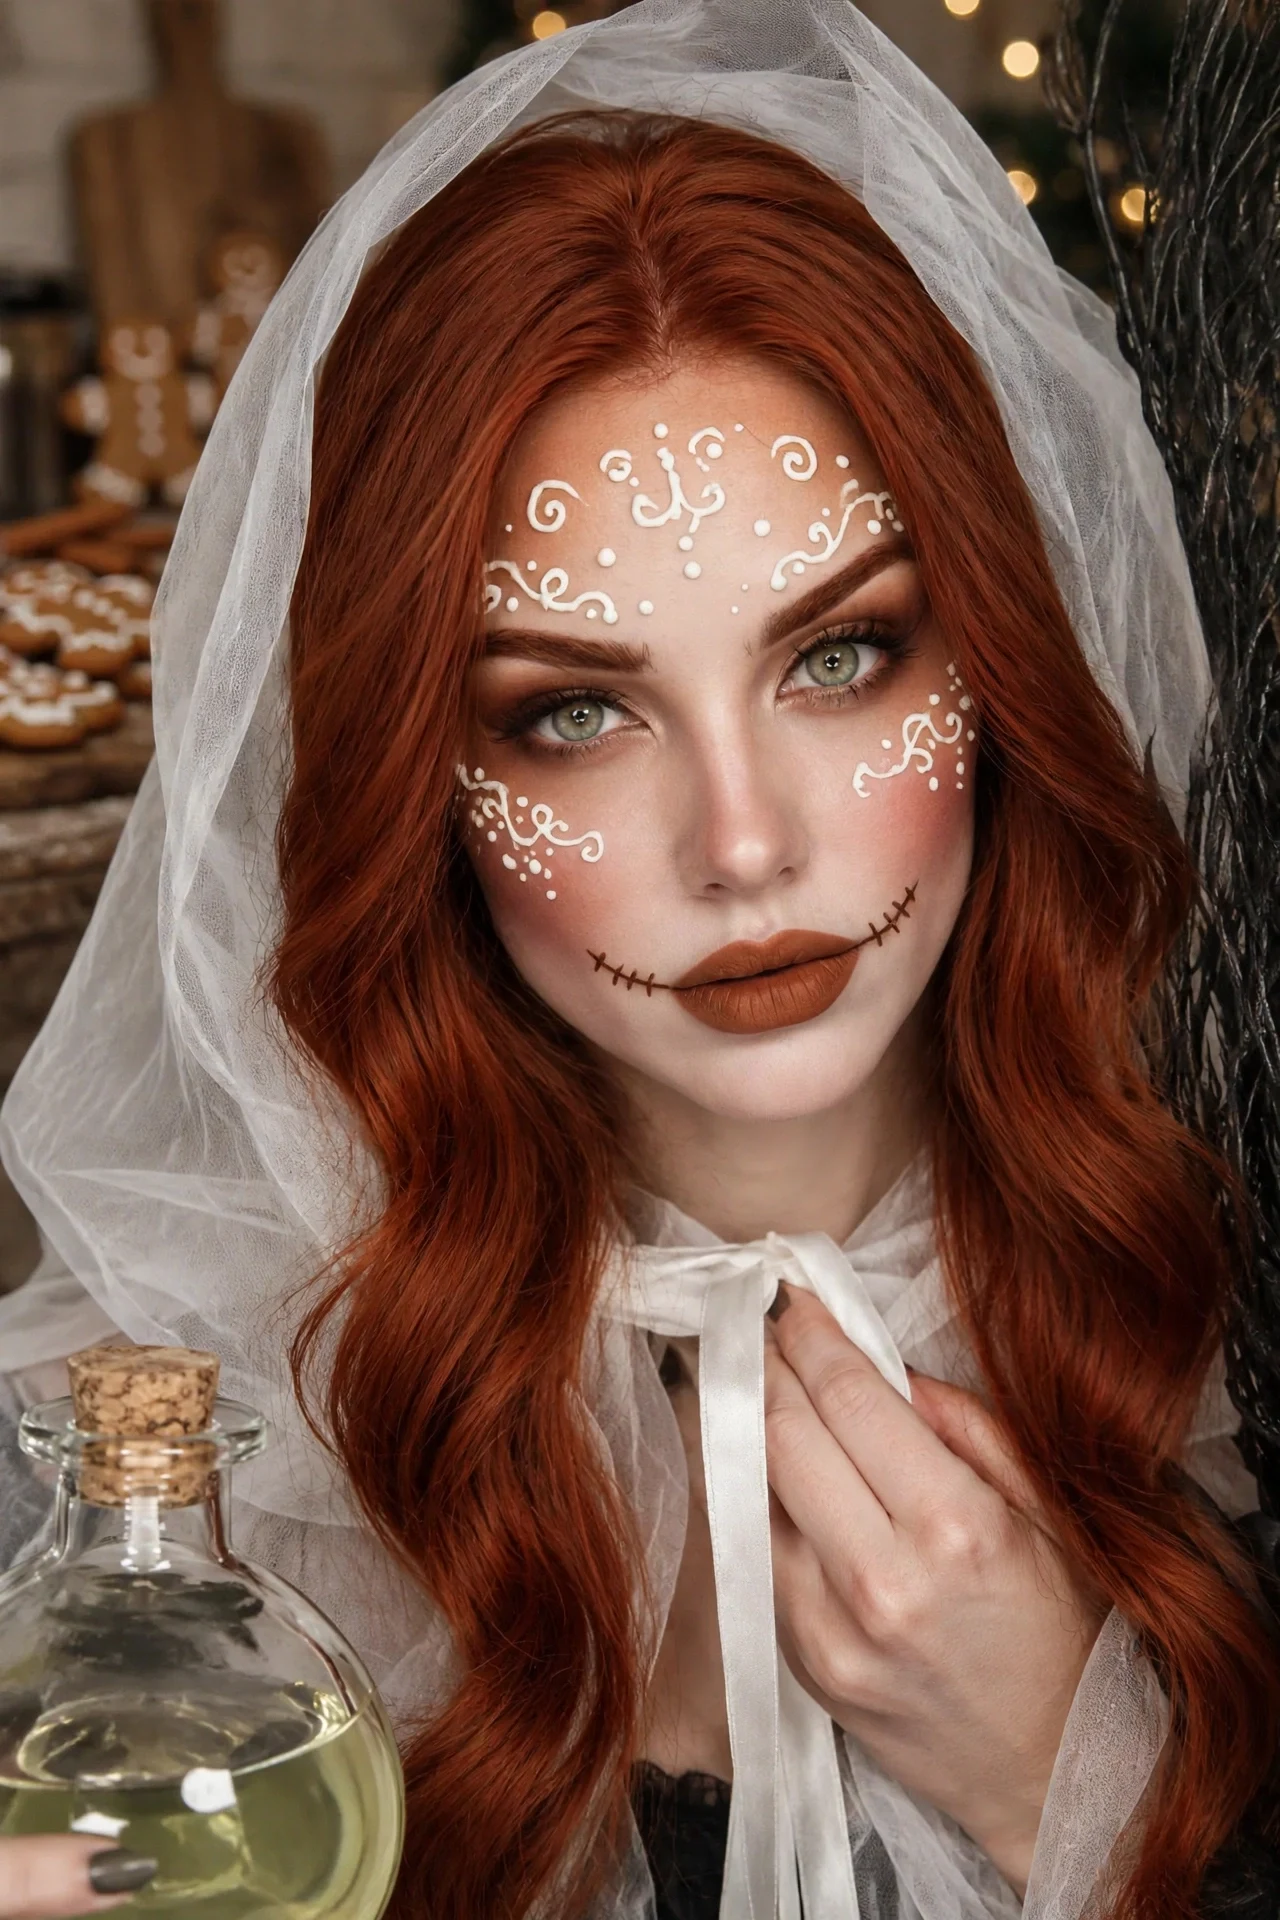
A cozy kitchen Christmas inspired this one: Sally’s base warms up with gingerbread-brown shading around the hairline and cheeks, white ‘icing’ dots and squiggles decorate the forehead and cheek like piped royal icing, and the stitches are drawn in warm chocolate brown. A cinnamon-toned lip and rosy baked blush sell the fresh-from-the-oven feeling.
It is the friendliest version for bakers and cookie-exchange parties, and it pairs naturally with a gingerbread apron or a plate of cookies in photos. Keep the icing details small and symmetrical — piping logic applies to faces too.
Quick Tip: Use white eyeliner for the icing details and set them with a dab of white shadow — liner alone can crack as it dries on moving skin.
Elf Green Sally Makeup
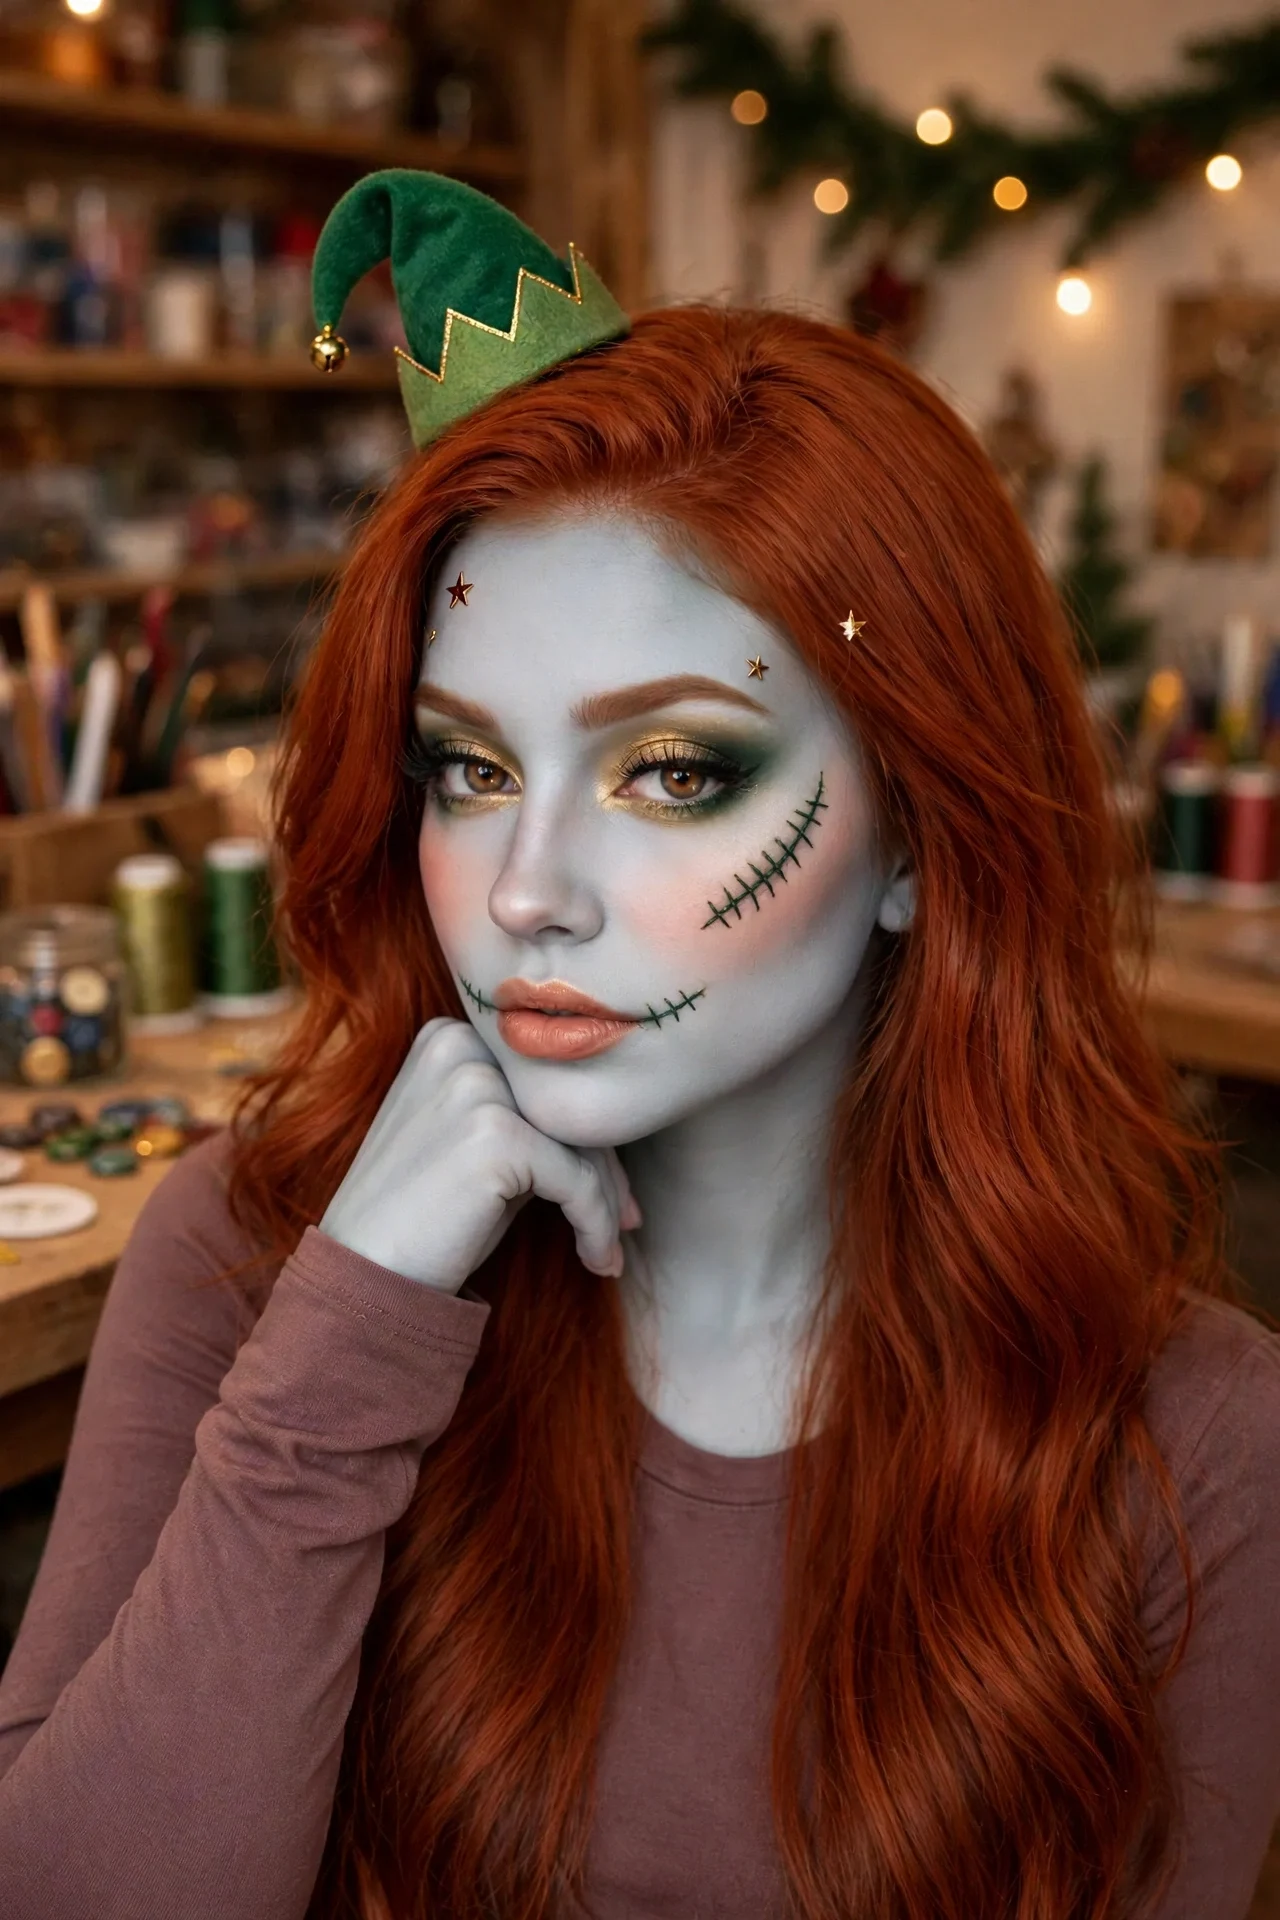
Sally joins Santa’s workshop: her stitches and eye makeup turn deep evergreen, a fine green-and-gold gradient sweeps the lids, and a small gold star or bell sits at each temple. The pale base keeps her recognizable while the green says Christmas elf — especially with a pointed elf hat or ears worn over the red hair.
Balance the green with warm skin tones everywhere else: peachy blush, warm nude lip, no cool contour. Green makeup can drag a pale base toward sickly if everything else is cool too; warmth is what keeps this version cheerful.
Quick Tip: If green shadow feels risky, do the stitches and liner in evergreen and keep the shadow neutral — the character still reads instantly.
Mistletoe Sally Makeup
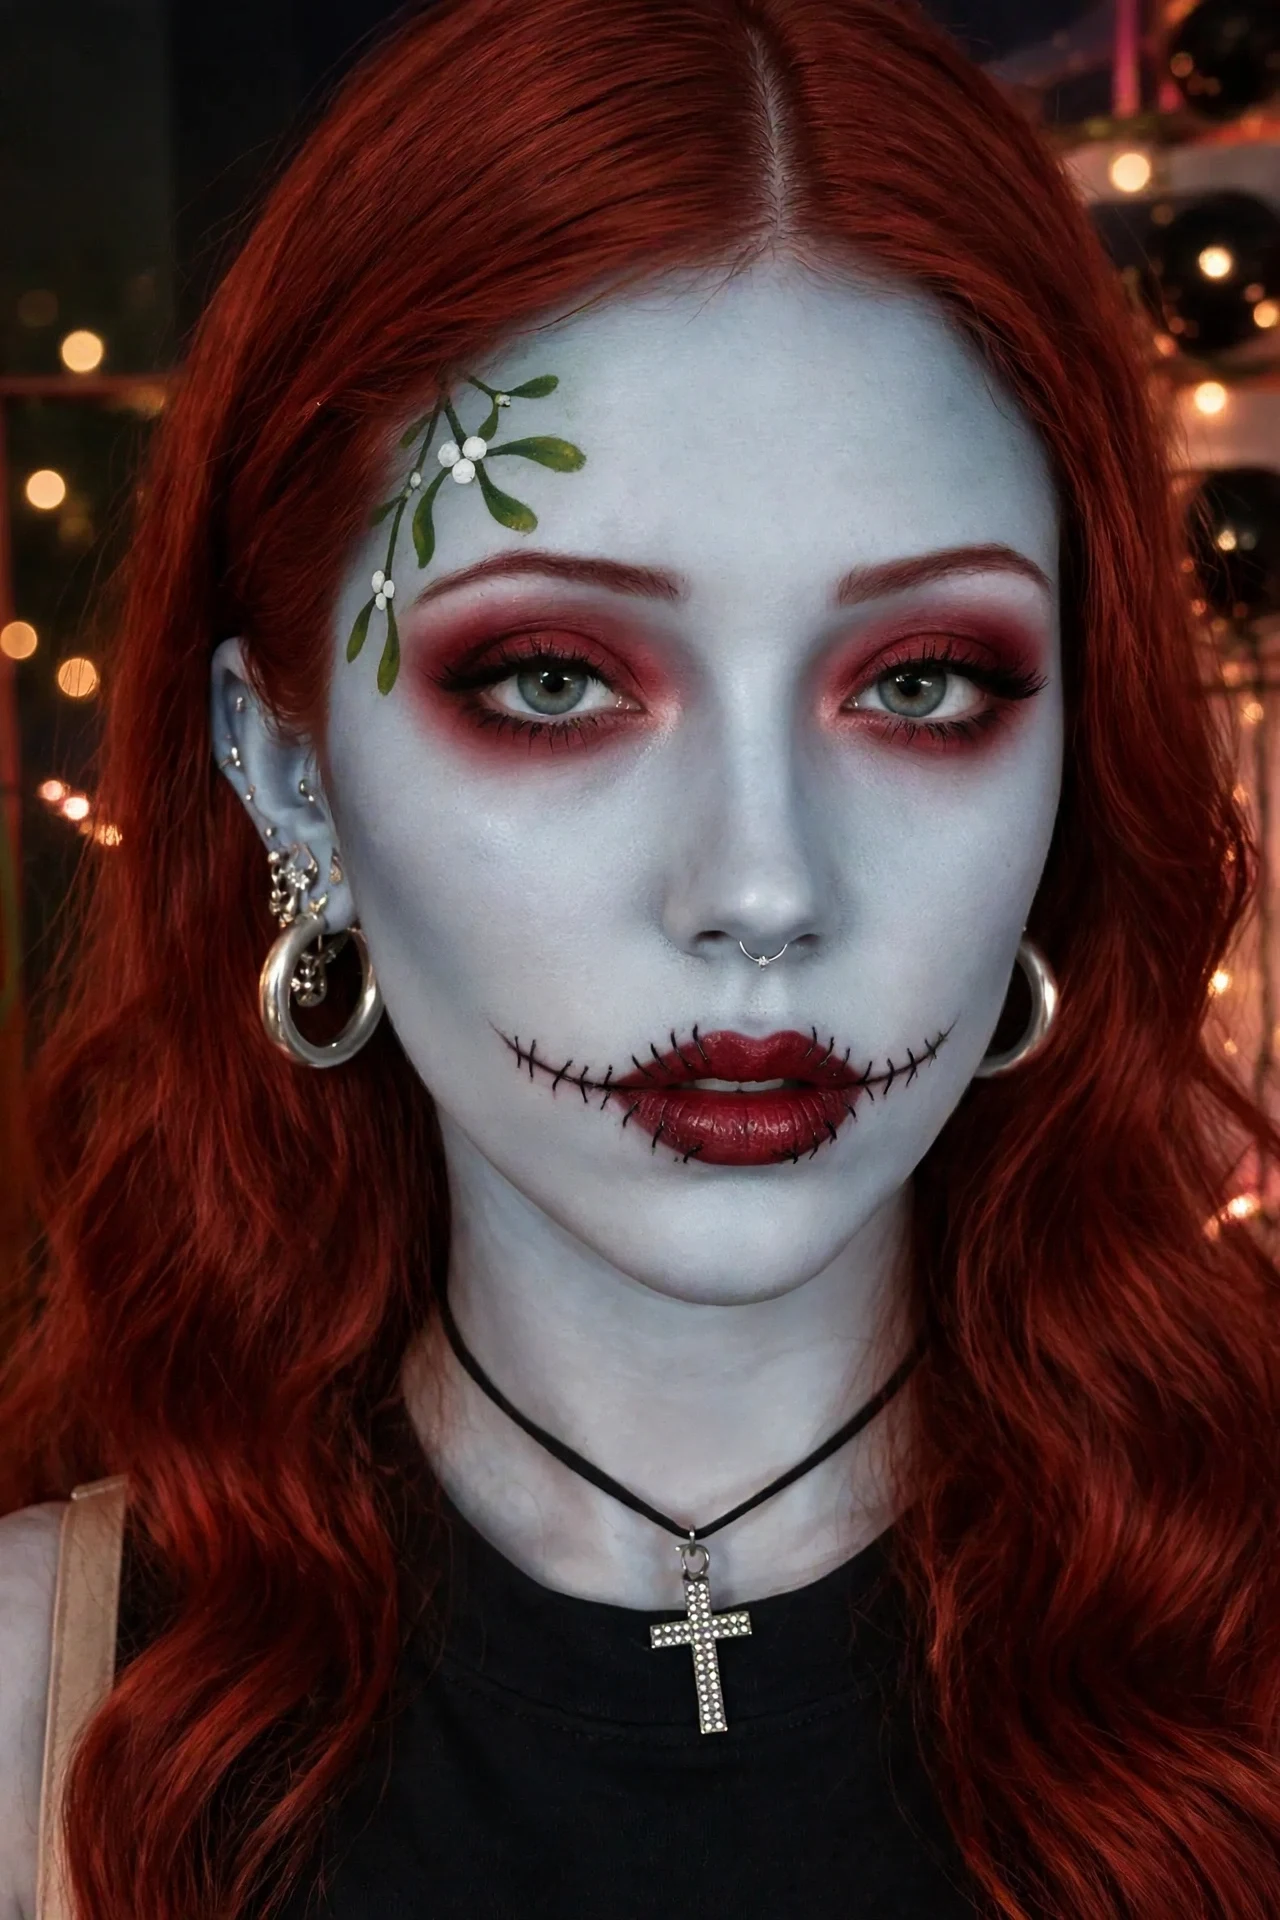
Romantic and a little mischievous: classic Sally makeup, plus a painted sprig of mistletoe — green leaves and white berries — at one temple, as if it is pinned in her hair. Deep red lips and a soft red smoky eye lean into the theme, and the stitched smile does the rest of the storytelling.
It is a natural couples’-costume look (someone has to stand under the mistletoe with her), and one of the prettiest versions for evening photos because the red-and-pale contrast is so strong. Keep the mistletoe small; at life size it should read as a hair jewel, not a salad.
Quick Tip: Paint the mistletoe on the side you photograph most — check your angles in the mirror before you commit to a side.
Frosty Icy Sally Makeup
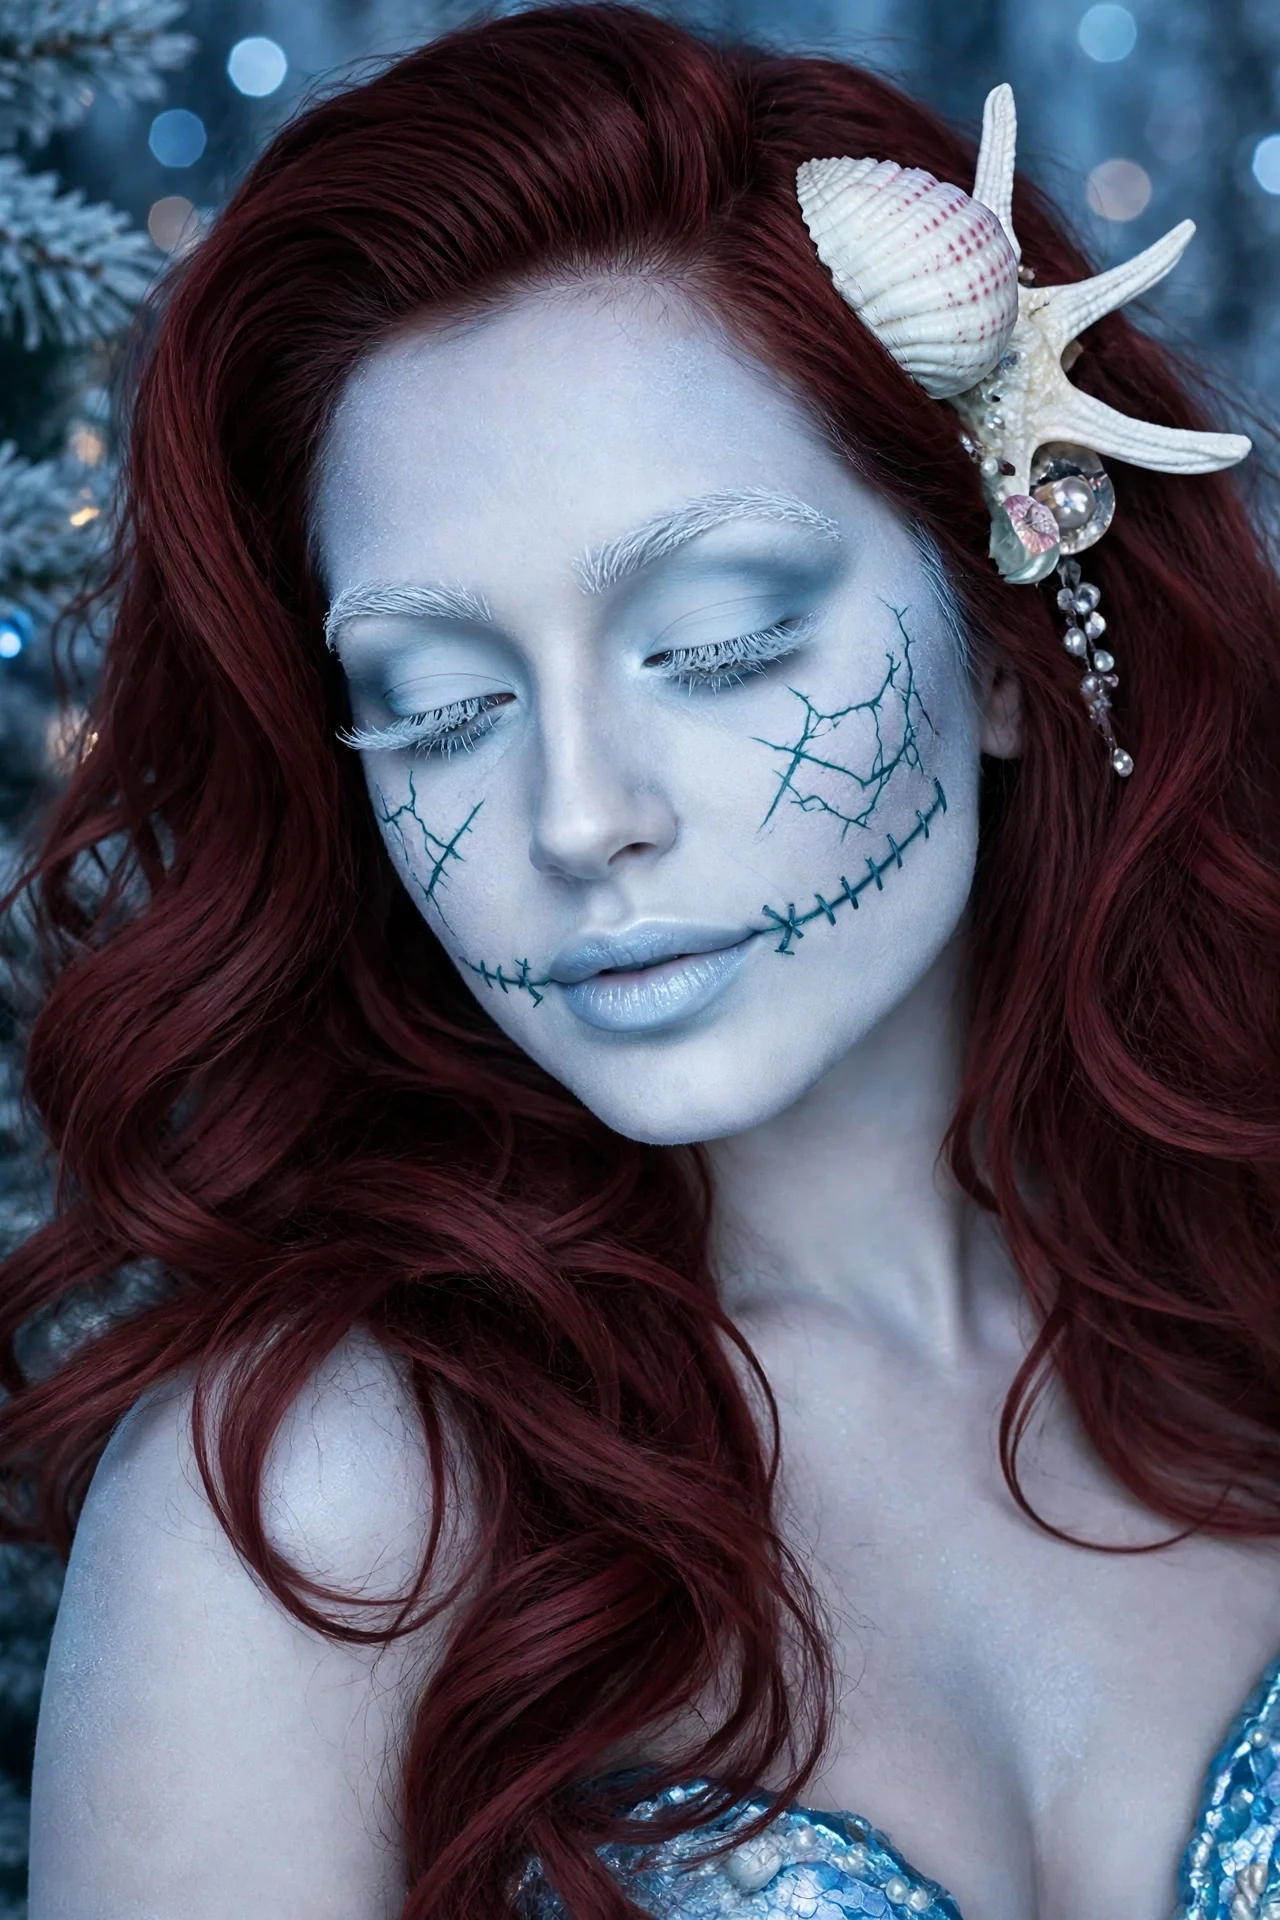
The coldest, most dramatic version: an almost-white blue base, silver-white brows and lashes frosted at the tips, and deep teal stitches that look like cracks in ice. A glossy pale lip with a hint of blue shimmer finishes the frozen-doll effect — Sally as the Snow Queen’s darker sister.
Save this one for evening events and flash photography, where the icy palette glows instead of washing out. Warm light kills the effect; if the venue is candlelit, the glam glitter version will serve you better.
Quick Tip: Frost the lash tips by pressing white mascara or white liner onto just the ends after black mascara dries — it reads as real frost up close.
Red Velvet Sally Makeup
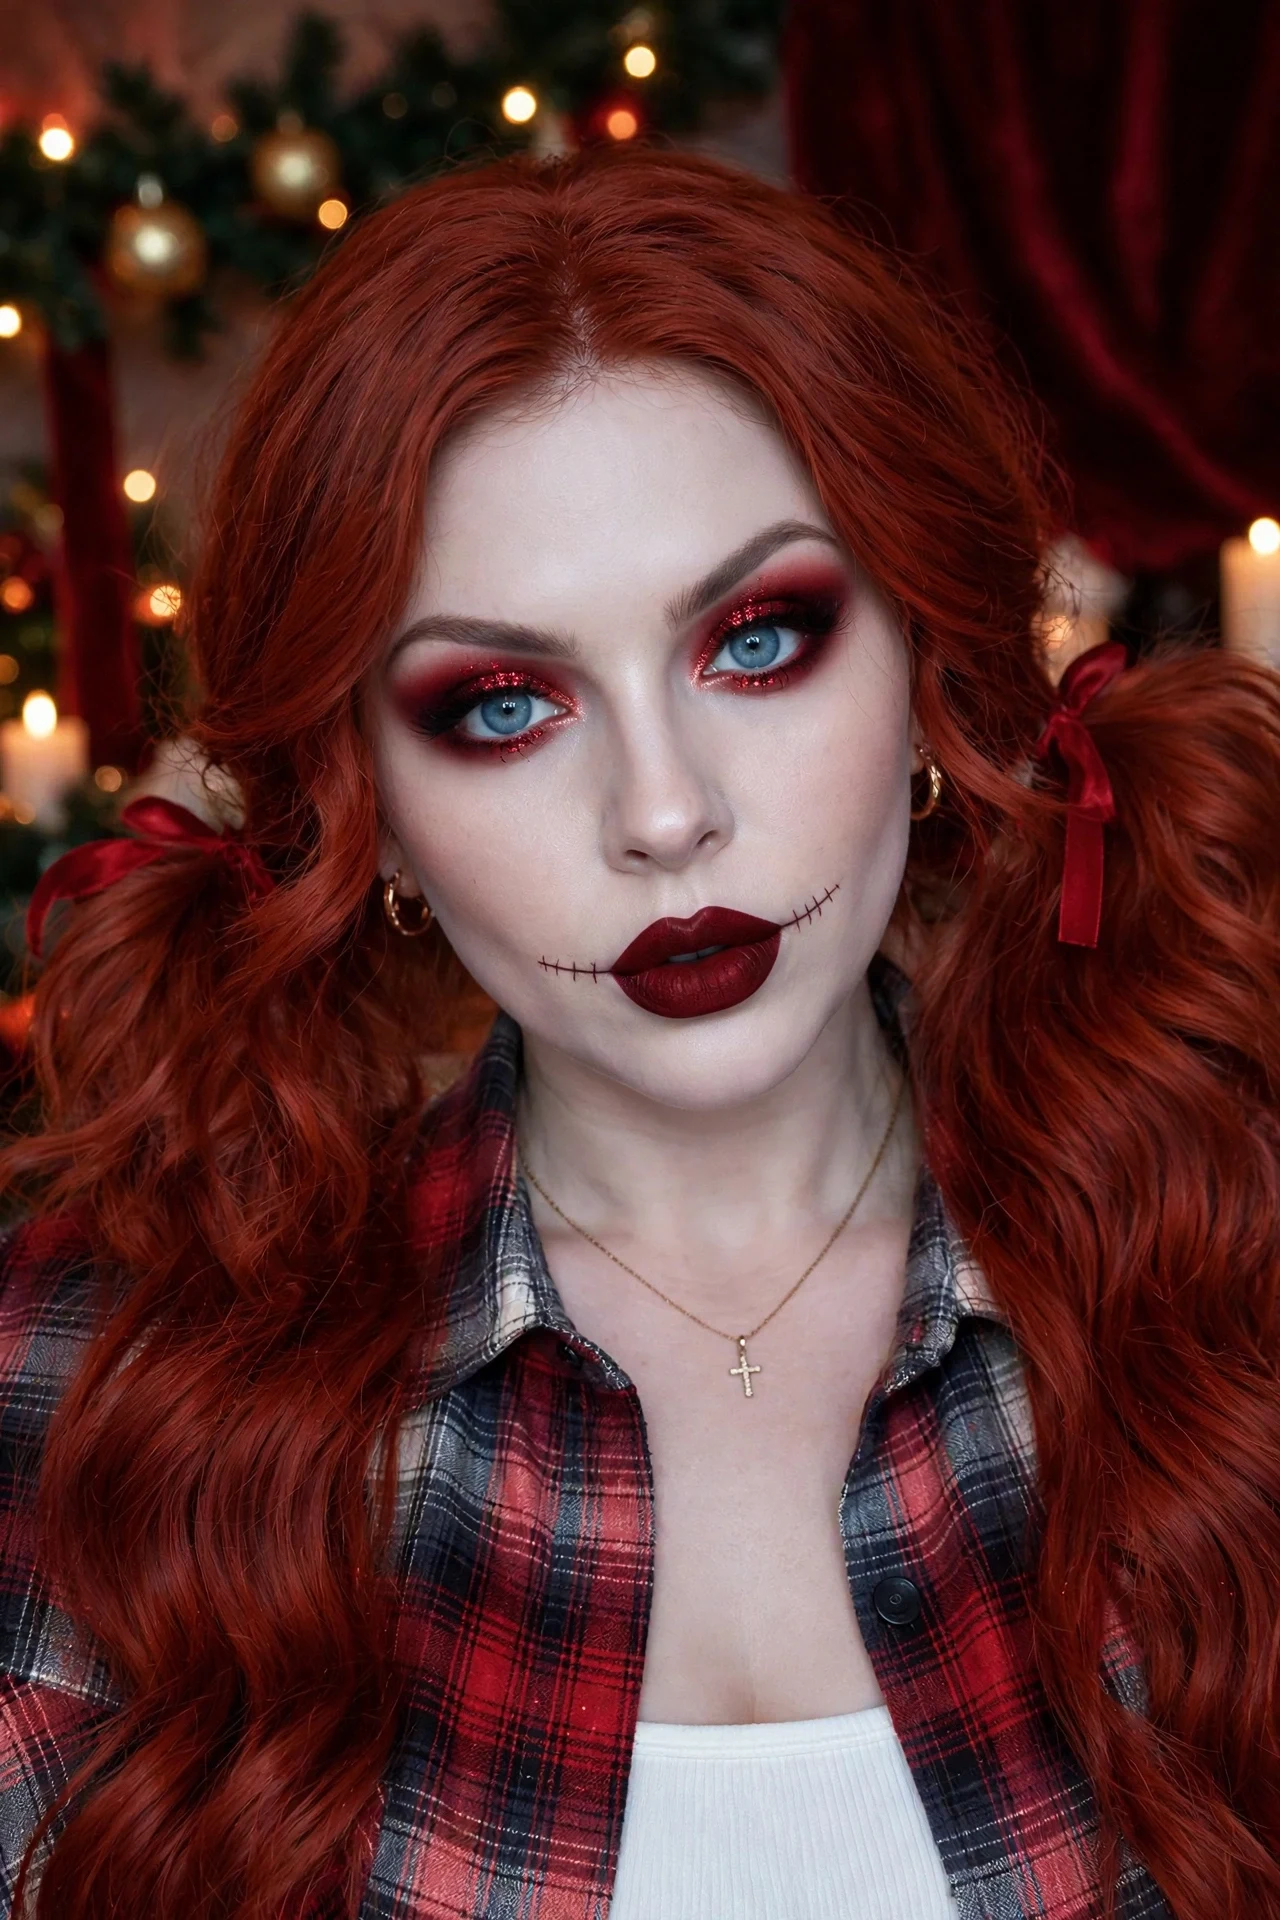
Pure Christmas luxury: the pale Sally base with a rich red velvet theme — burgundy-red smoky eyes, deep red matte lips outlined precisely, and stitches drawn in the darkest oxblood. A touch of red glitter pressed at the center of the lids catches light like wrapping paper foil.
This version loves a red dress and gold jewelry, and it is the one to pick when the invitation says festive but the crowd is fashionable. The stitches keep it character-true; everything else is red-carpet technique.
Quick Tip: Line the lips and fill them completely with liner before lipstick — deep reds feather into pale base makeup faster than into skin.
Silver Tinsel Sally Makeup
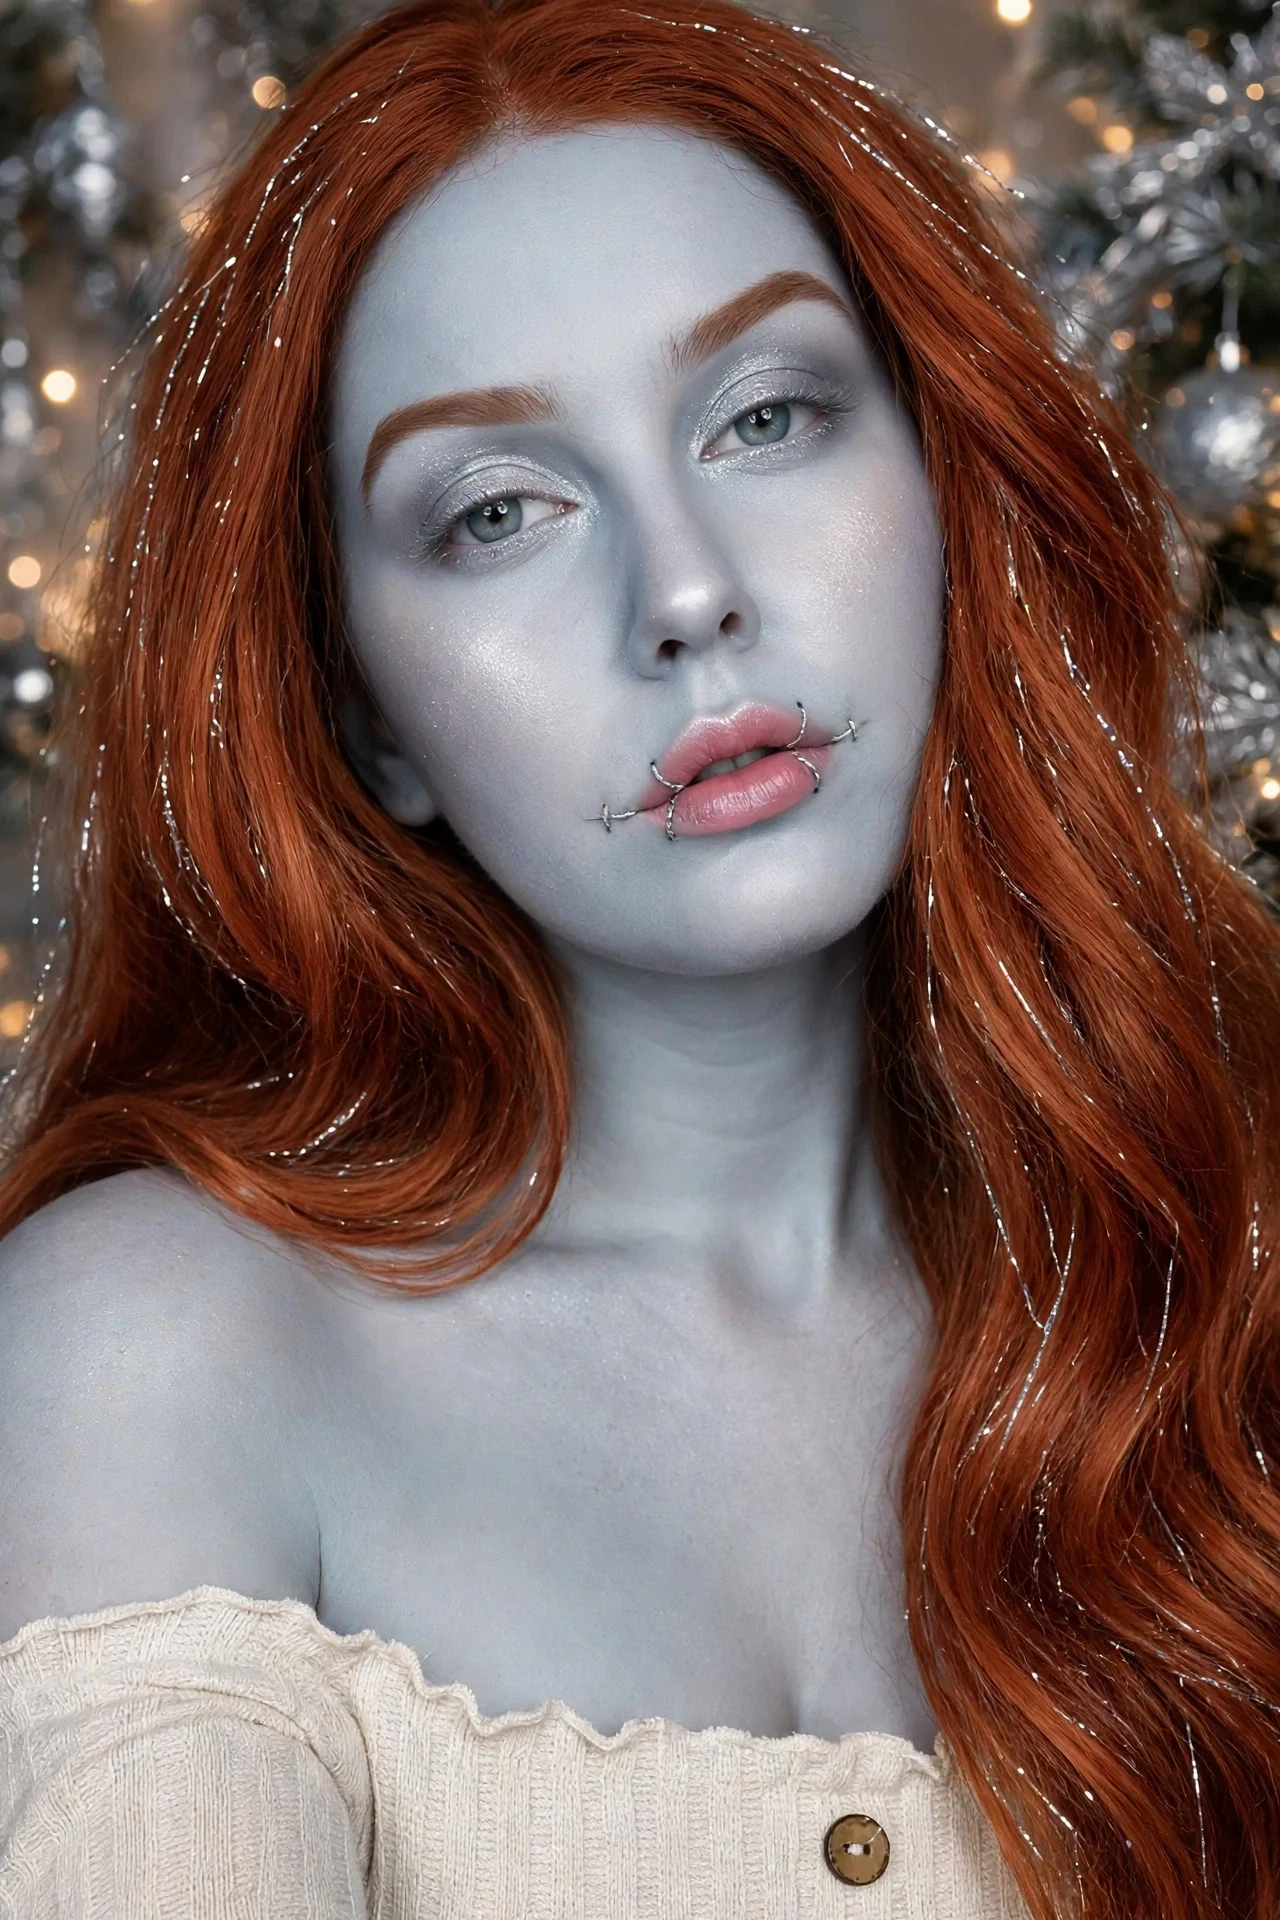
Tinsel is Christmas’s most underrated texture, and it suits Sally’s stitched-together story: silver shimmer swept across the lids and cheekbones, fine silver stitches that gleam like thread, and strands of silver tinsel woven through her long hair. The base stays pale and matte so the metal can shine.
A cool pink lip keeps the palette wintry. This version is made for flash photos and disco-lit office parties — every light source in the room will find the silver and use it.
Quick Tip: Weave real tinsel strands into a braid or clip them under a hair section — loose strands slide off straight hair within the hour.
Nutcracker Doll Sally Makeup
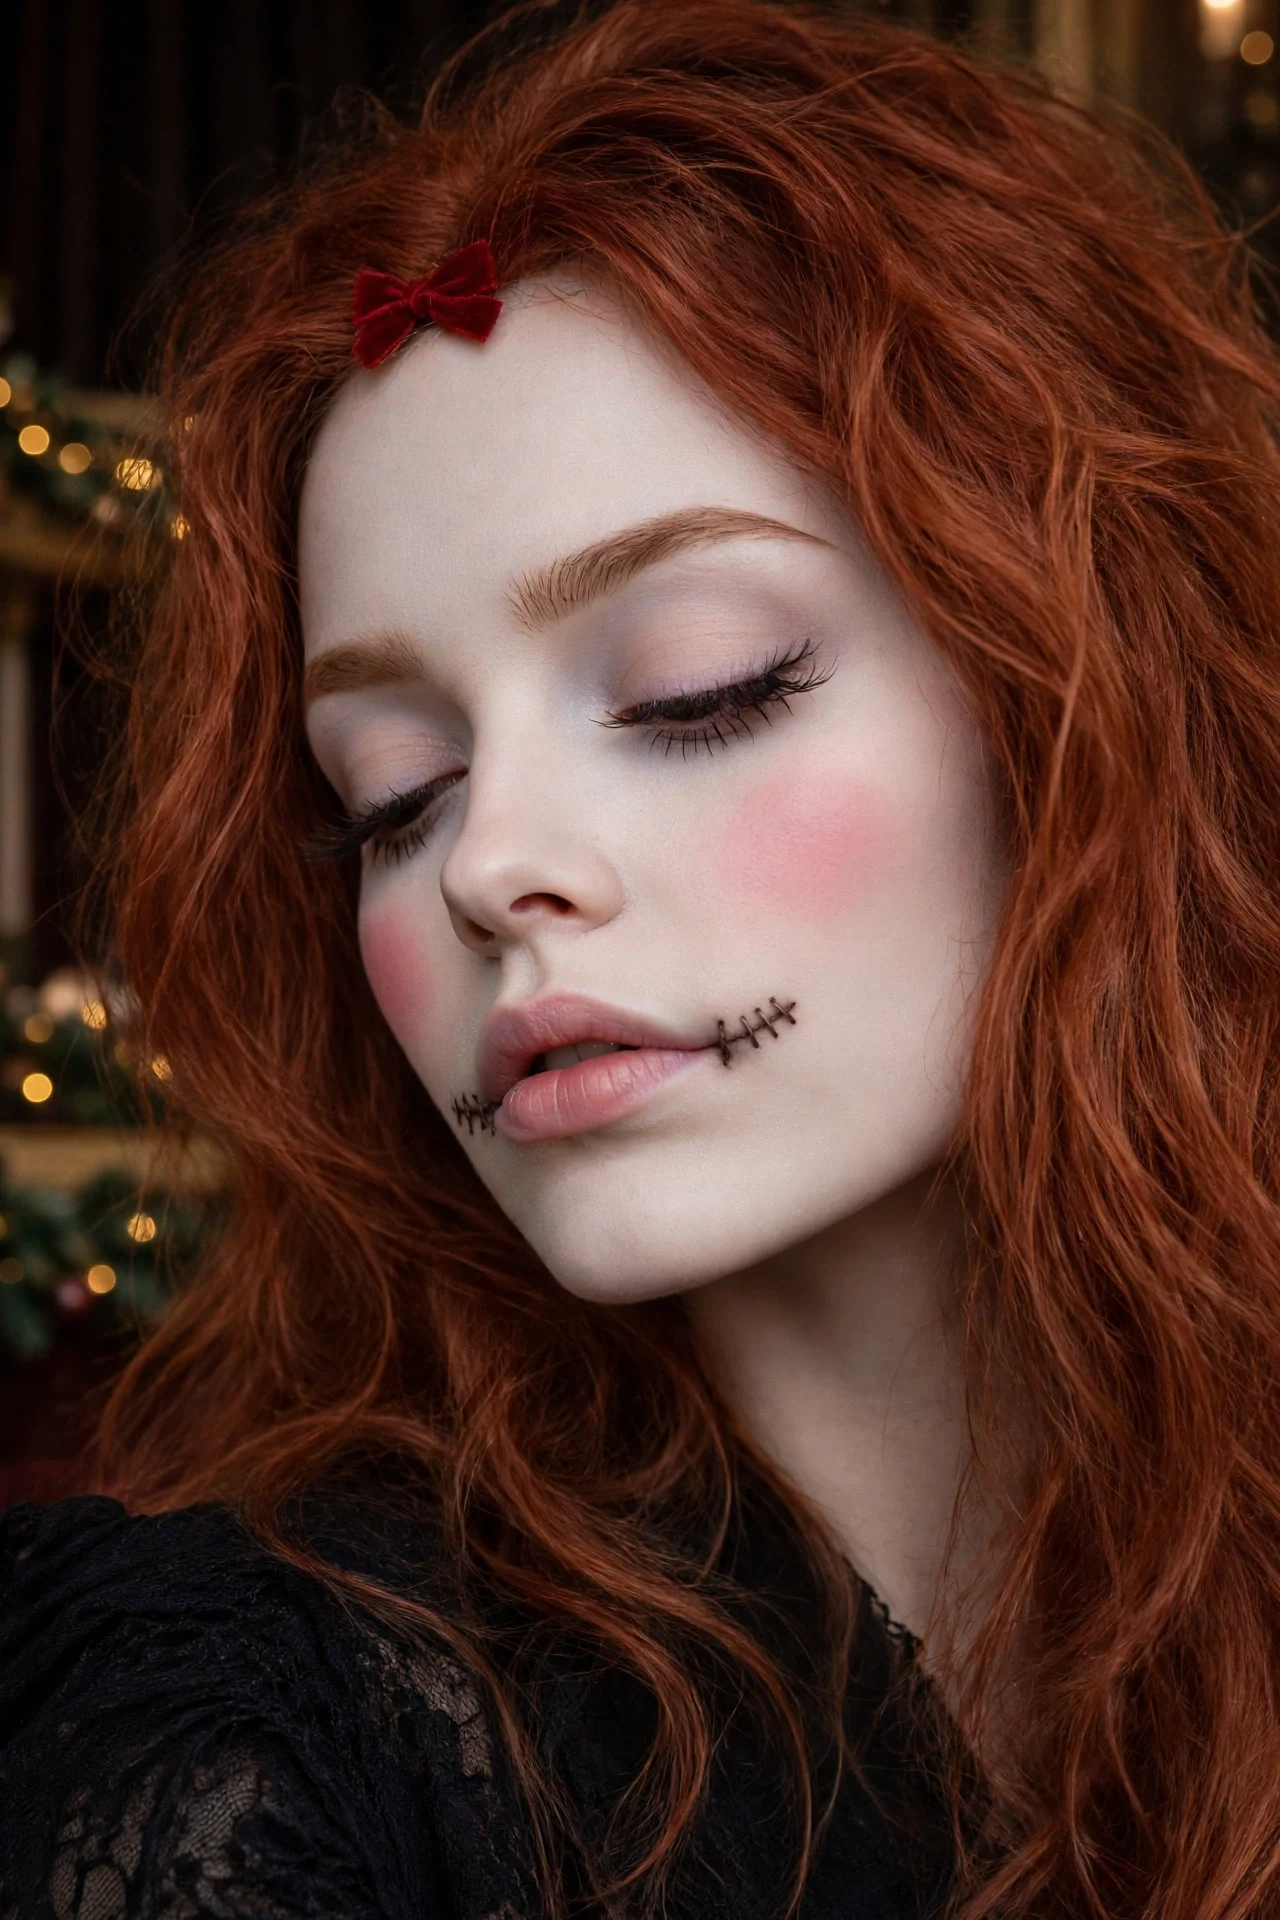
The Nutcracker ballet gives Sally a stage-ready sister look: porcelain-pale skin, perfect round circles of pink blush on the apples of the cheeks, doll lashes top and bottom, and a small rosebud mouth — with her stitches drawn fine and neat in dark brown, like seams on a handmade doll from the ballet’s toy shop.
A tiny painted music note or a small bow at the hairline nods to the ballet without costume overload. This is the sweetest version for theatre trips, dance-studio parties and anyone whose Christmas is not complete without Tchaikovsky.
Quick Tip: Apply the round blush circles with a damp sponge in two light layers — one heavy layer looks clownish, two sheer ones look porcelain.
Christmas Tree Sally Makeup
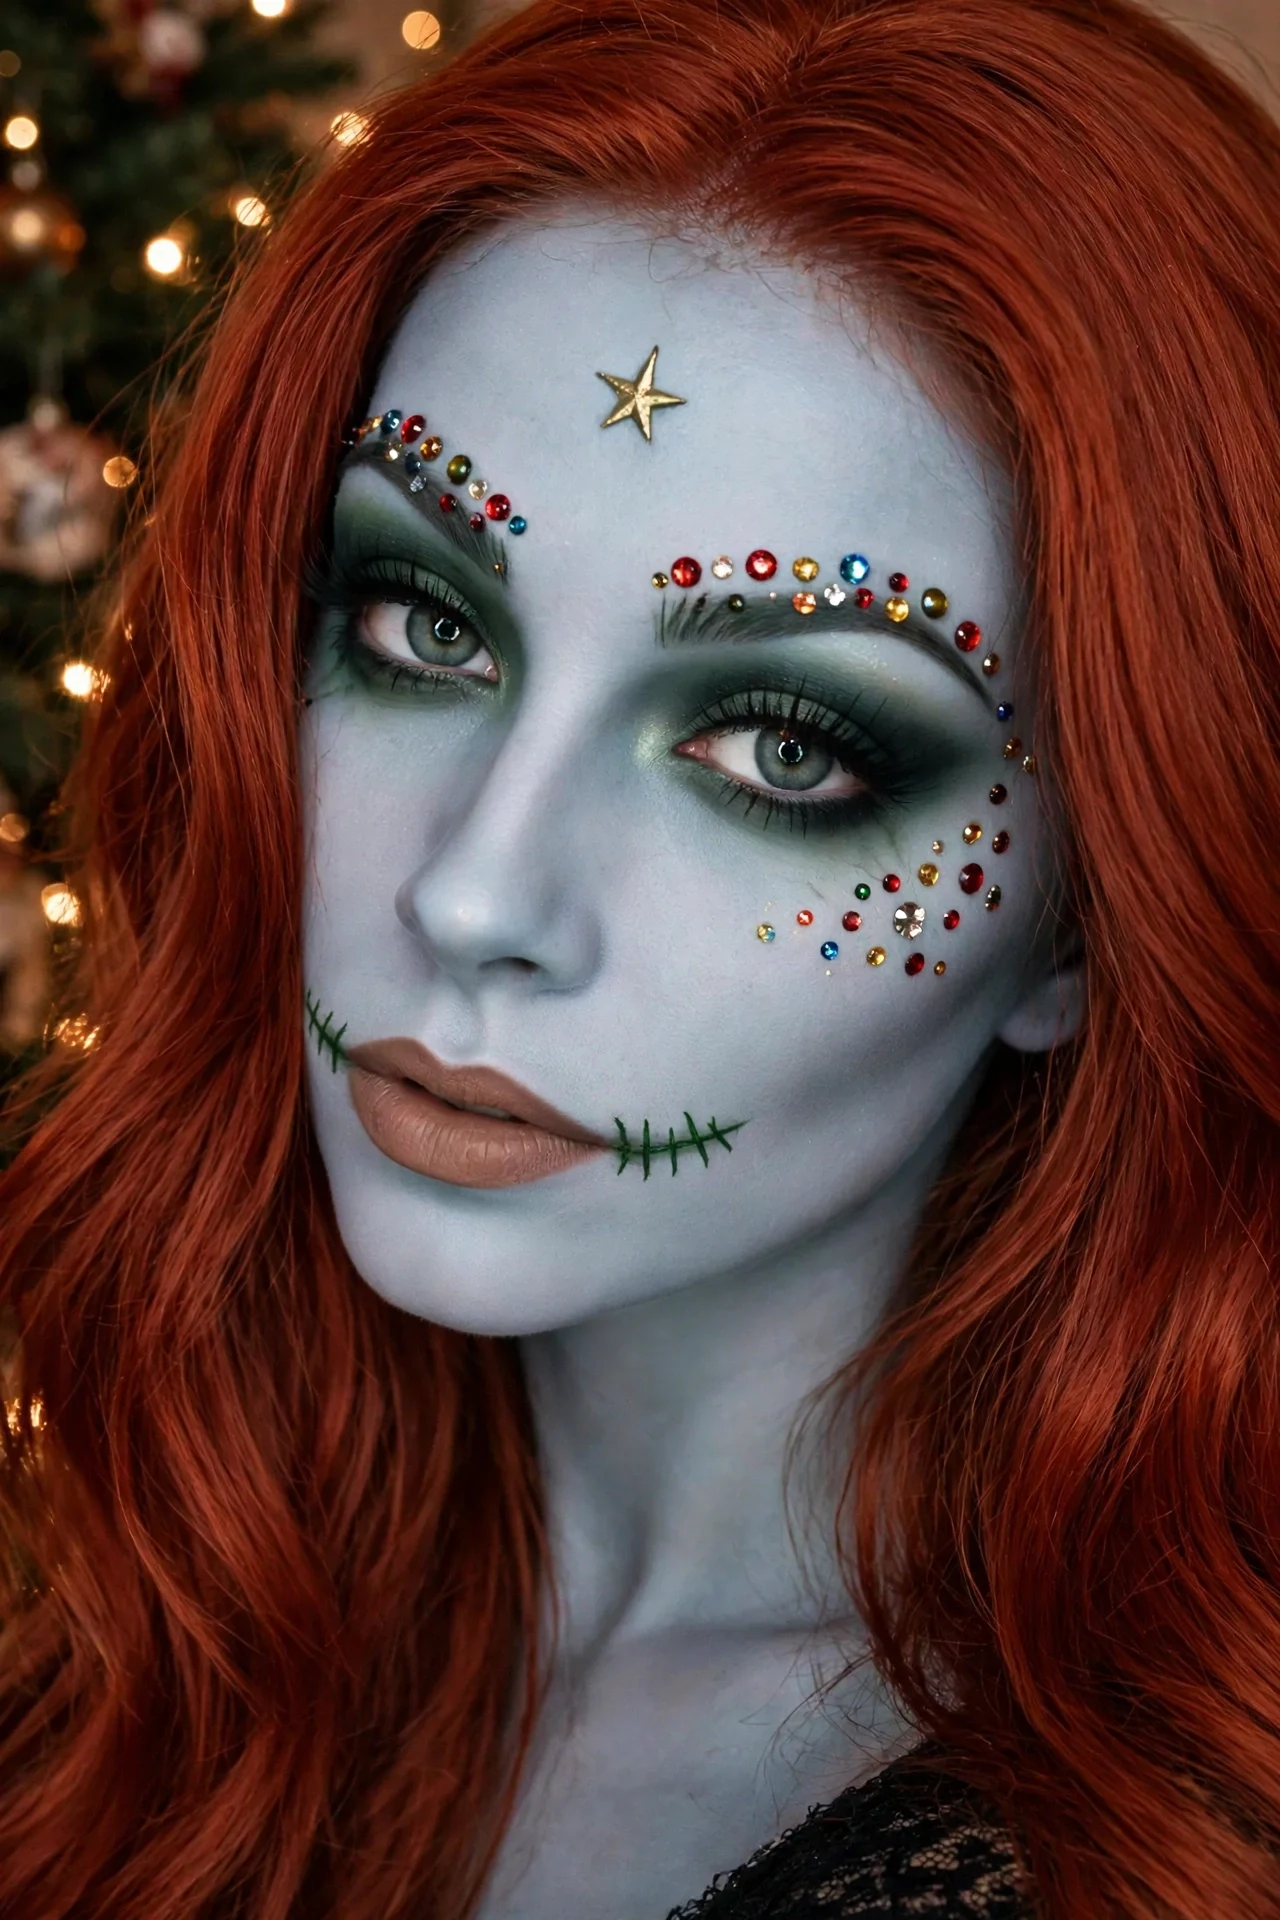
Sally as the tree itself: deep green smoky eyes, tiny colorful ornament dots — red, gold, blue gems — placed along the brow bone and cheek like baubles on branches, and a small gold star painted at the center of the forehead. Her stitches run in forest green to match the theme.
It is bold, graphic and unmistakably Christmas — the version for ugly-sweater parties and photo booths. Keep the lips a quiet nude so the face does not compete with itself; the ornaments are the whole show.
Quick Tip: Stick flat-backed gems with lash glue rather than painting every ornament — real dimension photographs better and removes in seconds.
Cozy Soft Sally Makeup

The everyday-wearable Sally: instead of full pale paint, a light foundation one shade paler than your skin, soft brown-grey shadow, and just the essentials — a short stitched line at each mouth corner and a few small stitches on one cheek. A knitted Christmas sweater and minimal jewelry complete a look you can wear to the office party and still be recognized.
This is also the fastest version, at about fifteen minutes, and the kindest to skin that dislikes heavy face paint. If you do one practice run of any look on this list, do this one — the stitch placement you learn here transfers to every other version.
Quick Tip: Draw the stitches with a brown-grey liner instead of black for the soft version — harsh black lines are what make Sally read ‘costume’ at close range.
Vintage Pin-Up Sally Makeup
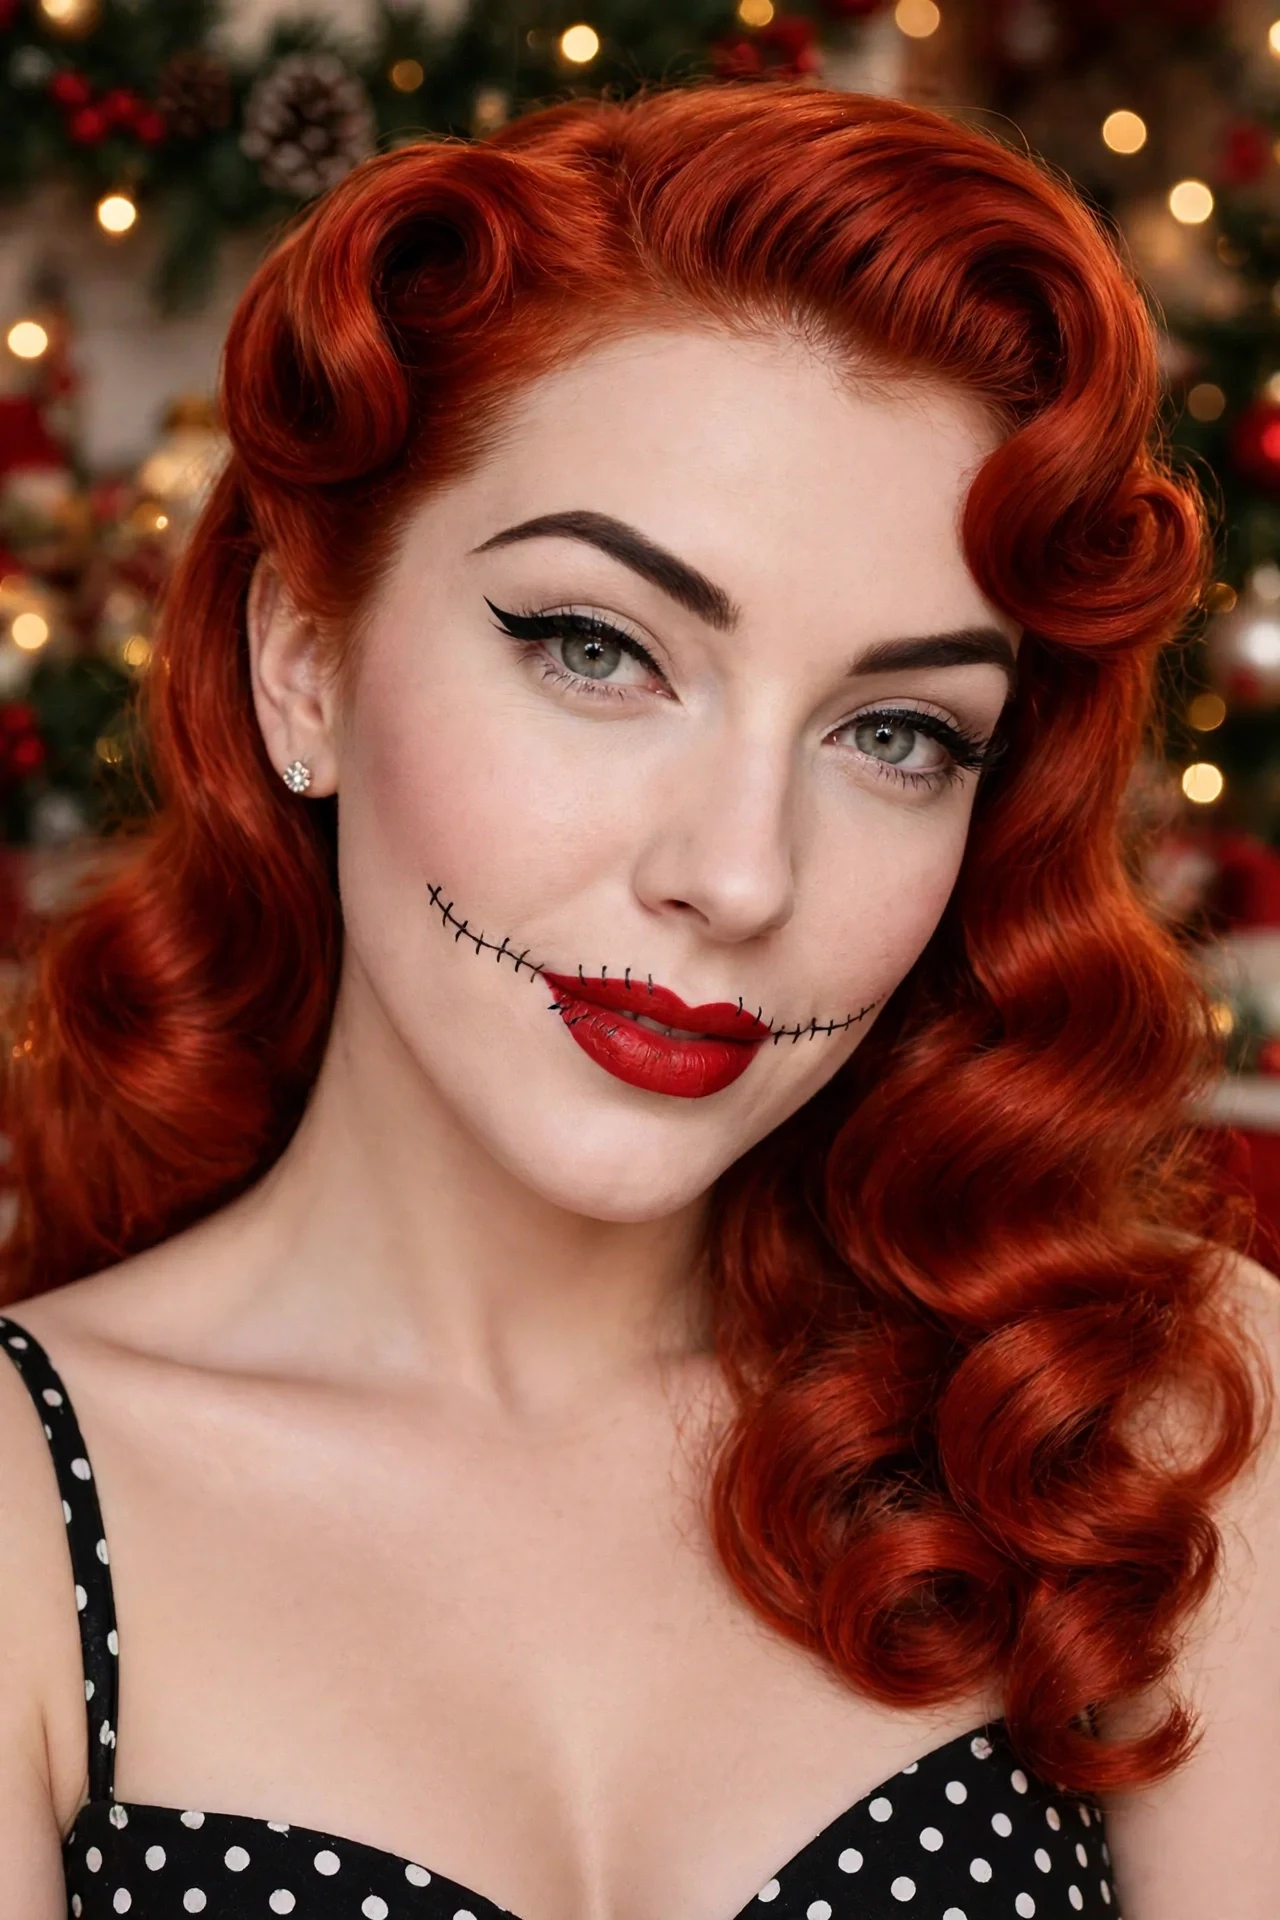
A 1950s Christmas card meets Halloween Town: victory-roll red hair, sharp winged liner, arched brows and a true red lip — then Sally’s stitches drawn small and precise along the smile, like a seam on a vintage doll. The base is a paler, more matte version of pin-up porcelain.
Polka-dot dresses and Christmas pin-up photos are a whole tradition, and this look slots straight into it. It is the version for retro lovers and anyone whose holiday style already leans vintage; the stitches are the only spooky note in a very merry picture.
Quick Tip: Set pin-up hair before doing the makeup — hairspray and pinning will smudge a finished pale base around the hairline.
Dark Gothic Sally Christmas Makeup
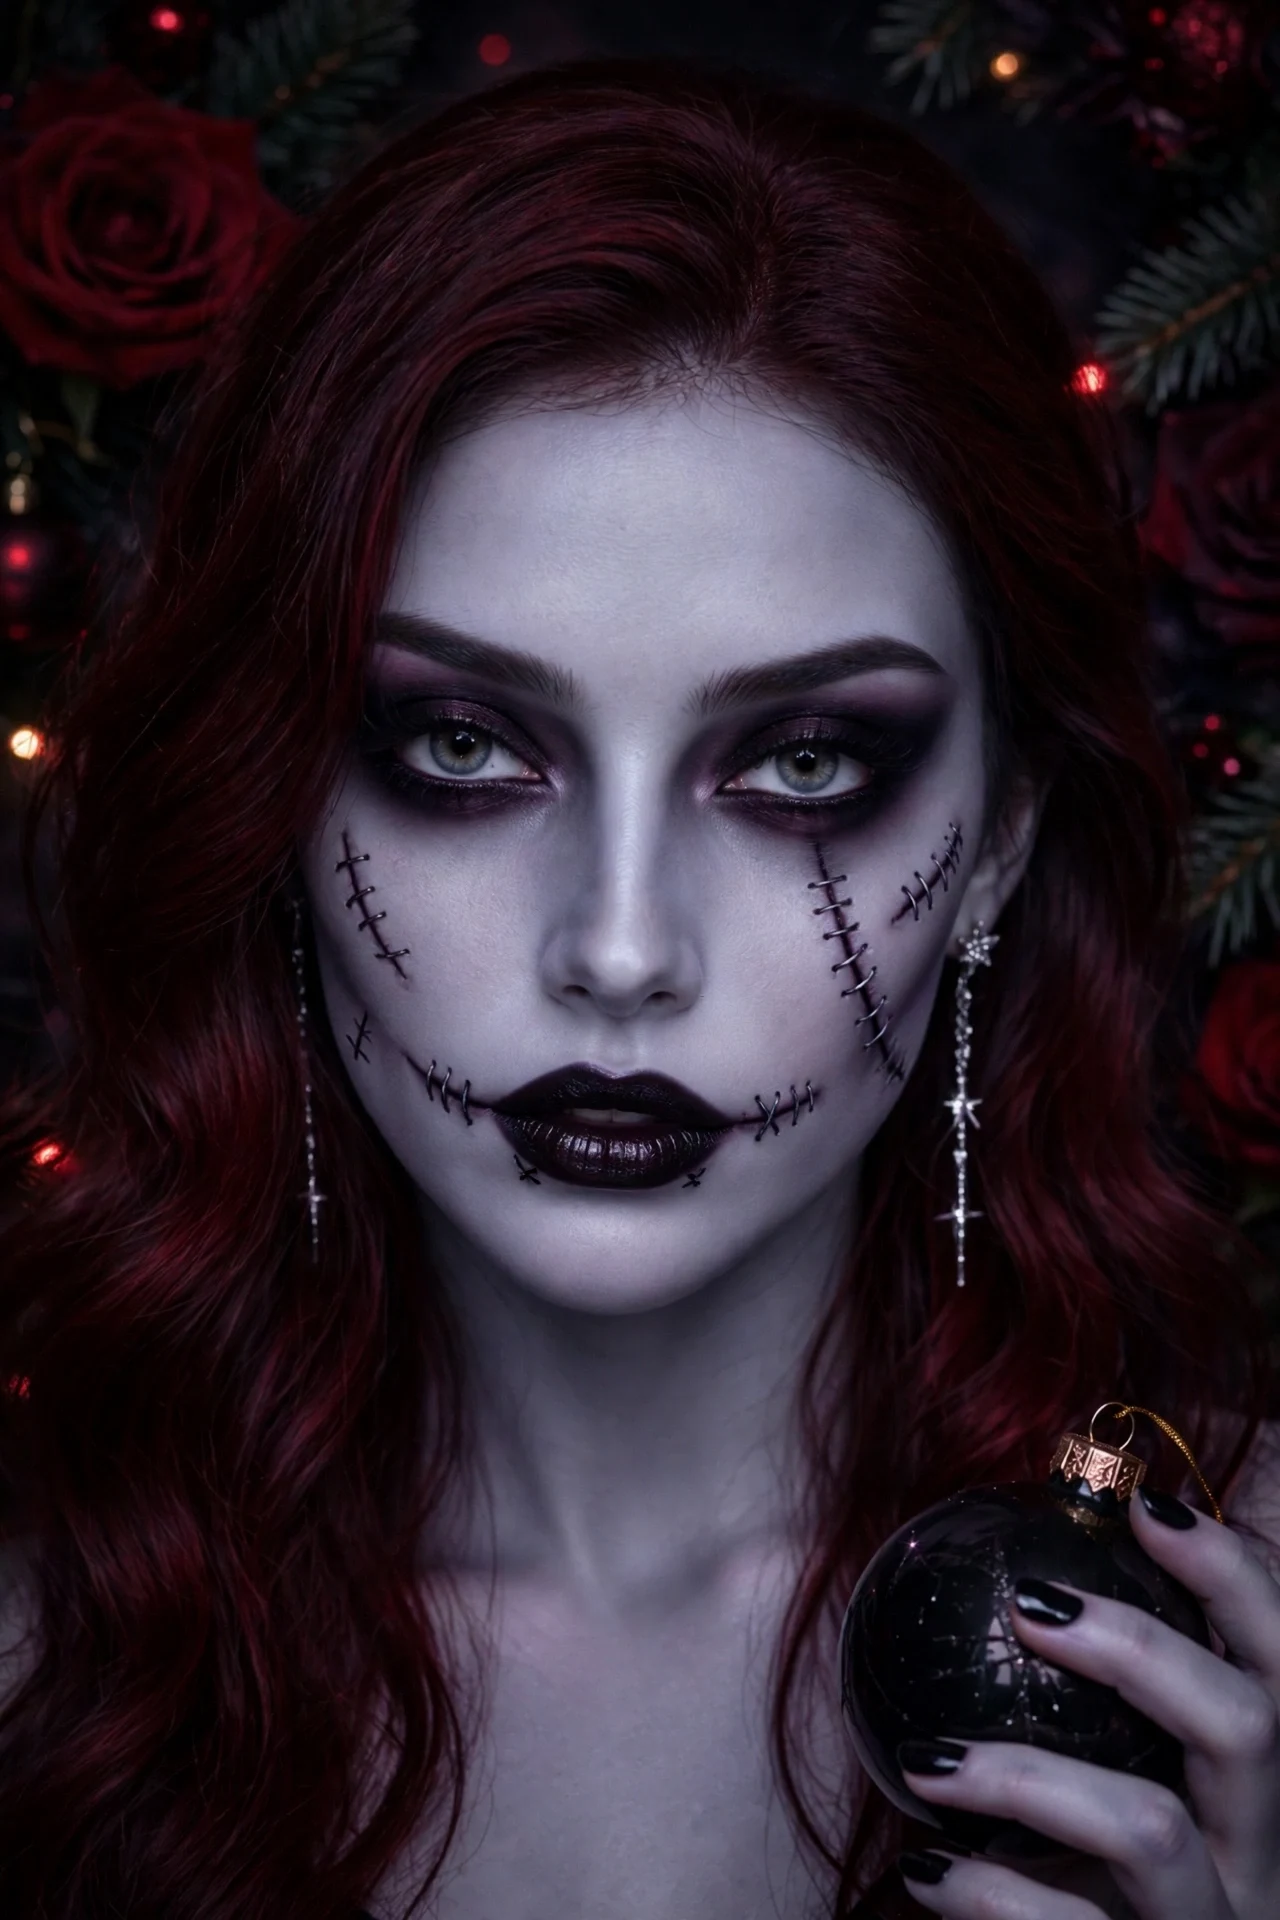
For those who like their Christmas with the lights low: the deepest version of Sally — a grey-violet base, blackened plum eye sockets, stitches drawn thick and dramatic, and a near-black cherry lip. Deep red roses or black Christmas ornaments as accessories push it fully into gothic holiday territory.
It is striking rather than pretty, and deliberately so — the look for alternative Christmas events, gothic markets and anyone who found the other versions too sweet. Silver jewelry cools it down; gold would warm it toward glam, so choose your metal on purpose.
Quick Tip: Blend the eye sockets with plum and grey, not pure black — black alone goes flat in photos, while plum keeps depth around the eye.
Simple Beginner Sally Makeup
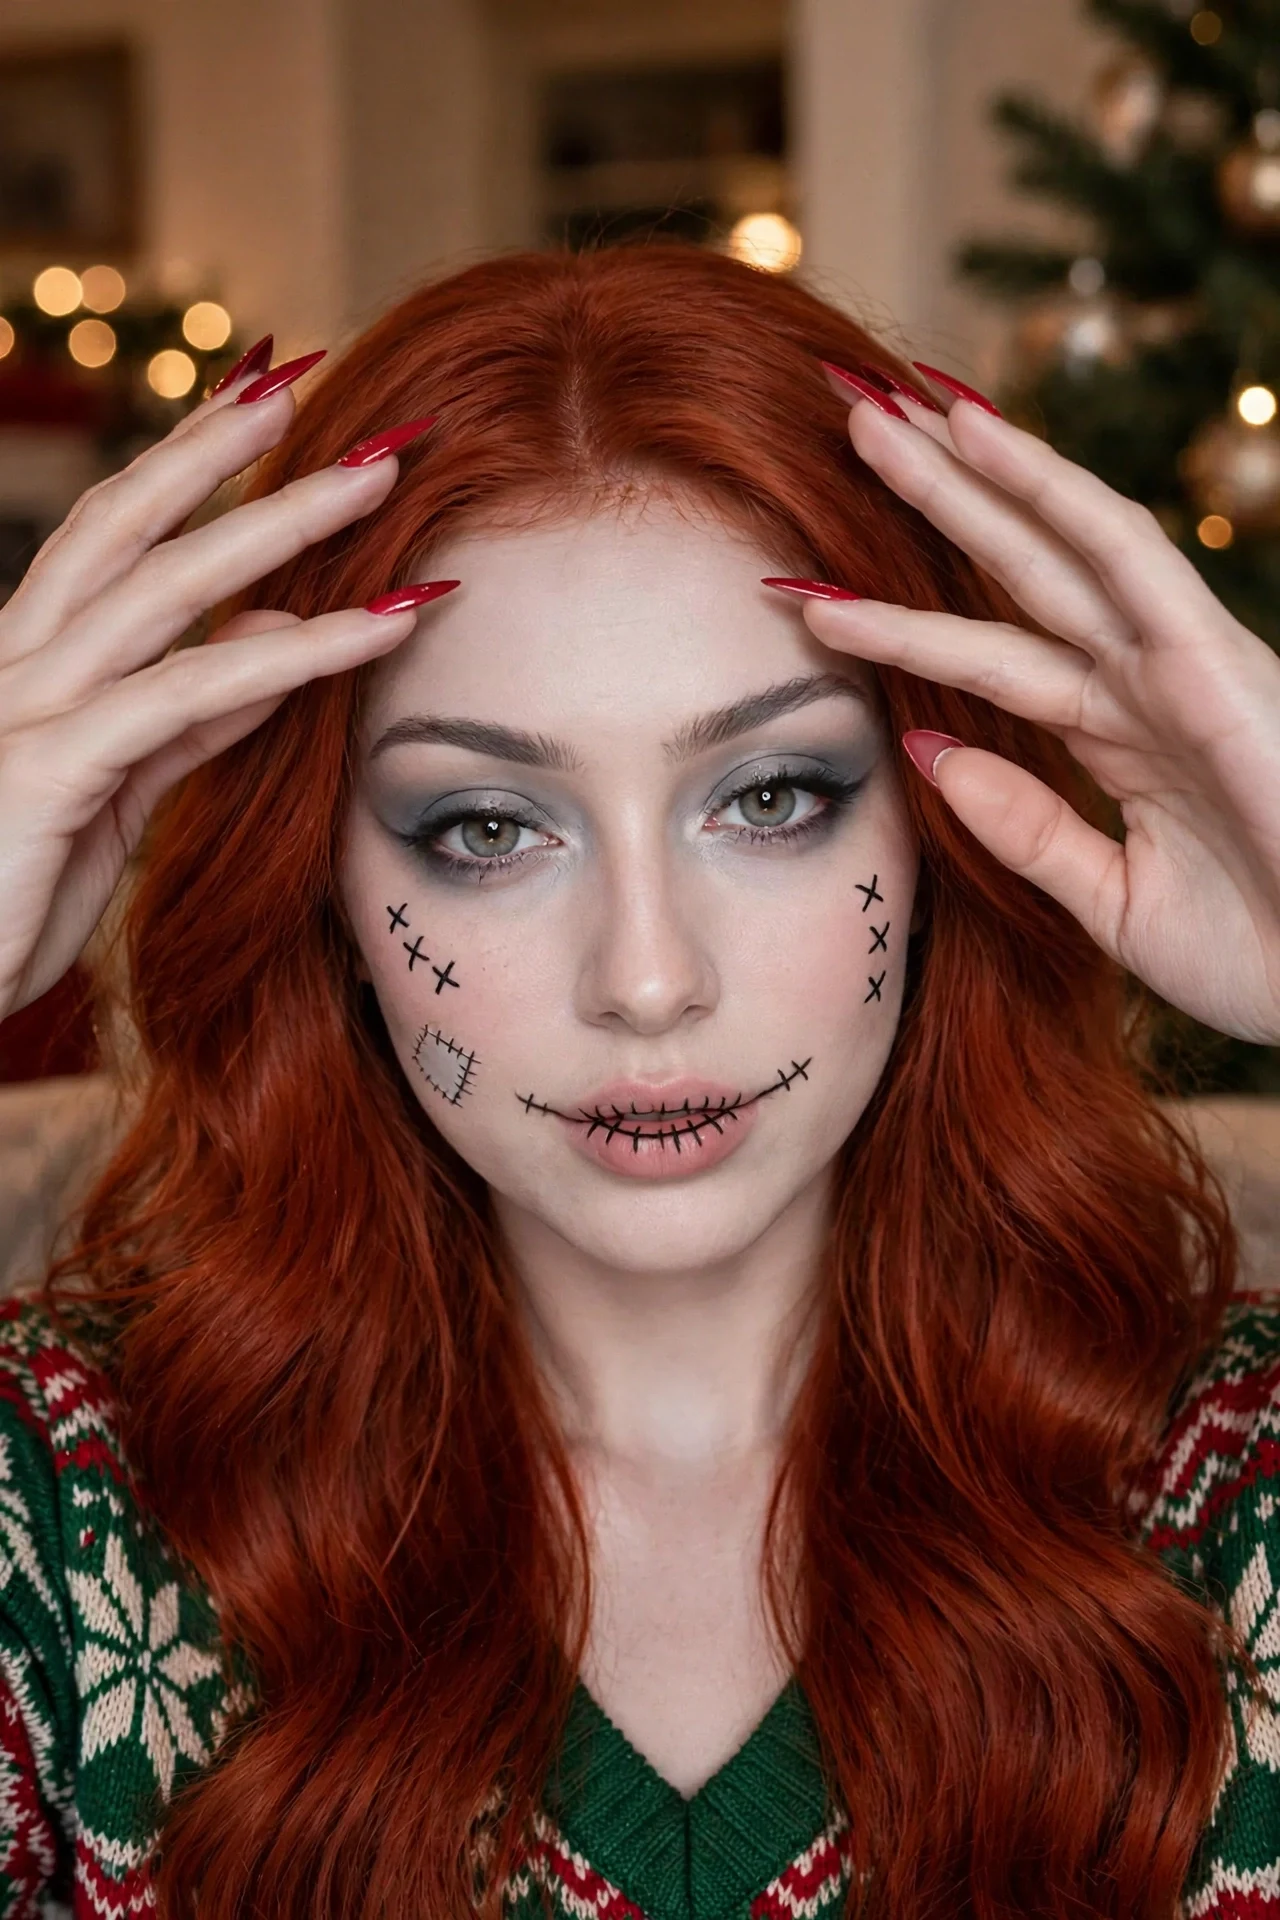
New to character makeup? This is the starter Sally: your normal foundation mixed with a little white or pale blue to mute it, soft grey shadow, mascara, and exactly two details — the stitched smile (one line from each mouth corner, three small crosses on each) and one small stitched patch line on the cheek. Twenty minutes, drugstore products, no face paint required.
Add a red wig or temporary red hair spray and a Christmas sweater, and the character is complete enough for any party or photo. Every other look on this list is built by adding to this base, so mastering the beginner version is genuinely the first step to all of them.
Quick Tip: Practice the stitched smile on the back of your hand first — two tries there save you from redrawing it on your face.
How to Make Sally Makeup Last All Day
Stitched details are drawn, not glued, so their worst enemy is touching your face. Set the pale base with a translucent powder before drawing any stitches, use a waterproof liquid liner for the stitch lines themselves, and finish with a setting spray held at arm’s length — a close spray can make fine lines bleed. Carry the liner pen with you; a stitch touch-up takes ten seconds in a mirror.
To remove the look gently, melt the pale base with a cleansing balm first rather than scrubbing — face paint and full-coverage foundation both come away more kindly with oil. Follow with your normal cleanser and a good moisturizer, because a long day under full-coverage makeup leaves skin thirsty.