
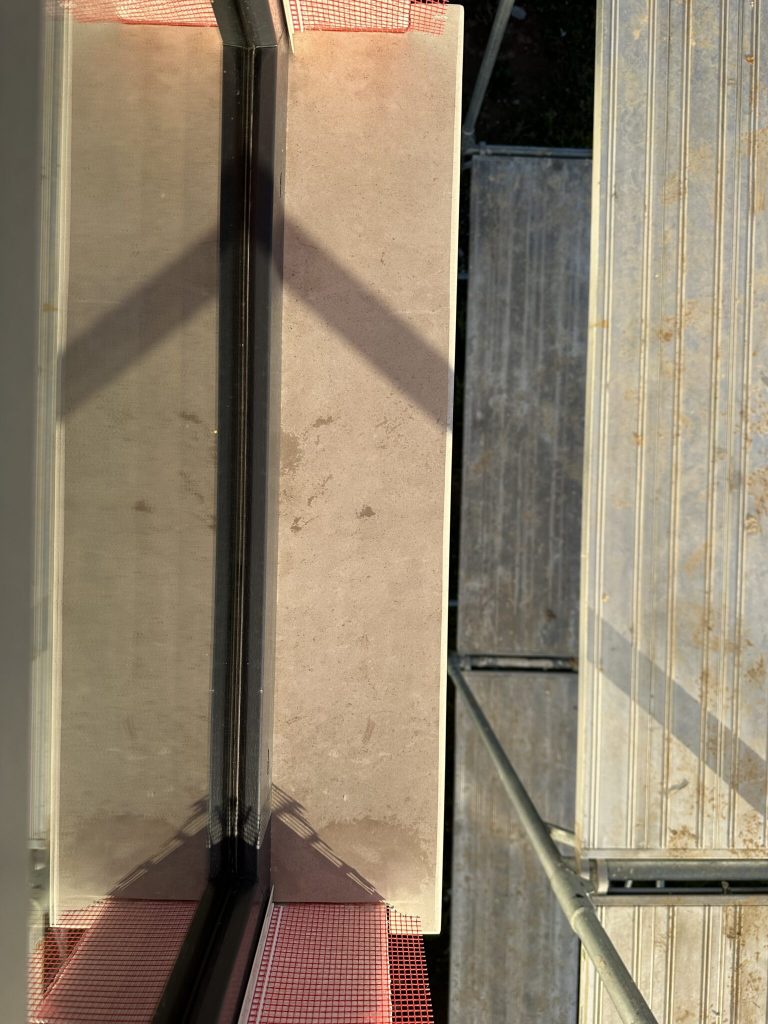
I’m going to say the thing everyone will probably disagree with: limestone is not the most practical material for exterior window sills. We knew that before choosing it, but we decided to go with it anyway.
Sometimes the most practical option isn’t necessarily the one you’ll be happiest looking at every day. We spent weeks comparing granite samples, researching durability, and thinking about maintenance. Then we visited a stone supplier, saw the limestone, and immediately knew it was the look we wanted.
The warm beige color and natural veining felt like they belonged with the house. We understood the maintenance involved, considered the alternatives, and still chose limestone. Now that the installation is finished, I would make the same decision again.
We Almost Went With Granite

Granite seemed like the obvious choice. Our builder recommended it, and most of the advice we found pointed toward granite as the more durable option. It handles rain and frost well, requires very little maintenance, and can last for decades.
The problem was simple: we couldn’t find a granite pattern that we genuinely liked.
That might sound like a strange reason to reject such a practical material, especially for something as small as a window sill. But when you’re building a house, every exterior detail contributes to the overall appearance.
Window sills may be small, but they’re noticeable. You see them when you approach the house, look at the facade from the street, and move around the exterior.
Then we found the limestone. The warm beige shade and subtle natural veining gave the house a softer, more timeless appearance. It looked as though it had always been part of the design.
We knew we were accepting a little more maintenance, but the appearance mattered to us. In the end, we chose the material that made us happiest.
What It Actually Cost
The limestone itself cost us $400 for all 14 window sills.
Professional installation quotes came in at around $800, but my partner and his father handled the installation themselves. His father has experience installing windows, so he already had the skills needed for the job.
We spent approximately another $80 on mortar and adhesive.
That brought our total DIY cost to about $480.
If we had hired someone to complete the entire installation, the estimated total would have been around $1,200 for all 14 natural stone sills.
For us, even the full installation price seemed reasonable considering how much the stone changed the appearance of the exterior.
Five Hours for All 14
I honestly expected the installation to take much longer.
I had basically prepared myself for a full weekend of work, but the entire process was finished in roughly five hours.
The installation itself was fairly straightforward. Mortar was applied where the sill would sit against the insulation, followed by another layer on the underside of the stone. Each sill was then positioned carefully, leveled, and secured before moving on to the next window.
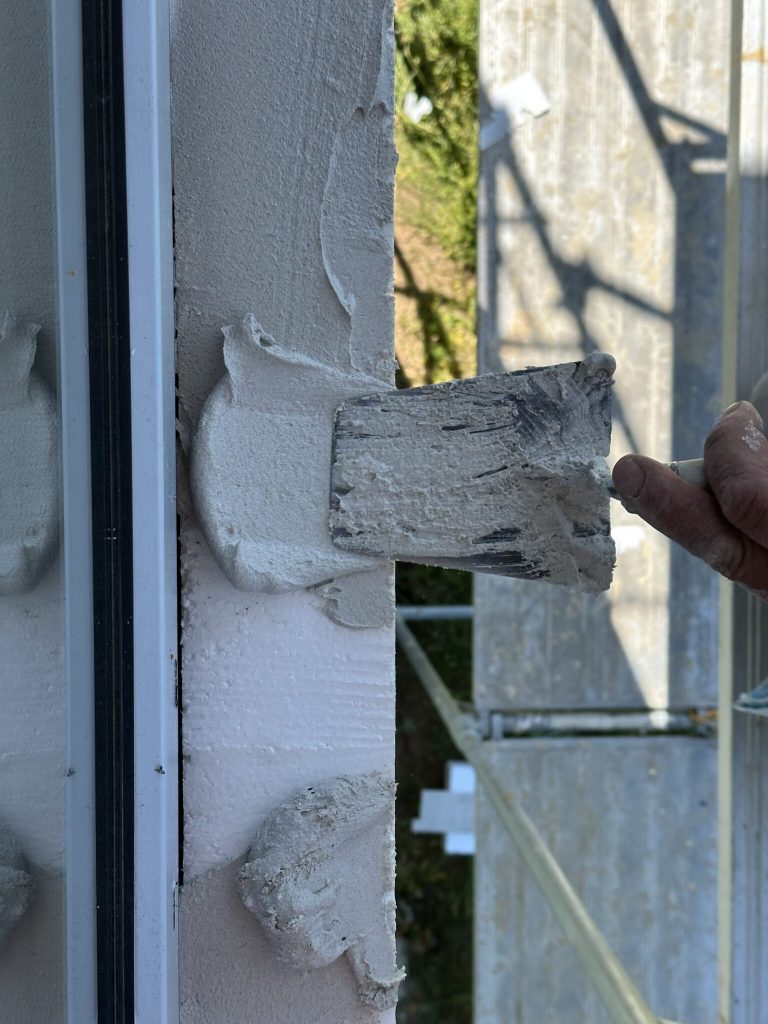
Each sill extends approximately 5 cm beyond the wall.
That amount of overhang gives the water somewhere to fall away from the wall without making the sill look overly large or bulky.

There was one unexpected complication. One of the upstairs bedroom windows had to be temporarily removed because the frame was interfering with the angle needed to install the sill underneath it.
That added roughly 30 minutes to the job.
It’s a small detail, but it’s something worth checking before installation begins. If your windows are already fitted, look carefully at the space underneath them and make sure the sill can actually be positioned correctly.
The Drip Edge Detail
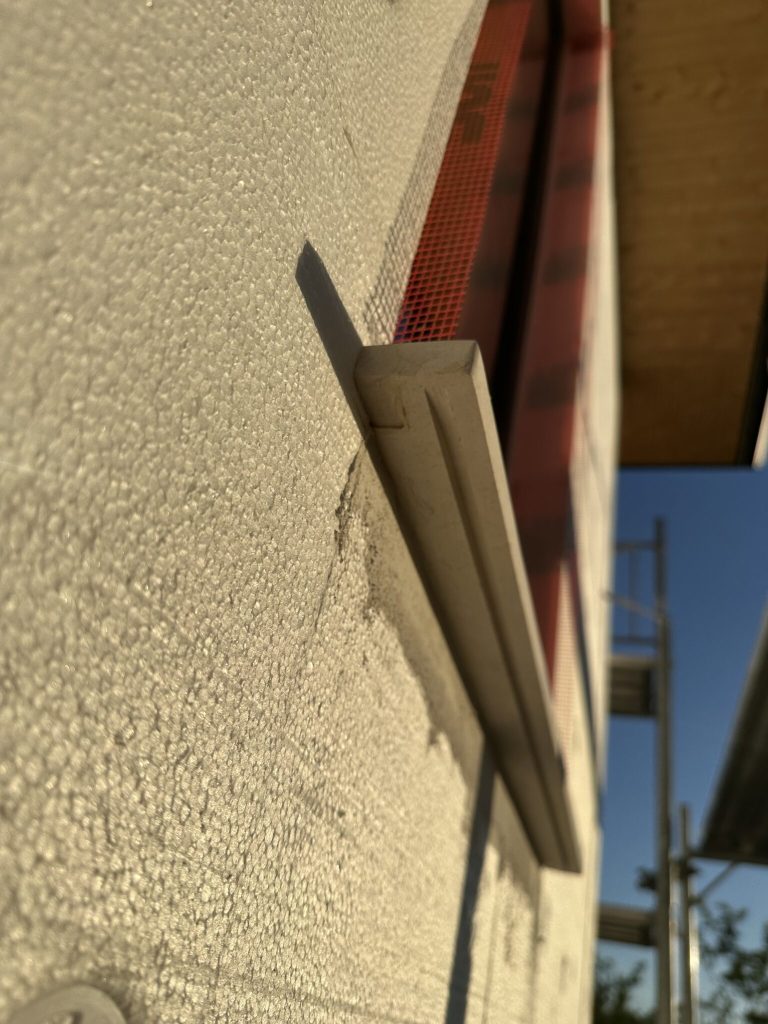
Before this project, I hadn’t given much thought to drip edges.
A stone sill isn’t simply a flat piece of material sticking out from the wall. Ours are slightly sloped so that rainwater moves away from the building.
There is also a small groove cut into the underside of the sill, approximately 3 cm from the outer edge.
When rain lands on the stone, it follows the slope and eventually reaches that groove, where it drips away instead of traveling back toward the wall and potentially causing stains or moisture problems.
Our measurements are:
- 2 cm thick
- 5 cm overhang
- Drip groove approximately 3 cm from the wall
If you’re ordering natural stone window sills, make sure you discuss the drip groove with your supplier. Some suppliers include this detail as standard, while others may require it to be specifically requested.
The Maintenance Reality
This is where limestone loses some points compared with materials such as granite.
Limestone is porous, which means it can absorb moisture if it isn’t properly protected. Over time, exposure to water can contribute to staining, moss growth, and deterioration around the edges.
Freeze-thaw conditions can make those problems worse in colder climates.
For us, the solution is regular sealing.
We plan to apply a suitable stone sealant approximately every three to four years. It isn’t something that needs to be done constantly, and the process can be added to other exterior maintenance tasks.
Would granite have been easier to maintain? Absolutely.
But maintenance wasn’t the only thing we were considering. We wanted a material that looked right with the house, and limestone gave us the appearance we had been searching for.
For us, the occasional sealing is a reasonable trade-off.
The Cherry on Top
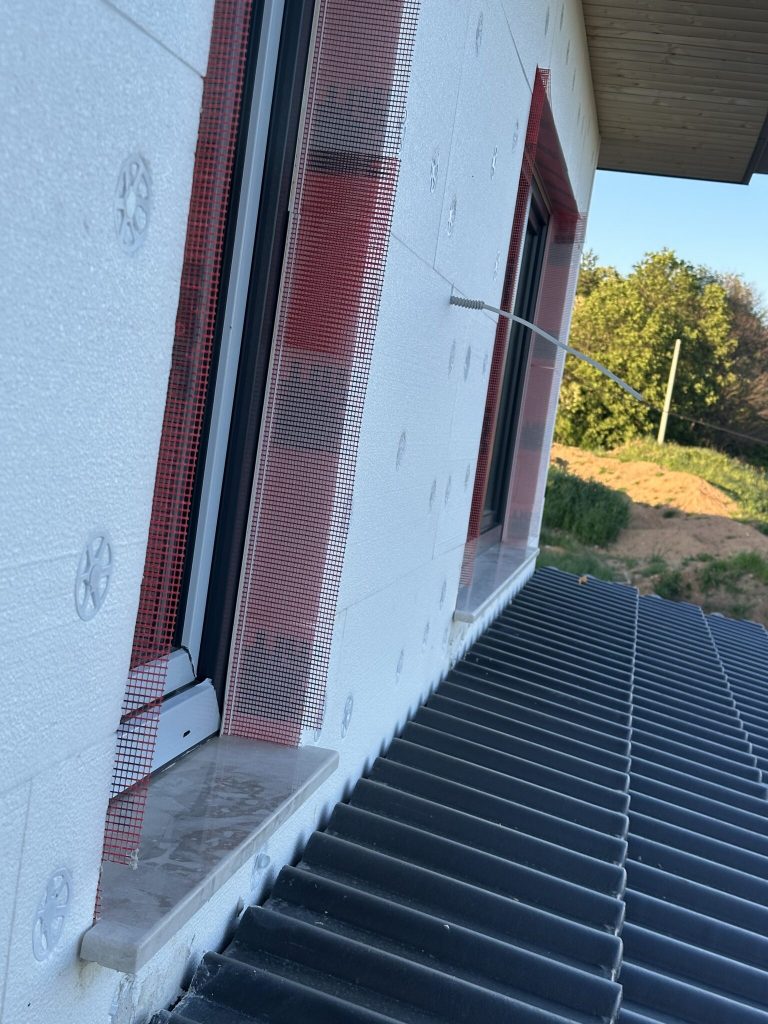
The window sills were installed after the exterior insulation was completed.
The house already had the insulation boards, mechanical anchors, and other necessary exterior work in place. The next major stage is the exterior plaster, which will bring the facade much closer to completion.
Before the sills were installed, the exterior looked very functional.
The insulation stage made the house feel as though it was covered in a layer of packaging. It was necessary, but it didn’t exactly make the facade look finished.
Adding the limestone sills completely changed that feeling.
Suddenly, the exterior started to look intentional. It felt less like a construction project and more like an actual house with a finished design.
That surprised me because window sills are such a small detail compared with insulation, windows, plaster, and all the other major elements of a build.
But sometimes those smaller decisions have a surprisingly big visual impact.
What I’ve Learned During the Build
One thing I keep realizing throughout this house project is how often plans change once you’re actually building.
We always knew we wanted stone window sills. What we didn’t know was exactly which stone we would choose.
That decision happened when we were standing in front of the available materials and seeing the colors, textures, and natural patterns in person.
A plan made six months earlier can look completely different when you’re standing on-site and making the decision for real.
That’s one of the interesting parts of building a house. Not every decision comes from a spreadsheet or a detailed plan. Sometimes you see a material, imagine it on your home, and realize it’s the right choice.
For us, that material happened to be limestone.
FAQ
How much do exterior stone window sills cost?
Our 14 limestone sills cost $400 for the stone and approximately $80 for mortar and adhesive. Professional installation was quoted at around $800, which would have brought the total to approximately $1,200 for all 14 sills.
The final price can vary depending on the type of stone, measurements, supplier, location, and installation costs. Granite may also cost more depending on the material and finish selected.
Is limestone good for exterior window sills?
Limestone can work well for exterior window sills, but it requires more maintenance than some alternatives.
Because limestone is porous, it should be properly sealed and protected from moisture. We plan to reseal ours approximately every three to four years.
Granite or concrete can be more practical choices if low maintenance is the main priority. However, limestone offers a warm, natural appearance that we preferred for our house.
How thick should exterior window sills be?
Our limestone sills are 2 cm thick with approximately 5 cm of overhang. The drip groove is positioned around 3 cm from the wall face.
The exact measurements can depend on the wall construction, insulation thickness, window design, and local building requirements.
Can you install exterior window sills yourself?
Yes, DIY installation can be possible if you have suitable masonry experience, the correct materials, and safe access to the windows.
My partner and his father installed all 14 sills in approximately five hours.
However, working at height requires proper safety precautions, particularly when scaffolding is involved. It’s also important to check the installation angle around existing windows before beginning, as one of ours had to be temporarily removed to provide enough access for the sill underneath.