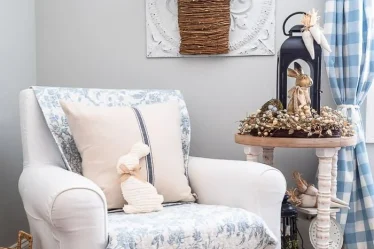
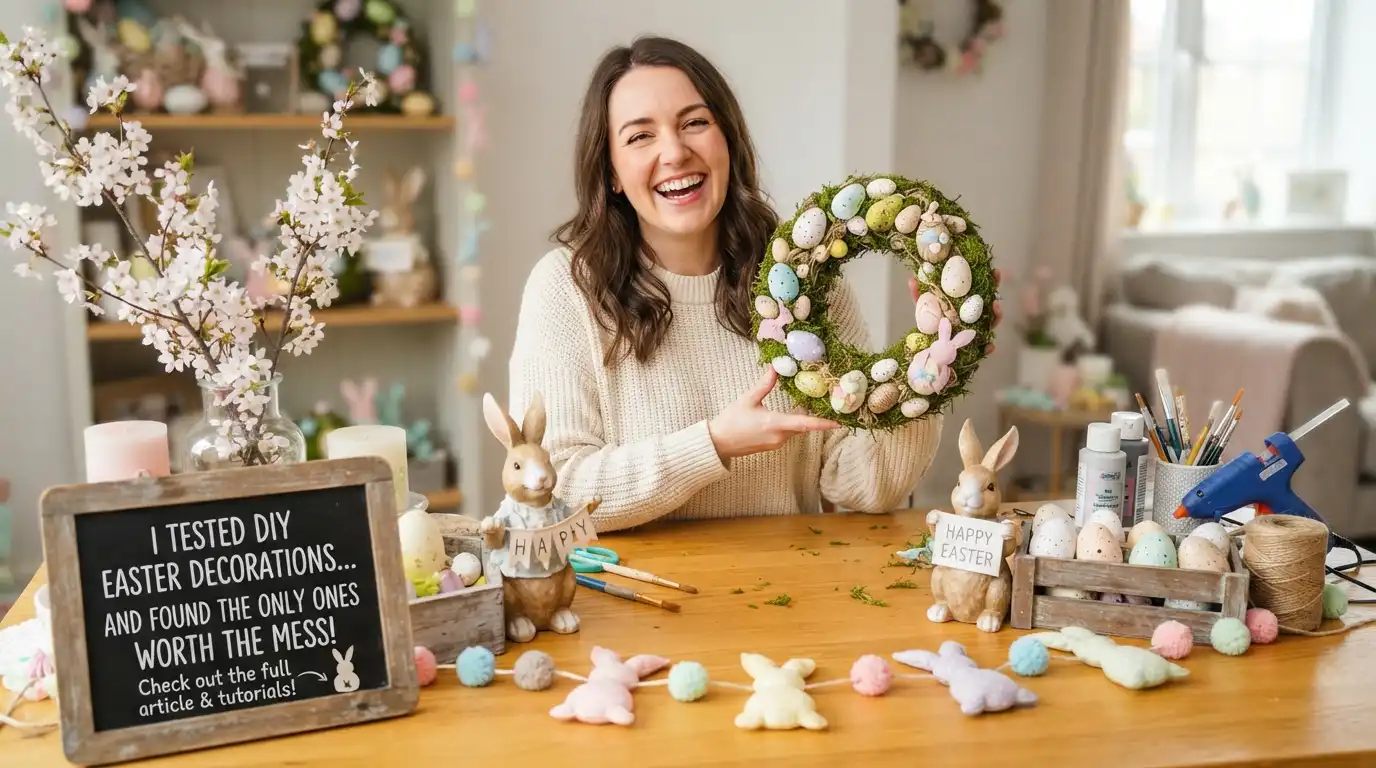
I blinked, and somehow my home suddenly needed a little springtime refresh. Since I was apparently in charge of making it happen, I tried several easy DIY Easter decorations to see which ones were actually worth the time, supplies, and inevitable crafting mess.
The best ideas were simple, affordable, and cute enough to display on a mantel, dining table, shelf, or entryway. Even better, you don’t need to be an expert crafter to pull them off. Whether you’re decorating with family or working on a project at 4:38 p.m. with barely any glue left, these Easter decorating ideas are easy to recreate and add a cheerful seasonal touch to your home.
Painted taper candles (yes, really)
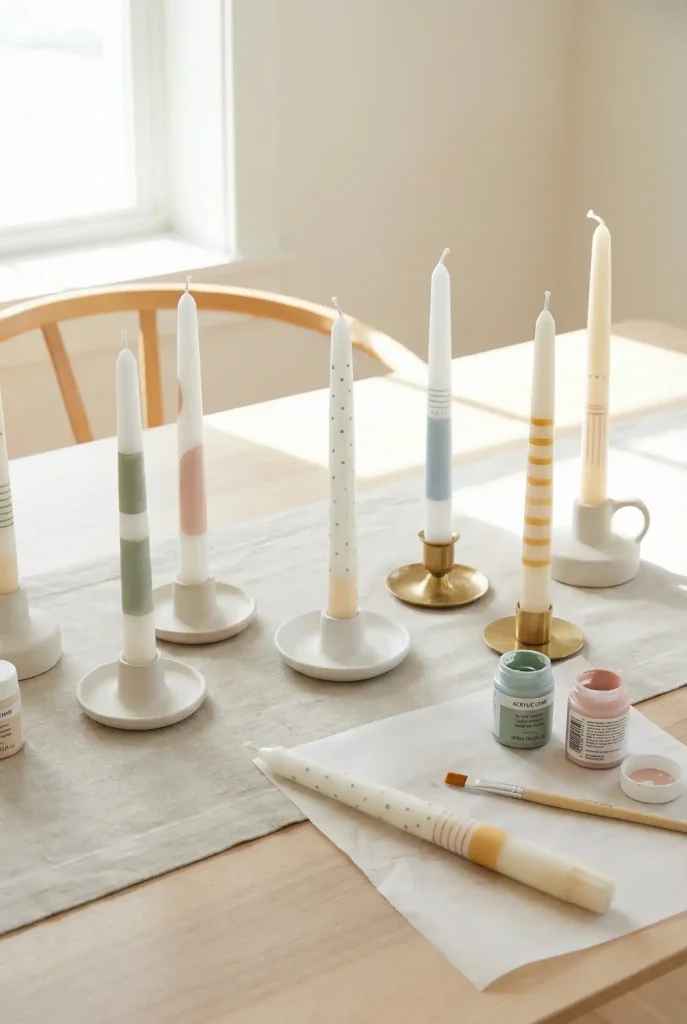
Time: 10 min + dry • Cost: $3–$10 • Mess: low • Kid-friendly: no (unless you love risk)
This is one of those simple projects that can make an inexpensive candle look surprisingly high-end. A little paint can give your Easter table decor a fresh, custom touch without adding another box of seasonal decorations to your storage.
You need:
- Plain taper candles (white or cream)
- Acrylic paint + small brush
- Optional: painter’s tape for clean stripes
How to do it:
- Paint simple stripes or tiny dots, keeping the design minimal.
- Allow the paint to dry completely before placing the candles in holders.
- Leave the bottom half inch unpainted since that section will be hidden inside the holder.
A quick tip from experience: resist the urge to touch the paint before it has fully dried. One accidental fingerprint can become a permanent part of the design.
The paper-egg garland that looks like a boutique window display
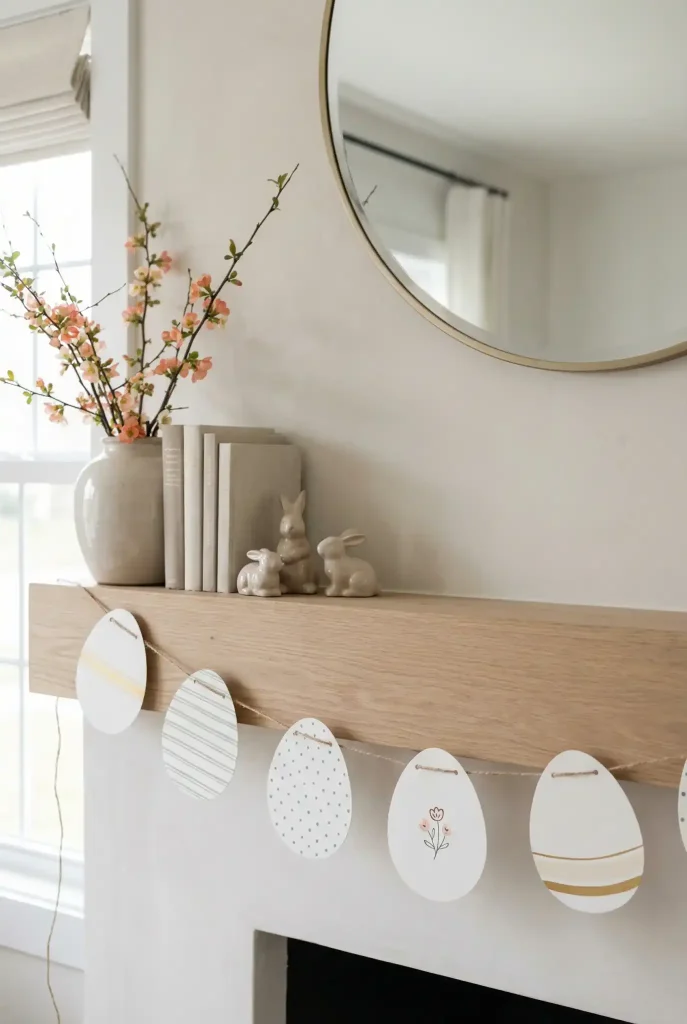
Time: 20–35 min • Cost: $0–$8 • Mess: low • Kid-friendly: yes (with scissors supervision)
A paper egg garland is an easy way to add seasonal charm without making a room feel overly decorated. It works especially well with Easter mantel decor, since it adds height and visual interest without taking up much surface space.
You need:
- Cardstock or watercolor paper
- Pencil + scissors
- Hole punch
- Twine or ribbon
- Optional: gold paint pen or white pen
How to do it:
- Cut egg shapes about 4″ tall. Create one cardboard template first so each egg stays relatively consistent.
- Decorate them with simple stripes, tiny dots, or a small floral design. This keeps your easy Easter crafts looking polished rather than overly busy.
- Punch a hole near the top of each egg and thread them onto twine or ribbon, leaving about 2–3″ between each one.
- Hang the finished garland with removable hooks or tape behind a mantel, mirror, or bookshelf.
If the garland starts to sag in the middle after a few days, simply adjust the spacing or add another hanging point. Sometimes gravity gets the final say in our decorating plans.
The simplest “bunny” decor that doesn’t scream bunny
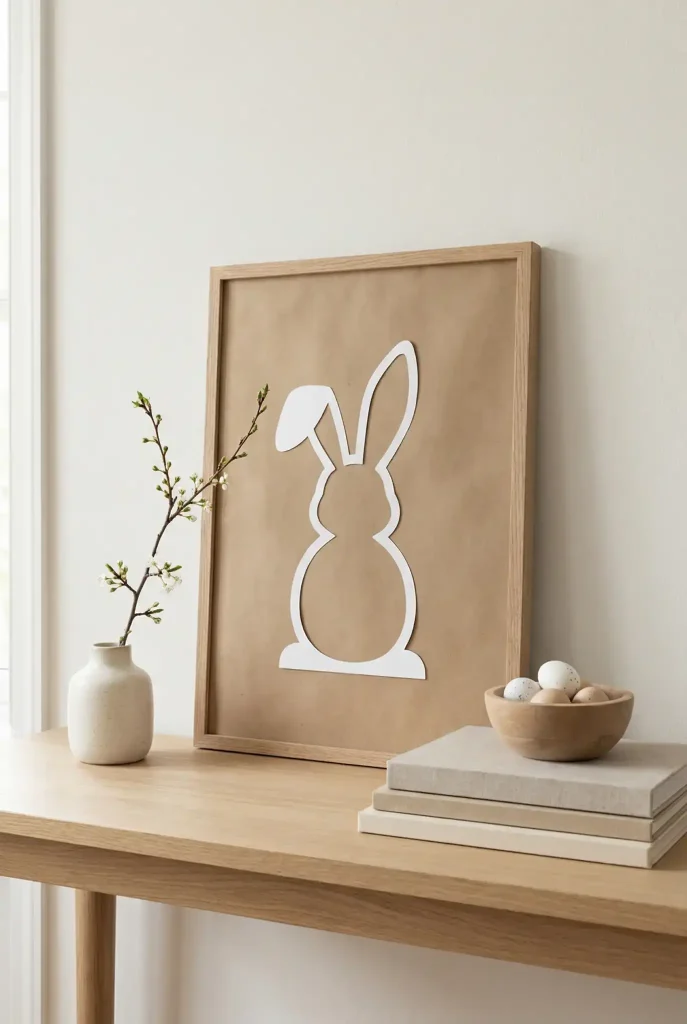
Time: 10–15 min • Cost: $0–$5 • Mess: low • Kid-friendly: yes
If you enjoy Easter bunny decorations but prefer a more understated look, a simple bunny silhouette can give you the seasonal feeling without filling the room with obvious rabbit-themed pieces.
You need:
- White cardstock
- Pencil
- Scissors
- Optional: neutral frame
How to do it:
- Draw a simple bunny silhouette without adding facial details.
- Cut out the shape and place it against tan or another neutral-colored paper for contrast.
- Put it inside a frame or lean it casually against a shelf.
This also makes an easy piece of Easter home decor for smaller rooms because it uses vertical space rather than taking up valuable table or shelf space.
Kid-Friendly Crafts + Activities
Dyed eggs, but make them “soft and fancy” (without buying a kit)
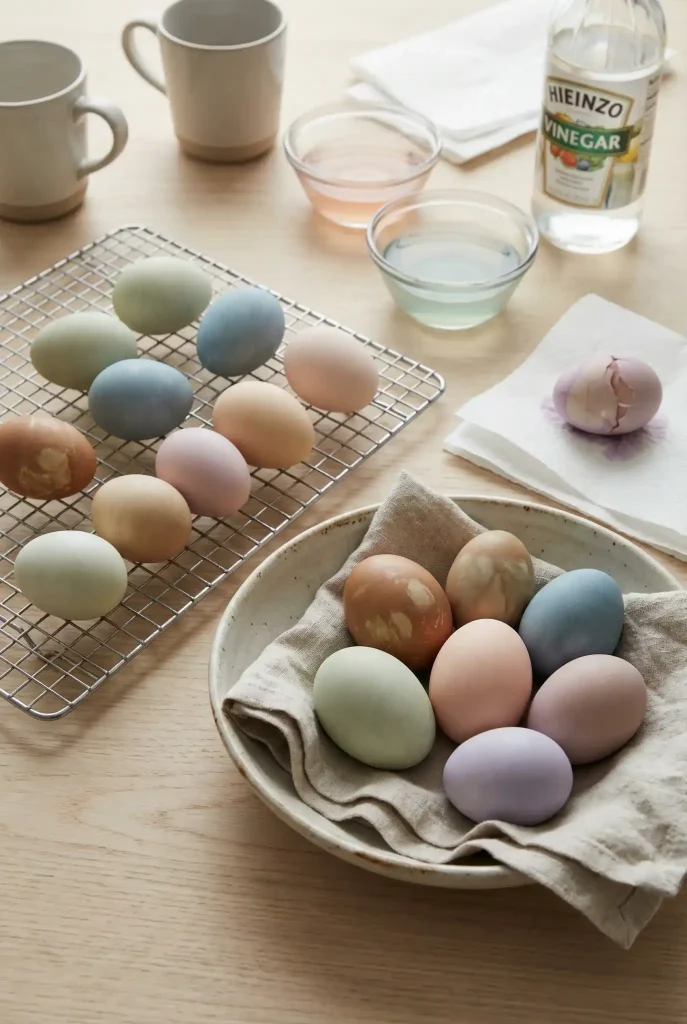
Time: 30–60 min • Cost: $2–$6 • Mess: medium • Kid-friendly: yes (with rules and aprons)
Dyed Easter eggs can look elegant without requiring a specialty kit. The key is to start with softer colors and build the shade gradually instead of adding too much dye at once. The result is a simple take on colorful Easter eggs that still feels calm and coordinated.
You need:
- Hard-boiled eggs (white eggs dye best, while brown eggs create deeper, earthy shades)
- White vinegar
- Food coloring or gel coloring
- Mugs or small bowls
- Paper towels + a drying rack or muffin tin
The specific mix that works:
- 1 cup hot water
- 1 tablespoon white vinegar
- 6–10 drops food coloring, starting with 6
How to do it:
- Dip the eggs for about 30–90 seconds for lighter shades. Leave them in longer if you want a stronger color.
- Place the eggs on a drying rack and let them dry naturally. Avoid wiping them while they are wet because this can create streaks.
- For a softer, slightly deeper finish, rub a tiny amount of mineral oil onto a paper towel and lightly buff the dried eggs.
- Display the finished eggs in a bowl, basket, or tray as part of your Easter egg decorating setup.
The best part of this activity is that it does not need to be perfect. A few uneven shades or tiny imperfections can make the finished eggs feel handmade and personal.
Glass jar “meadow lights” for the mantel or porch
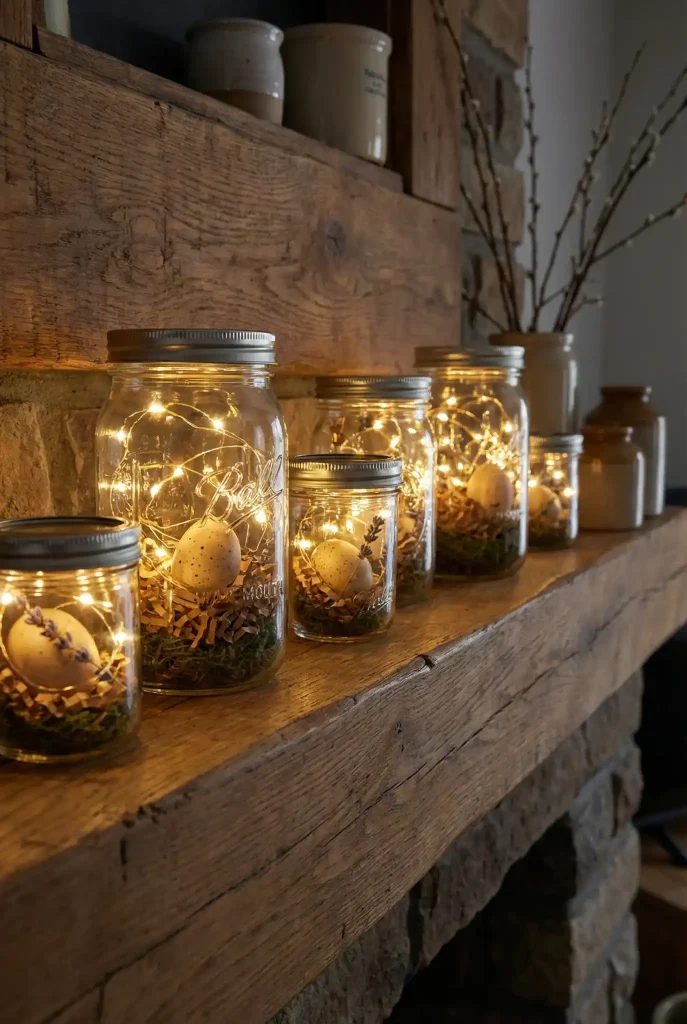
Time: 5–10 min • Cost: $0–$12 • Mess: low • Kid-friendly: yes
These little jar displays work beautifully indoors or outdoors and are one of my favorite simple Easter decorations because they look thoughtful without requiring much time or effort.
You need:
- Clean jars, such as mason jars or jam jars
- Battery-powered fairy lights
- Moss or shredded paper
- A few eggs or small faux flowers
How to do it:
- Add a small amount of moss or shredded paper to the bottom of each jar.
- Coil the battery fairy lights loosely inside.
- Add an egg and a tiny flower for a simple meadow-inspired finish.
You can easily adjust these to match whatever your home already looks like, which makes them especially useful when you want seasonal decor without completely restyling a room.
The “spring centerpiece” that’s basically a grocery run in disguise
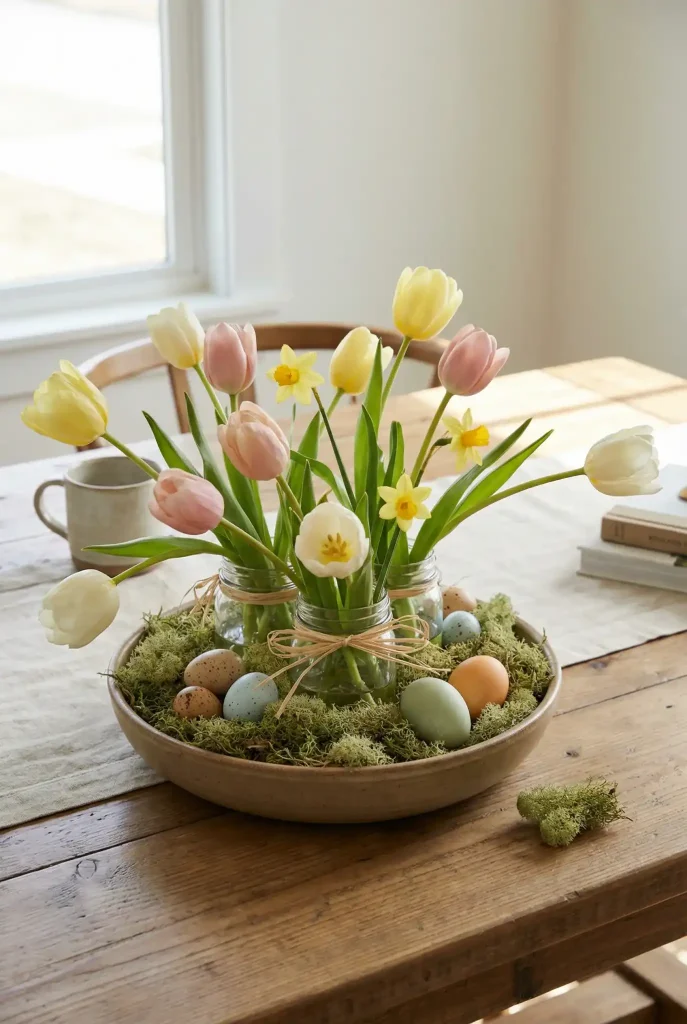
Time: 15–25 min • Cost: $8–$25 • Mess: low • Kid-friendly: yes (they can place eggs, not trim stems)
If you have been searching for Easter centerpiece ideas, this is a simple option that feels planned without requiring professional floral-arranging skills. A few grocery-store flowers, some eggs, and a shallow bowl can create a fresh centerpiece in minutes.
You need:
- One low bowl or shallow pot (8–12″)
- 2–3 small jars or bud vases, or cut-down plastic cups hidden inside
- A grocery-store bundle of tulips or mini daffodils for vibrant spring flowers
- A few real or faux eggs
- A little moss or raffia
How to do it:
- Place the small jars or vases inside the bowl to create the basic structure.
- Add moss around the containers to hide them.
- Arrange the flowers loosely, leaving some open space between the stems.
- Nestle a few eggs around the base for a subtle Easter detail.
There is no need to make every flower perfectly symmetrical. The slightly relaxed arrangement is what gives this centerpiece its fresh, effortless look. It also works as a casual take on Easter flower arrangements.
The mantel “layering” method that fixes everything
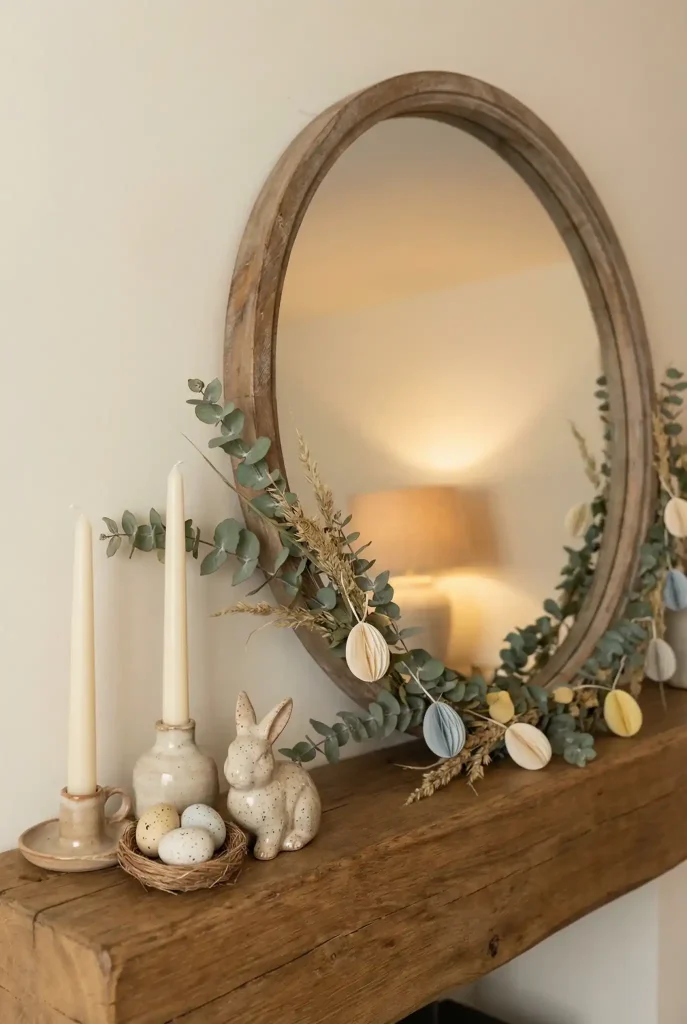
Time: 10–20 min • Cost: $0–$15 • Mess: low • Kid-friendly: not really (small hands will relocate everything)
Layering is one of the easiest ways to make Easter home decor feel balanced without filling every available space. Instead of lining objects up across the mantel, give each layer a different height and purpose.
Here’s the layering formula:
- Back layer: Use something tall, such as a mirror, framed artwork, or large woven tray.
- Middle layer: Add a garland, greenery, or another longer decorative element.
- Front layer: Place 3–5 smaller pieces, such as candles, eggs, a bunny figure, or a small vase.
Specific tip: Keep the smallest pieces together in one compact cluster instead of spacing them evenly across the mantel. A cluster usually looks more intentional and gives handmade Easter decor a natural, collected feel.
Carrot bunches that look cute, not cartoonish
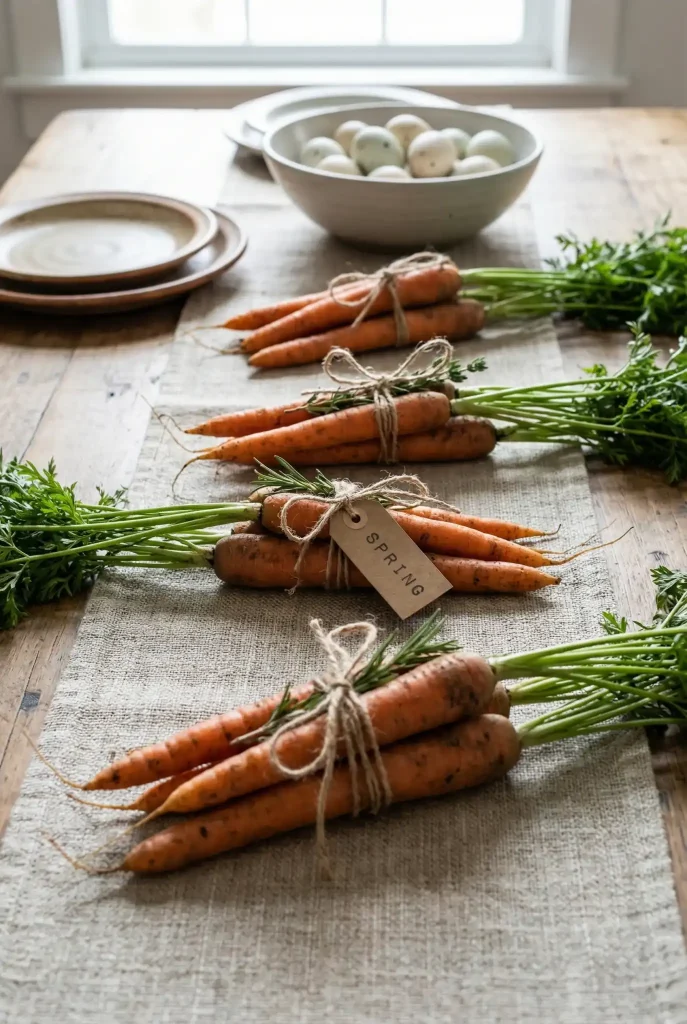
Time: 5–10 min • Cost: $2–$6 • Mess: low • Kid-friendly: yes
You need:
- Real carrots with the greens attached, or faux carrots
- Twine or ribbon
- Optional: a small decorative tag
How to do it:
- Wash and thoroughly dry the carrots before decorating them.
- Tie them into small bundles of three or five using twine or ribbon.
- Arrange the bundles along the center of your table, alternating their direction so the green tops create a fuller display.
It is a surprisingly easy way to add festive spring decor using something you may already have in your kitchen. The natural greens and orange color provide plenty of visual interest without needing many additional decorations.
A wreath, but not the “stiff craft store” kind
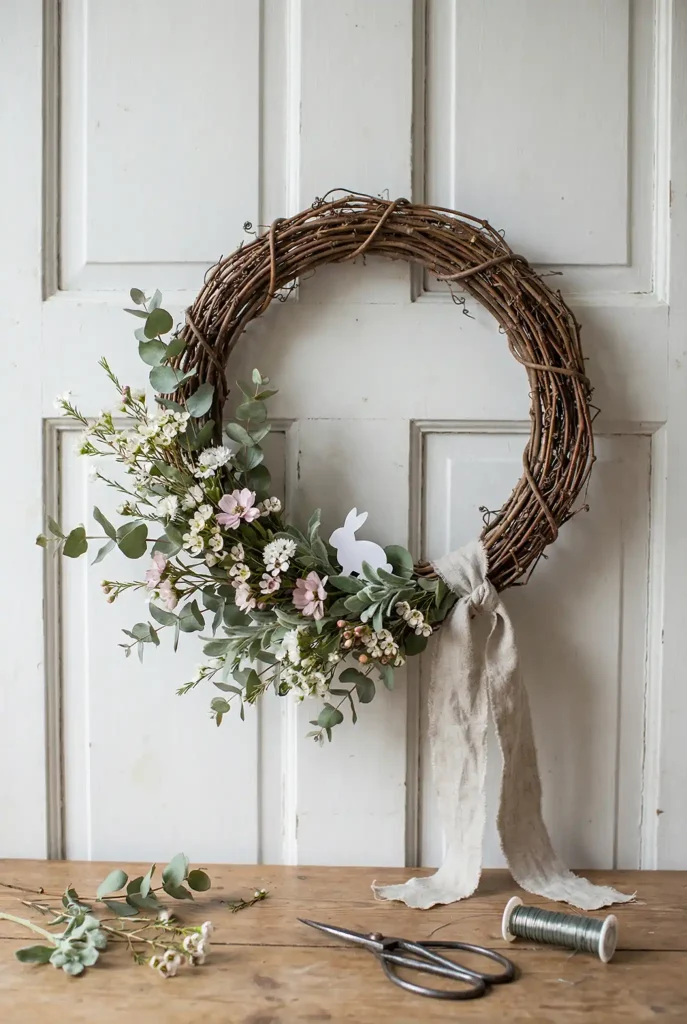
Time: 25–45 min • Cost: $10–$35 • Mess: medium • Kid-friendly: yes (they can help choose stems, not wire them)
Easter wreath ideas can look much more natural when the design is loose and slightly imperfect. Instead of covering the entire wreath, leave some of the grapevine visible and concentrate the flowers in one area for a relaxed spring floral wreath effect.
You need:
- A 12–18″ grapevine wreath form
- Faux flowers or a few real stems with floral wire
- Ribbon
- Optional: a small bunny silhouette cut from cardstock or wood
How to do it:
- Leave most of the grapevine exposed instead of covering the entire wreath.
- Arrange the flowers on one side, using roughly one-third of the wreath as your main floral area.
- Secure the stems with floral wire.
- Finish with a soft ribbon, preferably something with a natural texture such as linen.
A simple wreath can look just as polished as an elaborate one. Keeping the design minimal also makes it easier to update for different seasons.
A “brunch corner” that’s basically snacks plus a pretty tray
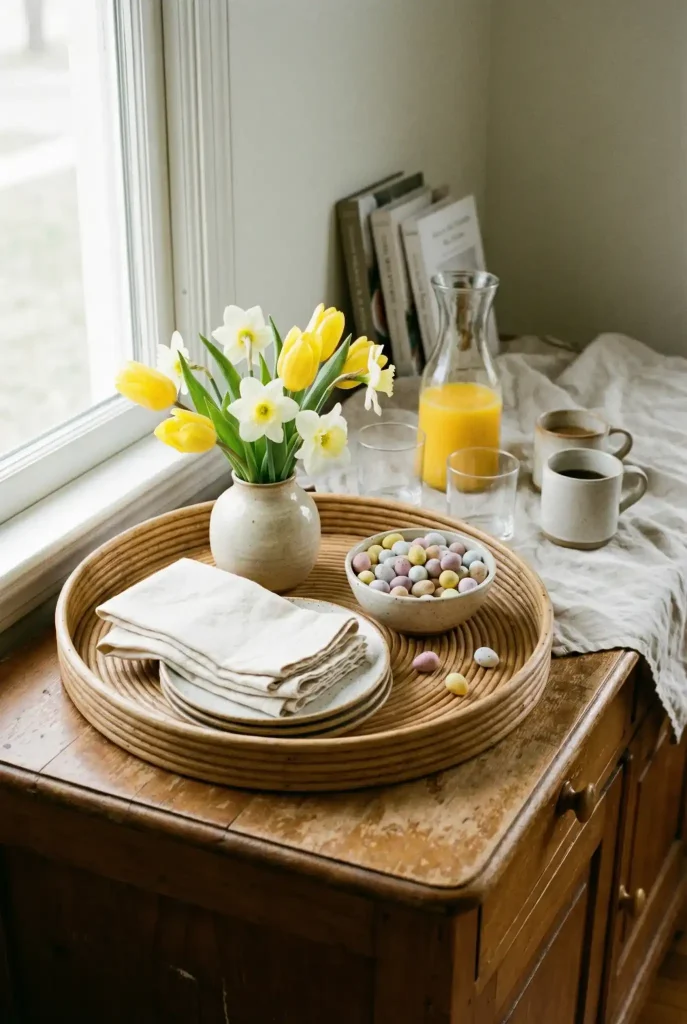
Time: 5–10 min • Cost: $0–$20 • Mess: low • Kid-friendly: yes (they will still sneak candy)
This is an easy way to combine decoration and function while making your Easter brunch ideas feel more special. You do not need a large buffet or a complicated menu. A well-arranged tray can create a dedicated little serving area.
You need:
- A decorative tray
- Small plates and napkins
- One small vase of flowers
- One bowl for candy eggs or chocolate
- A designated spot for coffee or juice cups
How to do it:
- Place the flower vase toward the back of the tray.
- Stack the plates and napkins neatly in front or beside it.
- Add the candy bowl toward the front where guests can easily reach it.
- Leave enough space for coffee, juice, or other drinks.
It can easily become part of your Easter party ideas without creating extra work. The goal is simply to put your snacks and drinks somewhere attractive so guests can help themselves.
The “five-minute entryway bowl” that makes the whole house feel festive
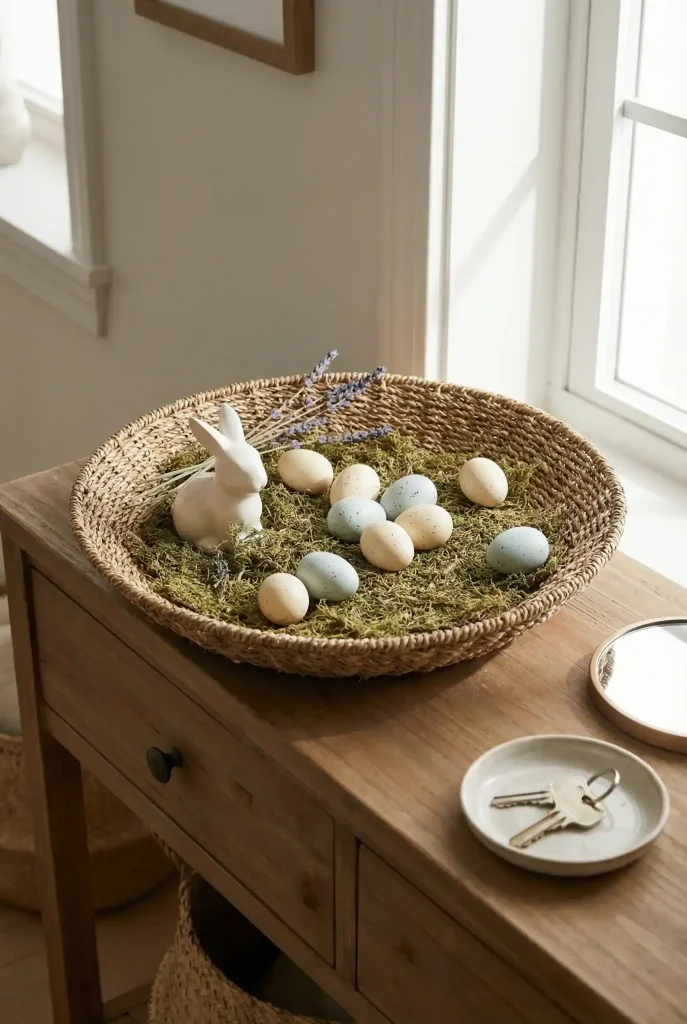
Time: 5 min • Cost: $0–$12 • Mess: low • Kid-friendly: yes
This is one of the quickest ways to give your entryway a seasonal update. A simple bowl filled with a few Easter details can introduce Easter decoration ideas without requiring a full decorating project.
You need:
- A bowl, tray, or shallow basket (12–16″ wide works well)
- A handful of plastic or wooden eggs
- A little moss or shredded paper filler
- One small bunny or bird figurine (optional)
How to do it:
- Add a thin layer of moss or shredded paper to the bottom of the bowl.
- Arrange eggs in no more than two colors for a coordinated look. If your eggs are bright, balance them with neutral filler.
- Place one small figurine slightly off-center to give the arrangement a more natural, styled appearance.
The finished bowl is small enough for an entryway table or console but still adds an obvious touch of spring.
The “one-shelf spring refresh” for small spaces
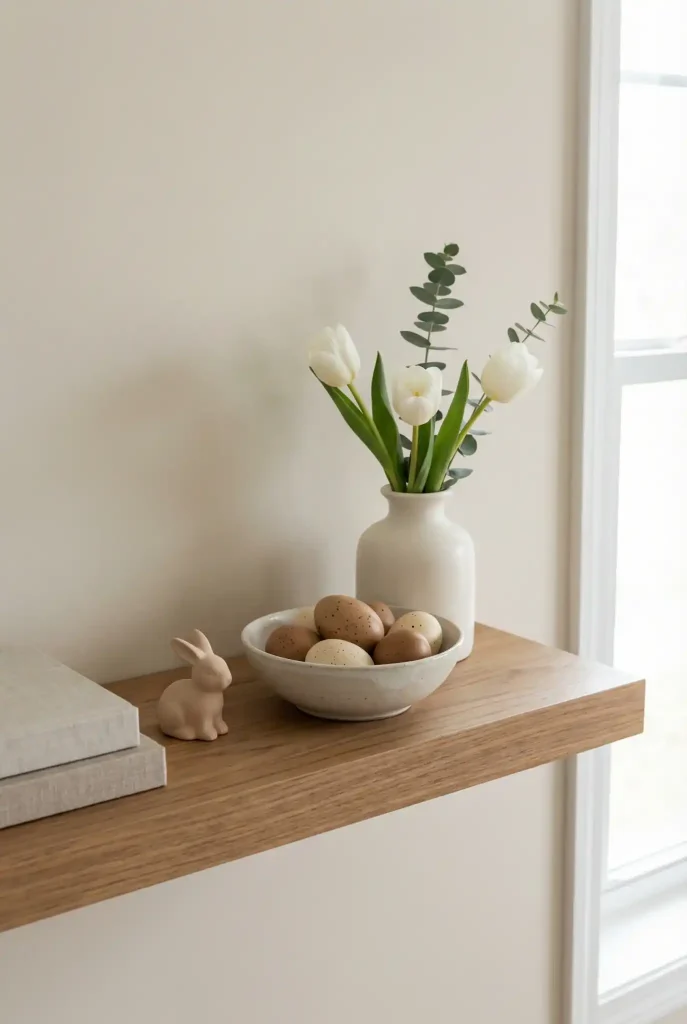
Time: 10 min • Cost: $0–$15 • Mess: low • Kid-friendly: yes
You do not need to decorate every room to bring Easter into your home. Refreshing a single shelf can be enough, especially if you live in a small space or prefer a more minimal seasonal look.
You need:
- One shelf surface
- A small vase
- A bowl of eggs
- One small spring-themed item, such as a bunny, bird, or floral accent
- A neutral book stack (optional)
How to do it:
- Place the tallest item toward the back, such as a vase filled with flowers.
- Put the bowl of eggs in front of the vase.
- Add one smaller decorative piece to the side to complete the arrangement.
- Keep some open space around the objects so the shelf does not feel overcrowded.
This approach works particularly well when you want seasonal decor that feels intentional without taking over your home.
The “one minute” egg place cards (that people will think took longer)
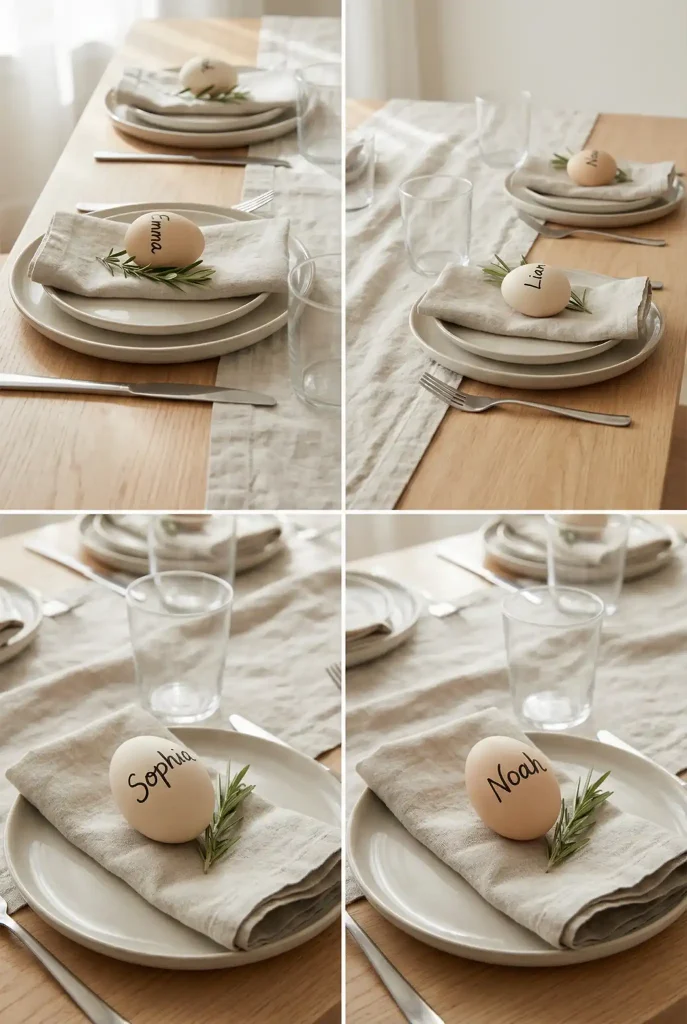
Time: 5–8 min • Cost: $0–$5 • Mess: low • Kid-friendly: yes
Egg place cards are an easy way to make Easter table settings feel more personal. They require very few supplies and can be customized for each guest.
You need:
- Real or faux eggs
- Sharpie or paint pen
- Optional: a small sprig of greenery
How to do it:
- Write each guest’s name directly on an egg.
- Place one decorated egg on each plate.
- For an extra seasonal touch, tuck a small sprig of greenery underneath the egg.
Use a paint pen if you want a softer, more decorative finish, or a fine-tip marker for a clean and simple look.
Bunny napkin “ears” that look weirdly expensive
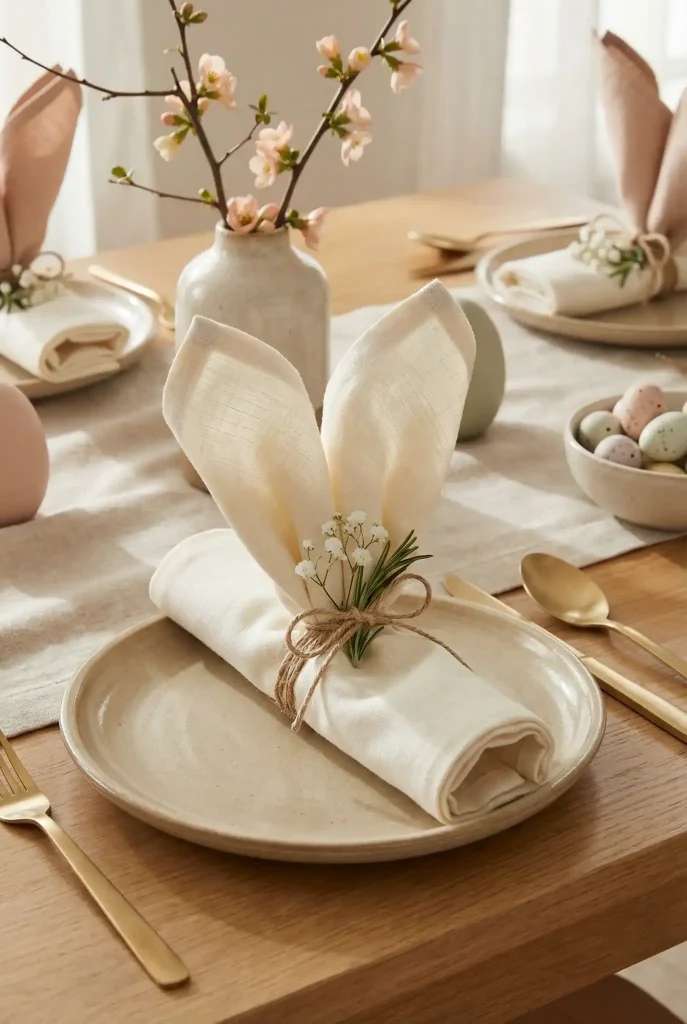
Time: 5–10 min • Cost: $0–$10 • Mess: low • Kid-friendly: yes
These bunny-shaped napkins are a fun addition to a brunch table and are especially easy to make with children. They also add a playful detail to your Easter table decor without requiring special napkin holders.
You need:
- Linen or linen-look napkins (18″ or 20″ square)
- Twine, thin ribbon, or pipe cleaners
- Optional: a tiny faux flower stem
How to do it:
- Fold the napkin into a rectangle.
- Roll it loosely from one end into a tube.
- Bend the rolled napkin in half so the two loops resemble bunny ears.
- Tie the base of the ears with twine or thin ribbon.
- Add a tiny flower or greenery sprig to the knot if you want a more decorative finish.
The result looks detailed and festive while taking only a few minutes to prepare.
Table runner trick: paper + ribbon = instant charm
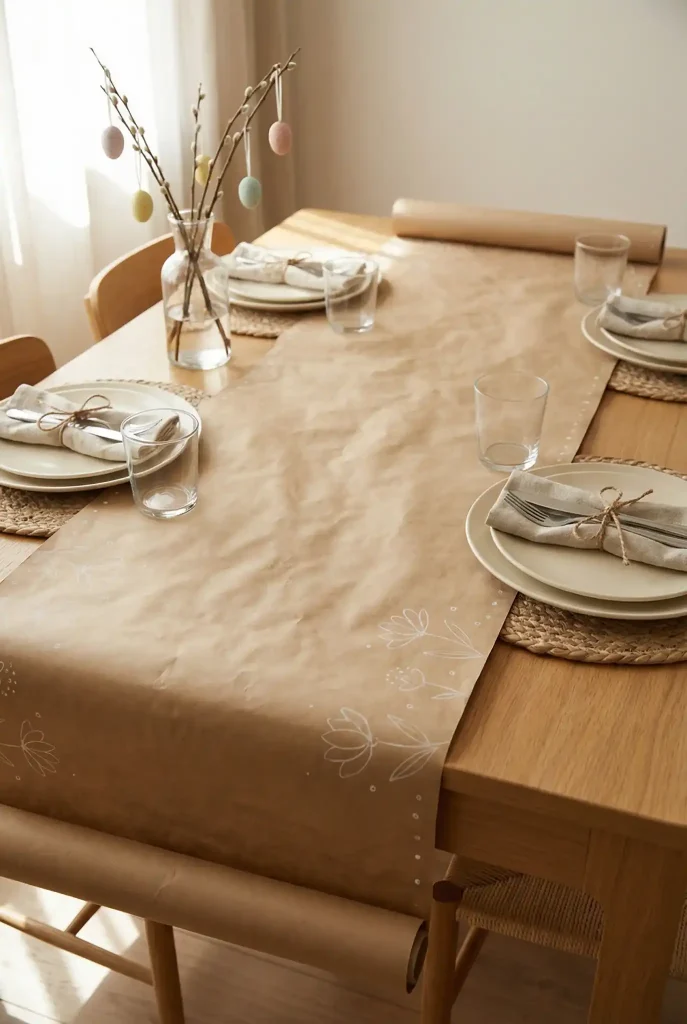
Time: 5–12 min • Cost: $0–$8 • Mess: low • Kid-friendly: yes
If you do not have seasonal table linens, kraft paper or butcher paper can create an inexpensive runner in minutes. It is one of the easiest simple Easter decorations for dressing up a table without purchasing something you will only use once a year.
You need:
- Kraft paper or white butcher paper
- Ribbon or twine
- Marker for optional doodles
How to do it:
- Roll the paper down the center of the table to create a simple runner.
- Tie small ribbon bows around napkins, utensils, or the bases of glasses.
- Add tiny flowers, leaves, or Easter-inspired doodles along the paper edge if desired.
- Keep the rest of the table relatively simple so the paper runner remains the main feature.
You can also use a few paper eggs to create easy Easter tree decorations. Hang them from a small branch arranged in a vase for another low-cost seasonal accent.
A few small-budget moves that punch way above their weight
I’m a big fan of handmade Easter decor when you want your home to feel festive without spending much. A handful of small, coordinated touches can make a space look thoughtfully decorated without requiring a large shopping list.
If you’re keeping things affordable, these are some of the first ideas I would try:
- One flower bundle + split it into two or three small vases for an easy spring update.
- Paper garland for a simple decoration that costs very little and can fill an empty wall or mantel.
- A bowl of eggs because even plain eggs can look beautiful arranged in a wooden bowl.
- One ribbon detail on a wreath, napkins, a vase, or a basket to tie the look together.
If you decide to buy something new, choose pieces you can reuse throughout the year. Neutral baskets, glass jars, wooden bowls, and simple trays can work for multiple seasons rather than being limited to one holiday.
That is really the secret behind affordable springtime holiday crafts: keep the basic pieces simple and reusable, then change the small seasonal details when the occasion comes around.