
I’m walking you through my step-by-step Easter table setup, from the linen base to the centerpiece glow. Expect simple styling shortcuts, easy DIY touches, and a table that looks beautiful while still being practical enough for brunch chaos.
I love Easter table decor in theory. In reality, I’ve definitely stood in the dining room at 8:47 a.m. wondering why the table suddenly feels too small and why I thought white napkins were a smart choice with kids.
This year, I decided to slow down and actually enjoy the process. Instead of treating the table as a place to put plates, I approached it as a complete Easter tablescape.
Think layered textures, soft spring colors, a little whimsy, and a few intentional Easter decorations that feel charming without becoming overly themed.
Here’s exactly how I put together our Easter table setting, step by step, along with practical ideas and a few things I may change next year.
Quick Style Picker (choose one so you don’t spiral)
Pick one overall direction and stick with it. Once you have a clear style, it becomes much easier to mix pieces without making the table feel cluttered.
- Soft Pastels + White Base: White linens, pastel tableware, tulips, speckled eggs, and clear or pale-blue glassware
- Gardeny + Slightly Wild: Floral runner, small bud vases, fresh herbs, mismatched plates, and plenty of greenery
- Modern Minimal Spring: Neutral linen runner, one type of flower, one bunny, candlelight, and very little else
- Rustic Spring: Taupe runner, woven placemats, brown eggs, rosemary sprigs, and warm candlelight
I went with Soft Pastels + White Base because it immediately feels like spring while still leaving plenty of room for everyday pieces.
Supplies quick checklist (before you spiral)
- Tablecloth or runner
- Optional placemats or chargers
- Cloth napkins
- Ribbon, twine, or napkin rings
- Flowers or greenery
- 2–4 small vases or jars
- Candles and candleholders
- Dinner plates and salad plates
- Flatware
- Glassware
- A few Easter-themed accessories such as eggs or a bunny
- Optional extras: painter’s tape for a slipping runner, a Sharpie for place cards, and extra tealights
Step 1: Easter Table Linens and Soft Overlays
Every Easter table design starts with the linens. They create the foundation for the entire table and make even simple dishes and decorations feel more intentional.
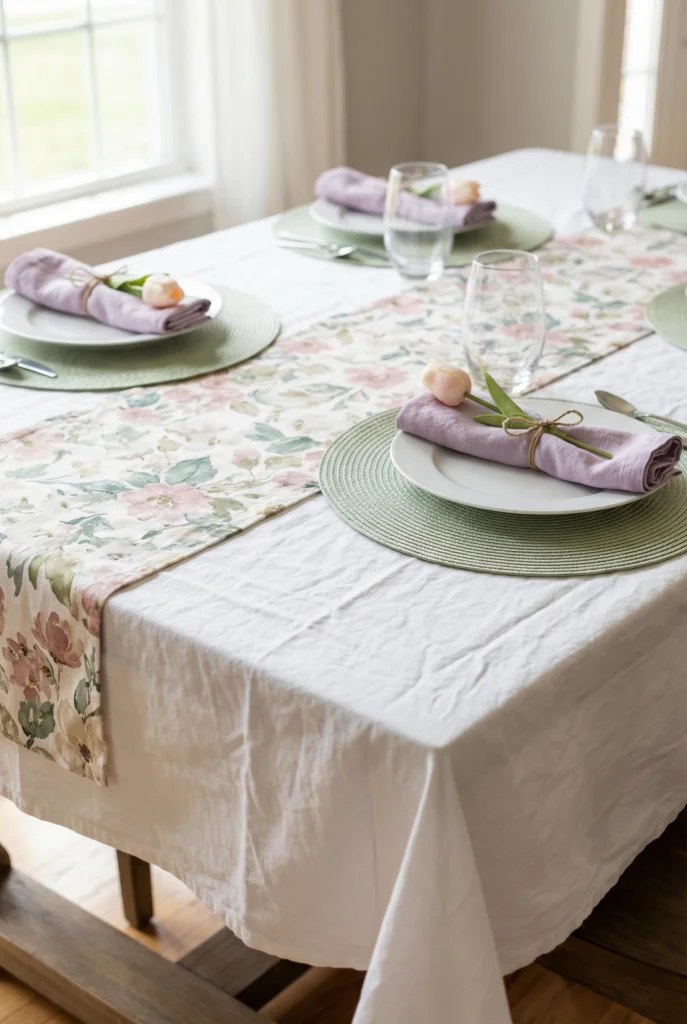
I used a white cotton tablecloth with a slightly relaxed, wrinkled finish. On top, I added a floral runner featuring soft pinks and greens. The combination instantly gave the table a fresh spring feel.
If you’re shopping for new linens, you don’t need to spend a fortune. A simple cotton tablecloth can work just as well as a more expensive decorative linen. The important thing is choosing colors and textures that support the rest of your table.
For another layer of texture, I added woven placemats in pale sage. They help define each place setting while making the table feel warmer and more relaxed.
Napkins were my chance to add a small decorative detail. I used lavender linen napkins, rolled them loosely, and tied each one with twine. A faux tulip tucked into the knot finished the look without requiring any complicated napkin folding.
My linen “recipe”:
- White cotton tablecloth
- Floral runner
- Woven placemats
- Linen napkins
- Twine or ribbon
Quick win: If your Easter table linens feel a little plain, try layering another fabric before buying an entirely new set.
Step 2: Easter Centerpiece Ideas (flowers, eggs, candles, repeat)
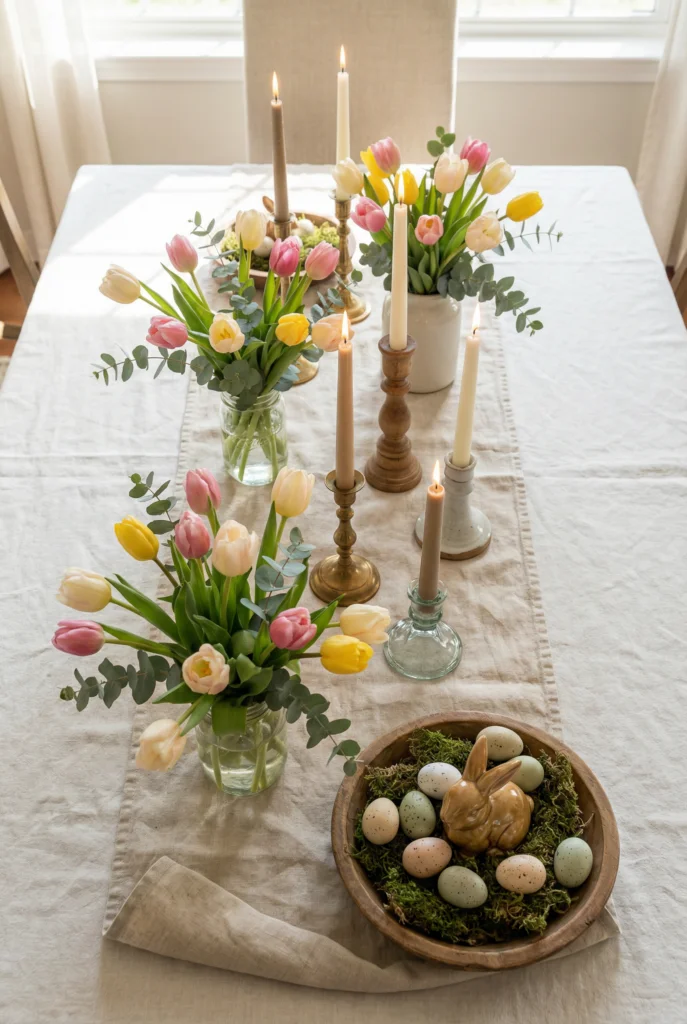
When it comes to Easter centerpiece ideas, I prefer several small arrangements over one large floral display.
A huge centerpiece may look beautiful in photos, but it can quickly become inconvenient when everyone needs to see across the table. Smaller arrangements create the same visual impact while keeping the table functional.
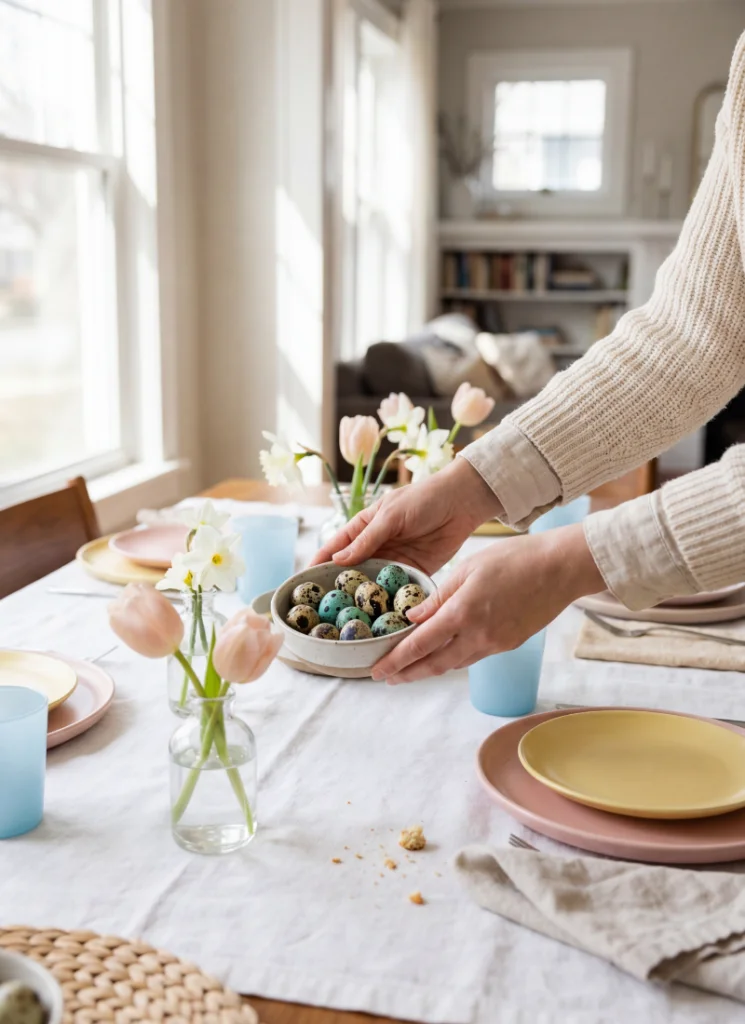
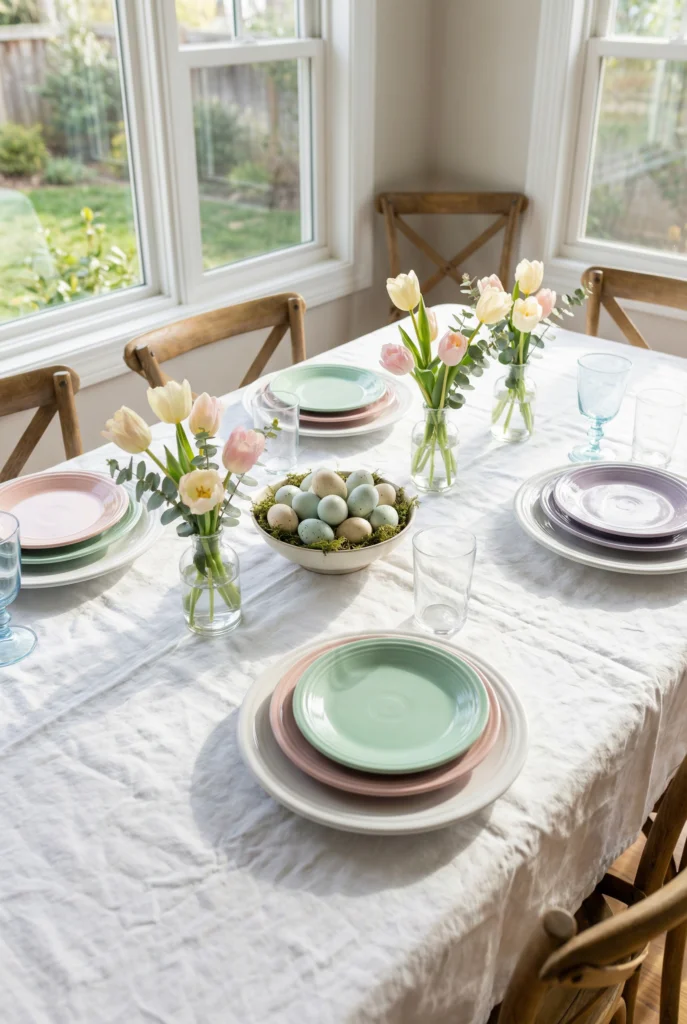
I used two bouquets of tulips and a bunch of greenery, then divided everything between three small vases. Spreading the flowers across the center created a soft, layered Easter floral arrangements look without blocking conversation.
Between the vases, I added taper candles in simple holders. They don’t need to match perfectly. In fact, using slightly different candleholders can make the table feel collected rather than overly coordinated.
For the Easter egg decorations, I placed faux speckled eggs inside a shallow bowl filled with moss. I also added one small ceramic bunny. Keeping the bunny count to one helped the table feel festive without becoming overly cute.
A shallow bowl also works beautifully for hiding an awkward spot on a runner or covering an area where the fabric refuses to lie flat.
My centerpiece “recipe”:
- Tulips
- Fresh greenery
- 3 small vases or jars
- 5 taper candles
- Candleholders
- Faux speckled eggs
- Shallow bowl with moss
- One small bunny
Quick win: Split one grocery-store bouquet between several small vases. It instantly makes your Easter centerpiece look more layered and intentional.
Step 3: Coordinating Dishware and Glass Accents for Easter Place Settings
This is where Easter dinnerware and pastel tableware can add personality without taking over the entire table.
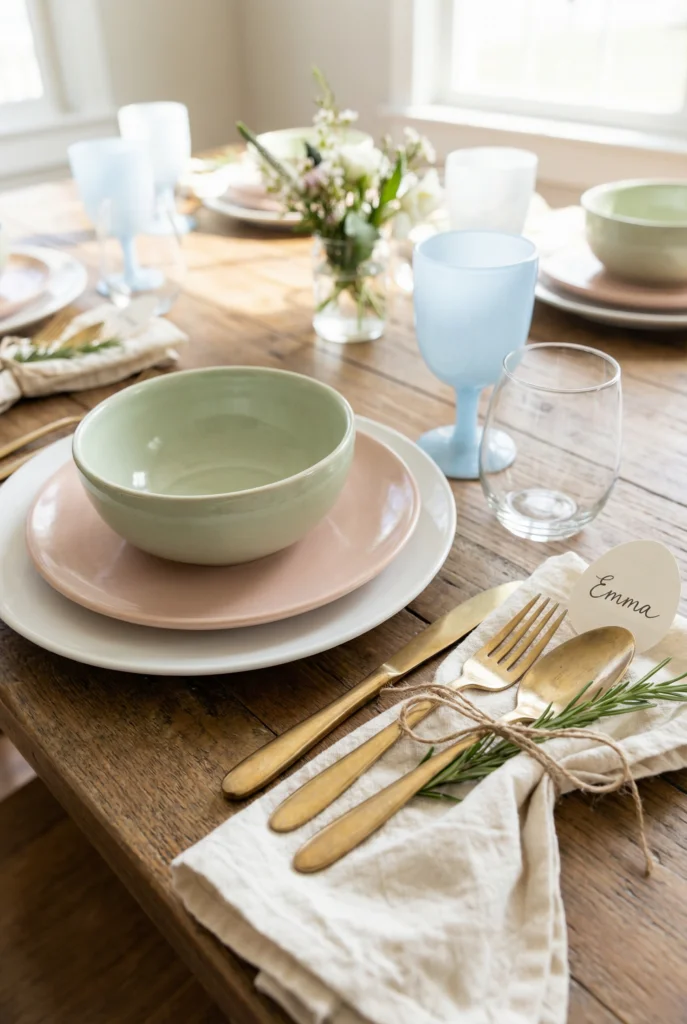
I started with classic white dinner plates and layered pastel salad plates in soft green and blush on top. This is one of my favorite ways to create pretty Easter table setting ideas without purchasing a completely new dinnerware collection.
Flatware can stay simple. Gold-toned pieces add warmth, while classic stainless steel keeps things more casual. Either option works as long as it complements the colors already on the table.
For glassware, I mixed light blue goblets with clear wine glasses. The colored glass brings in another soft spring accent while still looking sophisticated.
You can also mix pieces collected over time. A perfectly matched table isn’t necessary for a beautiful Easter setting.
My place setting “recipe”:
- White dinner plate
- Pastel salad plate
- Rolled napkin tied with twine and finished with a faux tulip or rosemary sprig
- Gold or stainless-steel flatware
- Clear or tinted water glass
- Optional egg-shaped place card or small paper tag
Quick win: If you don’t want to change your entire table, simply switch out the salad plates and glassware for an easy Easter update.
Step 4: Subtle Easter-themed Accessories (the restraint part)
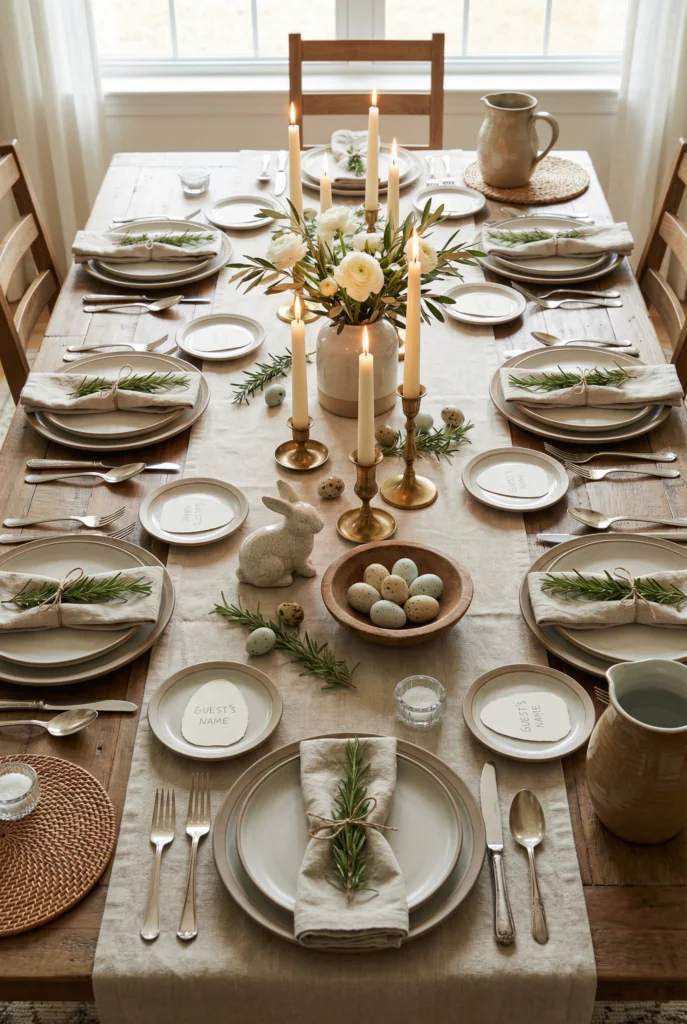
This is the fun part, but it’s also where Easter table decor can quickly become too much.
I added simple place cards made from paper eggs, with each guest’s name written by hand. They added a personal touch without taking up much space.
A few rosemary sprigs added greenery, texture, and a little natural fragrance. Small details like this can make the table feel thoughtful without requiring a lot of extra decoration.
I skipped banners, signs, and anything that literally said “Easter.” The theme was already clear through the pastel colors, flowers, eggs, bunny, and candlelight.
If you enjoy DIY Easter decorations, this is a great place to experiment. Try painted eggs, ribbon-tied napkins, handmade place cards, or thrifted vases. Keep the details small so there’s still plenty of room for plates, serving dishes, and actual food.
My “subtle accessories” list:
- Paper egg place cards
- A few rosemary sprigs
- One ceramic bunny
- A small bowl of decorative eggs
- Candles for warmth and atmosphere
Quick win: Add your Easter decorations last. Then remove one item before guests arrive. A little restraint usually makes the finished table look more polished.
Mini layout + Spacing rules (the stuff that makes it look styled)
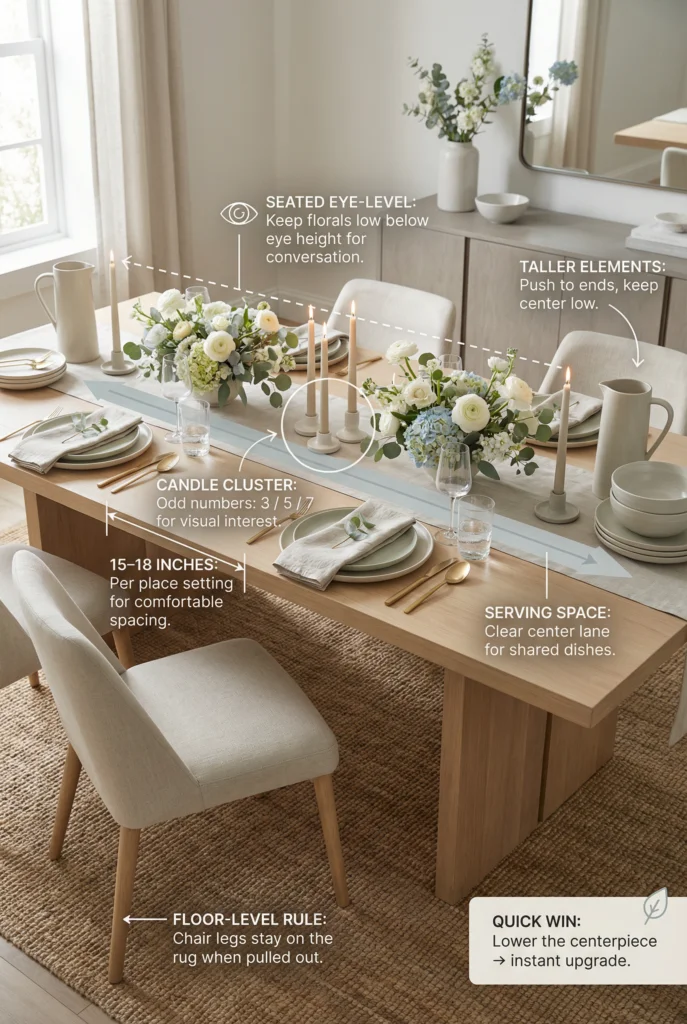
The little spacing details are what keep an Easter table from feeling crowded.
- Keep floral arrangements below eye level when guests are seated.
- Arrange candles in odd numbers, such as 3, 5, or 7.
- Allow roughly 15–18 inches per place setting so everyone has enough elbow room.
- Keep a clear center lane for serving platters and dishes.
- If there’s a rug beneath the table, keep the front legs of the chairs on the rug when pulled out to prevent constant scraping.
- Put taller elements toward the ends of the table if you want extra height.
- Keep the center of the table relatively low so guests can easily see one another.
Quick win: Lower your centerpiece. It’s one of the easiest ways to make an Easter table feel more elegant, comfortable, and expensive-looking without buying anything new.